Thinset vs Joint Compound: The #1 Mistake That Will Ruin Your Project
You’re standing in the aisle of your local home improvement store, ready to tackle that weekend project. Before you are two products that look remarkably similar—bags of gray powder and tubs of white paste. One is labeled “thinset mortar,” the other “joint compound.” They feel the same, they look like they do the same job, so what’s the difference? This moment of confusion is where catastrophic DIY failures begin.
Choosing the wrong product isn’t a small mistake you can simply paint over. It’s a foundational error that can lead to tiles falling off your shower wall, drywall crumbling into a moldy mess, and thousands of dollars in repairs. Understanding the fundamental chemical and structural differences between thinset and joint compound is the single most important piece of knowledge you need to ensure your project is a success, not a disaster waiting to happen.
You'll Learn About
What Is Thinset Mortar? The Unyielding Grip for Tile
At its core, thinset is a cement-based adhesive. Think of it as a specialized concrete designed for one primary purpose: to securely bond tile and stone to a substrate. Its composition is simple but powerful, typically containing Portland cement, fine sand, and water-retaining agents. When mixed with water, it doesn’t just “dry” like mud; it cures through a chemical reaction called hydration, forming a rigid, incredibly strong, and water-resistant bond.
This curing process is why thinset is the undisputed champion for any area involving tile, especially in wet environments like bathrooms and kitchens. It’s not meant to be pretty or smooth; its job is to provide unrelenting adhesive strength. You’ll almost never see the thinset in a finished project, as it’s completely hidden behind the tile.
Key Properties of Thinset:
- Composition: Primarily Portland cement, sand, and additives.
- Curing Method: Chemical reaction (hydration) that creates a permanent, rigid bond.
- Water Resistance: Excellent. Once cured, it is highly resistant to water, making it ideal for showers, backsplashes, and floors.
- Bond Strength: Extremely high. It’s formulated to hold heavy tiles and stone vertically without sagging.
- Flexibility: Very low. It is rigid and not designed to accommodate significant movement.
- Sandability: Nearly impossible to sand. Attempting to sand cured thinset is like trying to sand a concrete sidewalk.
Types of Thinset Mortar:
You’ll generally encounter two main varieties of thinset. Unmodified thinset is the basic mix of cement, sand, and water-retaining agents. Modified thinset includes special liquid latex or polymer additives that increase its bond strength, flexibility, and working time, making it a superior choice for bonding tile to surfaces like drywall or plywood.
What Is Joint Compound? The Master of Smooth Surfaces
Joint compound, often called drywall mud, serves a completely different purpose. It is a gypsum-based material designed for finishing drywall. Its job is purely aesthetic: to create a perfectly smooth, seamless surface for painting or wallpapering. It’s used to tape joints between drywall sheets, fill screw or nail holes, repair cracks, and create textures on walls and ceilings.
Unlike thinset, joint compound hardens through simple evaporation. As the water leaves the mixture, the gypsum compound is left behind as a soft, lightweight, and easily sandable solid. This softness is its greatest strength and its most critical weakness. While perfect for creating a flawless finish, it also means the compound is water-soluble. Even after it’s fully dry, exposure to moisture will cause it to soften, dissolve, and fail.

Key Properties of Joint Compound:
- Composition: Primarily gypsum, limestone, and other fillers and binders.
- Curing Method: Dries through evaporation. It does not chemically cure.
- Water Resistance: Extremely low. It will re-soften and dissolve with prolonged exposure to moisture.
- Bond Strength: Low. It has enough adhesion for paper or fiberglass tape but is not a structural adhesive.
- Flexibility: Moderate. It can handle minor settling without cracking.
- Sandability: Excellent. It is designed to be easily sanded to a feather-smooth finish.
The Head-to-Head Showdown: Thinset vs. Joint Compound
To put it simply, these two materials are engineered for completely different worlds. One is built for brute strength and water resistance, while the other is designed for delicate, smooth finishing. Swapping them is not a “close enough” substitution; it’s a guaranteed failure.
Here is a direct comparison of their primary attributes:
| Feature | Thinset Mortar | Joint Compound (Drywall Mud) |
|---|---|---|
| Primary Use | Adhering tile, stone, and backer board | Finishing drywall joints, patching, and texturing |
| Composition | Cement, sand, polymers | Gypsum, limestone, binders |
| Hardening Process | Chemical Cure (Hydration) | Evaporation (Drying) |
| Water Resistance | High (Ideal for wet areas) | Very Low (Will dissolve in water) |
| Bond Strength | Very High (Structural Adhesive) | Low (Finishing Product) |
| Sandability | Extremely Difficult / Impossible | Very Easy |
| Application Tool | Notched Trowel | Drywall Knife / Taping Knife |
| Cleanup | Water (before it cures) | Water (even after it dries) |
Why You Can NEVER Use Joint Compound for Tile
This is the most dangerous and common mistake homeowners make. The temptation is there—you have a bucket of joint compound left over, and it seems sticky enough. However, using joint compound as a tile adhesive is a catastrophic error for several critical reasons.
First and foremost is the lack of water resistance. Imagine you set your beautiful new shower tiles with joint compound. The first time you take a shower, water vapor will seep through the grout and re-wet the compound. It will turn back into a paste, lose all its strength, and your tiles will literally start falling off the wall. This creates a perfect environment for dangerous mold growth behind the wall.
Secondly, joint compound lacks the structural adhesive strength to hold the weight of tile, especially on a vertical surface. The bond is weak and will fail over time due to gravity alone, even in a dry area. Using joint compound for tile is not a shortcut; it’s a complete teardown waiting to happen.
When Thinset Is the Wrong Choice for Drywall Finishing
Using thinset for drywall finishing is less common but equally incorrect. If you try to tape drywall seams or patch a hole with thinset, you will create an unfixable mess. Because thinset cures into a cement-like hardness, it is impossible to sand smooth. You will be left with rough, gritty ridges and lumps on your wall that cannot be smoothed out without gouging the surrounding drywall.
Furthermore, its rigid nature makes it unsuitable for the subtle movements that occur in a home’s framing. While joint compound has enough flexibility to prevent stress cracks, thinset will crack and telegraph those cracks through your paint. Thinset is for bonding, not for finishing.
Navigating the Gray Areas: Common Questions and Expert Answers
While the core uses are distinct, some projects can cause confusion. Here’s how to handle those common scenarios with confidence.
Can you put thinset directly on drywall for tiling?
Yes, you absolutely can, especially for projects in dry areas like a kitchen backsplash. For this application, you should use a modified thinset, as the polymers in the mix provide a superior bond to the paper facing of the drywall. The wall must be clean, unpainted, or primed. If the wall is painted with a glossy finish, it should be scuffed up first to ensure a good bond.
How do you tape the seams of cement backer board?
This is a critical distinction. For seams between sheets of cement backer board in a wet area like a shower, you must use alkali-resistant fiberglass mesh tape embedded in thinset mortar. Never use joint compound here. The moisture will destroy the joint compound, compromising the integrity of your entire tile installation. Properly taping these seams with thinset ensures a monolithic, waterproof substrate.
What about the joint between cement board and drywall?
For the transition seam between cement board in a shower and the regular drywall in the rest of the bathroom, you should still use alkali-resistant mesh tape. The best practice is to fill the joint with thinset on the cement board side and then feather the edge with a setting-type joint compound on the drywall side to create a smooth, paintable transition. This gives you the best of both worlds: waterproof strength where it’s needed and a smooth finish for the visible wall.
Step-By-Step: The Right Product for the Right Job
To avoid any confusion, let’s walk through the basic steps for the two most common applications of these materials.
How to Properly Set Tile on a Wall Using Thinset
- Prepare the Surface: Ensure the wall (whether drywall or cement board) is clean, flat, and free of dust. Seams in backer board should be taped with fiberglass mesh and thinset.
- Mix the Thinset: Following the manufacturer’s instructions, mix the powdered thinset with water to a smooth, peanut butter-like consistency. Let it “slake” or rest for 5-10 minutes, then remix.
- Apply with a Notched Trowel: Use the flat side of the trowel to spread a thin layer onto the wall. Then, use the notched side, holding the trowel at a 45-degree angle, to comb ridges into the mortar.
- Set the Tile: Firmly press each tile into the thinset with a slight twisting motion to ensure full contact and collapse the ridges. Use spacers to maintain consistent grout lines.
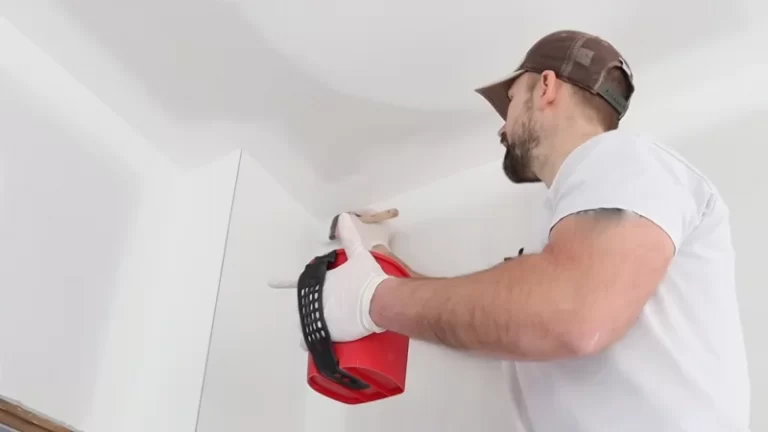
How to Perfectly Finish Drywall Seams with Joint Compound
- Apply the First Coat and Tape: Using a 6-inch drywall knife, apply a smooth, thin layer of joint compound over the seam. Immediately embed paper or fiberglass tape into the compound, pressing firmly to remove air bubbles.
- Apply the Fill Coat: Once the first coat is dry, use a 10-inch knife to apply a second, wider coat, feathering the edges to blend them into the wall. This coat fills the recess created by the tape.
- Apply the Finish Coat: After the second coat is dry, apply a final, very thin skim coat with a 12-inch knife, extending even further out from the seam to create an invisible transition.
- Sand Smooth: Once completely dry, lightly sand the entire area with fine-grit sandpaper until it is perfectly smooth to the touch. The goal is a surface so seamless you can’t tell where the joint was. Proper material storage and curing are also key; extreme temperatures, much like considering how hot an attic gets, can negatively impact your results.
Conclusion: The Right Choice for a Lasting Project
The debate of thinset vs. joint compound isn’t a matter of preference; it’s a matter of function. Thinset is the unyielding, water-resistant adhesive that locks tiles in place, while joint compound is the soft, sandable finisher that creates flawless walls. They are not interchangeable. Using the wrong one is a recipe for wasted time, money, and a failed project that will need to be completely redone.
By understanding their fundamental differences and applying them correctly, you empower yourself to achieve professional-quality results. Now that you have this crucial knowledge, you can approach your work with confidence, ready to tackle any project correctly from the foundation up, whether it’s a complex bathroom remodel or another creative DIY home improvement. You can even apply this knowledge to more specialized projects, such as those involving specific materials detailed in guides like the one for Sentinel foam board installation. Choose wisely, and build something that lasts.