Drywall Tapered Edge Against Ceiling [Meaning, Installation, Suggestions]
Drywall tapered edges play an important role in the installation of drywall, as they ensure a smooth, seamless transition between the drywall and ceiling. The tapered edge provides a slope that helps to eliminate cracks and gaps, resulting in a cleaner and more professional finish.
In this blog, we will explore the process of installing drywall tapered edges against the ceiling and the benefits that come with it. Whether you’re a DIY enthusiast or a professional drywall installer, understanding the importance of drywall tapered edges is crucial to achieving a high-quality finish.
You'll Learn About
Drywall Tapered Edge Against Ceiling
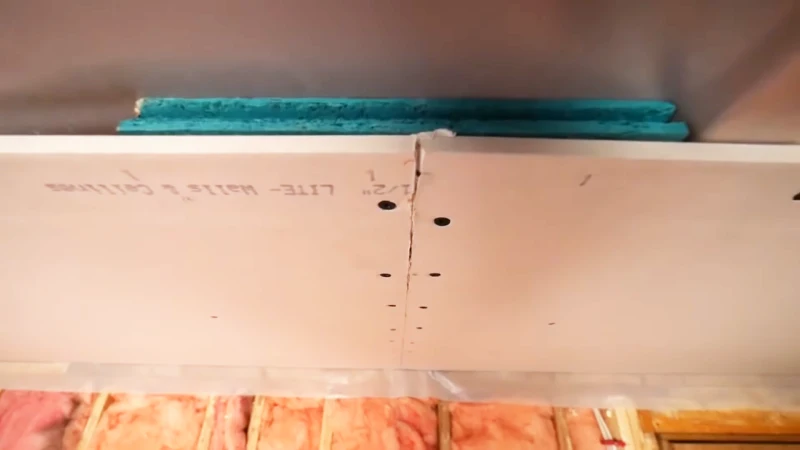
In cases where a tapered edge meets a butt edge where the wall and ceiling meet, you can still achieve a smooth and seamless finish. The first step would be to run a sharp utility knife at a 45-degree angle down the entire length of the butt edge that will meet the tapered edge.
Then, apply drywall compound over the seam to form a micro-thin ridge that covers up the seam. The key is to ensure that the drywall compound is evenly applied and the thickness of the ridge is consistent along the entire length of the joint.
This will help to create a smooth and even surface that is ready for painting or wallpapering.
Understanding Tapered Edges
Drywall is a common material used in construction and renovation projects. It is a cost-effective and versatile solution for creating smooth, finished surfaces in interior spaces. One important aspect of drywall installation is the use of tapered edges, which are crucial for ensuring a seamless and professional finish.
Understanding Tapered Edges
Location of Tapered Edges
Tapered edges are typically located at the seams between sheets of drywall, where they meet the ceiling or other vertical surfaces. These edges are specially shaped to create a slight slope, which allows for easy finishing and helps to hide the seams between the drywall sheets.
Advantages of Tapered Edges
There are several key benefits to using tapered edges when installing drywall. For one, they make it easier to finish the drywall surface, as the tapered edges provide a better surface for taping and mudding. This helps to reduce the amount of time and labor required to complete the project, as well as improve the overall quality of the finish.
In addition, tapered edges can help to hide the seams between sheets of drywall, creating a smoother and more professional look. This is particularly important when working with light-colored paints or other finishes that may highlight the seams.
Differences Between Tapered and Butt Joints
It is important to note that there is a difference between tapered edges and butt joints. Butt joints are flat and do not have any slope, while tapered edges have a slight slope that helps to conceal the seams. This makes tapered edges a better choice for projects where a seamless and professional finish is desired.
tapered edges are a critical component of drywall installation, providing numerous benefits and helping to create a professional and seamless finish. Whether working on a renovation project or building a new structure, understanding the importance of tapered edges can help to ensure a successful outcome.
Installing Tapered Edges Against Ceiling
When installing drywall, having a smooth and seamless finish is crucial for achieving a professional look. Tapered edges are an important aspect of this process as they can provide a smooth transition from the drywall to the ceiling. Here is a step-by-step guide on how to install tapered edges against the ceiling:
Tools and materials needed:
- Tape measure
- Drywall saw
- Drywall screws
- Drywall compound
- Joint knife
- Sandpaper
- Drywall tape
Steps for Installing Tapered Edges against the Ceiling:
Measuring and Cutting the Drywall
Measure the length and width of the area where you need to install the drywall. Cut the drywall to the desired size using a drywall saw.
Aligning the Tapered Edge With the Ceiling
Place the drywall with the tapered edge facing upwards and align it with the ceiling. Make sure that the tapered edge is perfectly straight and level with the ceiling.
Securing the Drywall to the Ceiling
Use drywall screws to secure the drywall to the ceiling, making sure to place them every 12-16 inches. Avoid overdriving the screws, as this can cause the drywall to crack.
Taping and Finishing the Joint
Once the drywall is secured, use joint knife to spread a thin layer of drywall compound over the tapered edge. Place a piece of drywall tape over the compound and spread another thin layer of compound over the tape.
Let the compound dry, then sand it smooth. Repeat this process until you have a seamless finish.
Tips for Ensuring a Seamless Finish:
- Take your time and be meticulous when spreading the drywall compound.
- Avoid applying too much pressure while sanding, as this can cause the surface to become uneven.
- Apply a final coat of paint or texture to the ceiling to hide any imperfections.
installing tapered edges against the ceiling is a crucial step in achieving a professional and seamless finish when installing drywall. By following the above steps and tips, you can ensure that your drywall installation is smooth and seamless, providing you with a beautiful finished product.
What to Avoid When Installing Tapered Edges Against Ceiling
When installing drywall tapered edges against the ceiling, it’s important to avoid common mistakes that can lead to a less-than-perfect finish. The following are three of the most common mistakes to avoid when installing tapered edges.
Cutting the Drywall Too Short
One of the most common mistakes made when installing tapered edges against the ceiling is cutting the drywall too short. When the drywall is too short, it can result in gaps between the tapered edge and the ceiling, which can be difficult to cover up with joint compound. To avoid this mistake, make sure to measure the drywall carefully before cutting it to ensure that it’s the correct length.
Failing to Secure the Drywall to the Ceiling
Another common mistake made when installing tapered edges is failing to secure the drywall to the ceiling properly. If the drywall isn’t secured properly, it can move and cause gaps between the tapered edge and the ceiling. To avoid this mistake, make sure to secure the drywall to the ceiling using screws or nails, and place the fasteners every 12 to 16 inches along the length of the drywall.
Not Taping and Finishing the Joint Properly
Taping and finishing the joint between the tapered edge and the ceiling is an important step in the installation process, and one that should not be overlooked. If the joint is not finished properly, it can result in an uneven surface and visible seams. To avoid this mistake, make sure to apply the joint compound smoothly and evenly, and take the time to sand the surface after the compound has dried to ensure a smooth, seamless finish.
By avoiding these common mistakes, you can ensure a successful installation of drywall tapered edges against the ceiling, and achieve a seamless, professional finish.
Tips for Installing Tapered Edges Against Ceiling
Installing tapered edges against the ceiling can be a tricky task, but by following some additional tips, you can ensure a seamless finish. Here are some tips to keep in mind:
Clean the Ceiling
Before installing the drywall, make sure the ceiling is clean and free of any dust or debris. This will help ensure a strong bond between the drywall and ceiling.
Use a Straight Edge
When measuring and cutting the drywall, use a straight edge to ensure straight cuts. This will help ensure that the tapered edge aligns correctly with the ceiling.
Secure With Screws
Instead of only relying on joint compound to secure the drywall to the ceiling, use screws as well. This will provide additional support and help ensure a secure bond between the drywall and ceiling.
Sand the Joints
After taping and finishing the joint, sand the edges to ensure a smooth and seamless finish. Make sure to sand gently to avoid damaging the drywall or the tapered edge.
Allow Time to Dry
Before painting or texturing the drywall, make sure to allow ample time for the joint compound to dry. This will ensure that the surface is smooth and ready for the next step in the installation process.
By following these additional tips, you can ensure a successful installation of tapered edges against the ceiling. With the right tools, materials, and attention to detail, you can create a smooth and seamless finish that will last for years to come.
Comparison of Tapered and Butt Joints in Drywall Installation
When it comes to installing drywall, one of the most important decisions to make is which type of joint to use – tapered or butt. Both options have their pros and cons, and the choice will ultimately depend on the specific project requirements and the preferences of the installer. To help make the decision easier, let’s take a closer look at the key differences between tapered and butt joints.
| Feature | Tapered Joint | Butt Joint |
|---|---|---|
| Purpose | To create a seamless finish when two pieces of drywall are joined together | To join two pieces of drywall together without any gap |
| Installation Time | Longer, as it requires cutting and shaping of the drywall edges | Quicker, as it simply involves butt joining two pieces of drywall together |
| Strength | Stronger, as the tapered edges create a mechanical lock that helps keep the drywall securely in place | Not as strong, as there is a higher risk of cracking along the joint |
| Finish | Seamless, as the tapered edge is covered with joint compound and tape, making it virtually invisible | Visible, as the joint is not tapered and there is a noticeable gap between the two pieces of drywall |
| Cost | Higher, as it requires more materials and labor to install | Lower, as it is quicker and easier to install |
The choice between tapered and butt joints will depend on the specific requirements of the project. If a seamless finish is a priority, tapered joints may be the better option. However, if cost and speed are the main concerns, butt joints may be the way to go.
Frequently Asked Questions
What is the purpose of using tapered edges when installing drywall against the ceiling?
The purpose of using tapered edges when installing drywall against the ceiling is to create a seamless, smooth surface for painting or wallpapering. Tapered edges are specially designed to accommodate a layer of joint compound, which will be used to cover the seams between sheets of drywall. This results in a smooth transition between sheets and eliminates the need for multiple coats of compound and sanding to achieve a level surface.
What are the advantages of using tapered edges compared to other types of joints in drywall installation?
Tapered edges have several advantages compared to other types of joints in drywall installation. Firstly, they allow for a thinner layer of joint compound to be used, which dries faster and is easier to sand.
Secondly, the taper design helps to hide any imperfections in the cut or fit of the drywall sheets, resulting in a cleaner, more professional appearance. Finally, tapered edges are easier to install compared to other types of joints, as they do not require precise cuts or alignment and can be finished with a single coat of compound.
What tools and materials are needed to install tapered edges against the ceiling?
To install tapered edges against the ceiling, you will need the following tools and materials: drywall sheets, drywall screws, joint compound, a drywall knife, a drill, a drywall saw, a level, and a utility knife. You may also need a ladder or scaffolding, depending on the height of your ceiling.
What are the steps involved in installing tapered edges against the ceiling?
The steps involved in installing tapered edges against the ceiling are as follows:
What mistakes should be avoided when installing tapered edges against the ceiling?
When installing tapered edges against the ceiling, it is important to avoid the following mistakes:
- Cutting the drywall sheets too short, as this will result in gaps between the sheets and make it difficult to achieve a seamless finish.
- Failing to secure the drywall to the ceiling, as this can result in the drywall sagging or falling down.
- Not taping and finishing the joint properly, as this can result in a rough, uneven surface that will be noticeable after painting or wallpapering.
- Not allowing enough time for the joint compound to dry completely, as this can result in a weak bond that will crack and peel over time.
- Not sanding the surface adequately, as this can result in a rough, uneven surface that will be noticeable after painting or wallpapering.
Conclusion
Tapered edges are a crucial aspect of drywall installation, particularly when it comes to the ceiling. Properly installing tapered edges can result in a seamless finish and a smooth transition between the wall and ceiling.
It is important to understand the location, advantages, and differences between tapered and butt joints before starting the installation process. In addition, it is crucial to have the necessary tools and materials, and to follow the steps carefully, avoiding common mistakes such as cutting the drywall too short, failing to secure it to the ceiling, or not taping and finishing the joint properly.
Using a tapered edge for drywall against the ceiling ensures a seamless finish and easier joint compound application. Proper installation involves aligning the tapered edge with the ceiling and applying joint compound evenly. This technique minimizes visible seams and creates a professional look.
While working on your drywall, consider other home improvement tips. For example, understanding why joint compound becomes liquid on top can improve your drywall finishing skills. Additionally, learning about 3/8 vs 1/2 drywall differences can help you choose the right materials for your project. For more insights, explore our guide on getting a straight line off a crooked wall.