DIY Lucidium Dog Pen: Get the High-End Look Without the Price Tag
You love your dog, but you also love your home’s decor. That’s the core of a common problem for pet owners: the struggle between function and style. Standard wire crates or bulky plastic playpens can be an eyesore, creating a visual barrier that makes your pet feel caged in and your living room look cluttered. They often feel like a necessary evil for puppy training, post-surgery recovery, or simply keeping a mischievous dog safe when you can’t supervise them directly.
The solution seems simple: a modern, transparent enclosure. Brands like Lucidium have popularized a sleek design using clear acrylic panels and aluminum frames. These pens are beautiful, allowing your pet to have a 360-degree view, which can reduce anxiety and help them feel more connected to the family. The problem? The high-end look comes with a high-end price tag, often running into hundreds of dollars. This leaves many dog owners wondering if they have to choose between their budget and a beautiful, functional space for their beloved pet.
This guide will show you that you don’t have to compromise. We’ll walk you through every step of creating your own DIY Lucidium-style dog pen. You’ll get the same modern aesthetic and “cage-free” feeling for your pet at a fraction of the cost, with the added satisfaction of building it yourself.
You'll Learn About
The Problem with Traditional Dog Crates and Pens
For decades, the go-to solutions for containing a dog have been wire crates, plastic kennels, and metal exercise pens. While functional, they bring a host of issues that modern pet owners are tired of accepting. They are often aesthetically displeasing, creating a jail-like feel that clashes with thoughtful interior design. This visual clutter can make a room feel smaller and less inviting.
Beyond looks, there’s the emotional impact on your dog. Solid walls or dense bars can obstruct their view, leading to feelings of isolation and increased separation anxiety. A dog that can see their family moving around the home is often calmer and more content. Furthermore, pre-made pens come in standard sizes that might not fit perfectly in your available space, forcing you to settle for an awkward layout.
Why a DIY Lucidium-Style Pen is the Perfect Solution
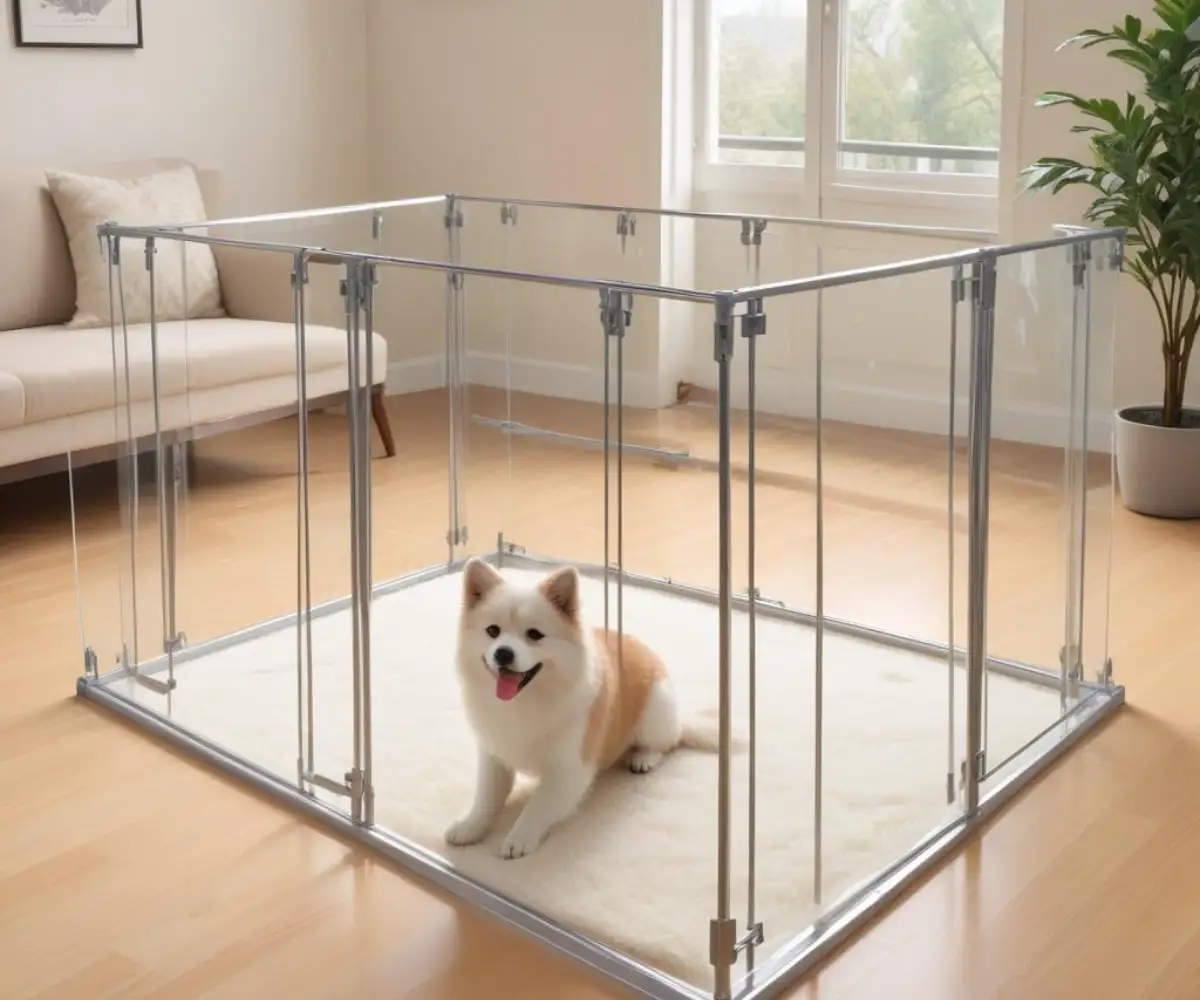
A “Lucidium” style pen refers to a design that prioritizes visibility and modern aesthetics, typically using crystal-clear acrylic or polycarbonate panels set into a metallic or minimalist frame. The allure is undeniable. These pens blend seamlessly into your home, removing the visual barrier between you and your pet. This fosters a greater sense of connection and can significantly ease stress for anxious dogs.
Choosing to build your own offers three huge advantages over buying one pre-made. First and foremost is the cost savings. By sourcing the materials yourself, you can slash the final price significantly. Second is customization; you can design a pen that fits your exact dimensions, whether it’s a perfect square for the corner of your living room or a long rectangle for a hallway. Finally, there’s the immense pride and satisfaction that comes from a successful DIY project.
Planning Your DIY Masterpiece: Before You Begin
Proper planning is the most critical step for a smooth and successful build. Rushing into a project without a clear plan can lead to wasted materials and frustration. Before you make a single cut, you need to finalize your design, dimensions, and material list.
Sizing It Right: How Big Should Your Pen Be?
The ideal size for your pen depends on your dog’s breed, age, and how the pen will be used. A pen for a tiny puppy has different requirements than one for an active medium-sized dog. The goal is to provide enough space for your dog to stand, turn around, and lie down comfortably, with extra room for a bed, water bowl, and perhaps a potty pad. For younger puppies, planning for their adult size can save you from having to build a new one later.
Gathering Your Arsenal: Tools and Materials
Having all your tools and materials ready before you start will make the assembly process much more efficient. You don’t want to have to stop midway through to run to the hardware store. Here’s a comprehensive list of what you’ll likely need.
Essential Materials:
- Clear Panels: Your choice here is primarily between acrylic (Plexiglas) and polycarbonate. Both offer excellent clarity. Acrylic is generally more affordable and has a glossier finish, but it can be more brittle and prone to cracking if not handled carefully during cutting and drilling. Polycarbonate is more impact-resistant and flexible, making it more forgiving to work with, but it often comes at a higher price and can be more easily scratched.
- Frame Material: For the authentic Lucidium look, aluminum C-channel or U-channel is the best choice. It’s lightweight, strong, rust-proof, and the channels provide a perfect slot for the acrylic panels to sit in. Square aluminum tubing or even wood can also be used as alternatives.
- Connectors: You will need corner brackets (L-brackets or 3-way corner connectors for square tubing) and screws to join the frame together. Use screws designed for metal or wood, depending on your frame choice.
- Gate Hardware: A set of small, sturdy hinges and a secure latch are crucial for the door. Choose a latch that is easy for you to operate but difficult for a clever pup to nudge open.
Essential Tools:
- Safety Goggles and Gloves
- Measuring Tape & Straight Edge
- Drill with various bit sizes
- Saw suitable for your frame material (e.g., a hacksaw with a fine-tooth blade for aluminum, a miter saw for wood)
- Saw or scoring tool for cutting the clear panels
- Screwdriver or screw gun
- Clamps to hold pieces steady while working
- Fine-grit sandpaper or a metal file for smoothing sharp edges
Building the Frame: The Skeleton of Your Pen
The frame provides the structure and stability for your entire pen. Accuracy here is key. The saying “measure twice, cut once” has never been more relevant. Start by cutting your frame pieces to your predetermined lengths for the top and bottom sections, as well as the vertical uprights.
When assembling, work on a flat, level surface. Begin by building the bottom rectangle of your pen. Use your corner brackets to connect the pieces, drilling pilot holes before driving in the screws to prevent splitting or stripping. Ensure each corner is a perfect 90-degree angle. Once the bottom frame is complete, attach the vertical uprights at each corner, followed by the top frame. Double-check that the frame is square and stable before moving on to the next step. If you notice any exposed sharp edges after cutting, it’s crucial to file them down to prevent injury to your pet; leaving potential hazards is a mistake you don’t want to make. For homeowners, this principle of ensuring a safe, finished project is just as important in other areas, such as understanding why did my roofer leave roof exposed common reasons fixes to prevent potential damage.
Installing the Clear Panels: Creating the “Invisible” Walls
This is where your pen truly takes shape. If you didn’t have your acrylic or polycarbonate panels pre-cut, this is the time to do it. The safest method for DIYers cutting thin acrylic (up to about 3/16″ thick) is the “score and snap” method. Use a utility knife or a special scoring tool with a straight edge to make a deep, continuous score along your cut line. Then, place the panel on the edge of a sturdy table with the scored line facing up and apply firm, even pressure to snap it cleanly.
For thicker sheets or for polycarbonate, a jigsaw or table saw with a fine-toothed blade designed for plastics is recommended. The key is to cut slowly to avoid heat buildup, which can melt the plastic. Leaving the protective film on the panels during cutting will help prevent scratches. Once cut, place the panels into the channels of your assembled frame. If you’re not using channels, you will need to drill holes through the panels and the frame and secure them with bolts and nuts, using rubber washers to prevent cracking the plastic.
The Grand Entrance: Assembling and Hanging the Gate
The gate requires its own small, separate frame. Construct it in the same manner as the main pen walls, ensuring it is slightly smaller than the opening to allow for swing clearance. Attach the clear panel into the gate frame.
Next, attach your hinges to one side of the gate frame and then to the corresponding vertical support on the main pen. Ensure the gate is level and swings smoothly without binding. Finally, install the latch on the opposite side, making sure it aligns perfectly and closes securely. A double-action latch can provide extra security against escape artist dogs.
| Feature | Acrylic (Plexiglas) | Polycarbonate (Lexan) |
|---|---|---|
| Clarity | Excellent, very glass-like | Excellent, though can have a slight blue tint |
| Impact Resistance | Good (10x stronger than glass) | Superior (250x stronger than glass) |
| Scratch Resistance | Fair, can be scratched | Poor, scratches more easily unless coated |
| Ease of Cutting | Good, can be scored and snapped when thin | Better, less prone to cracking or chipping |
| Cost | More affordable | More expensive |
| Best For | Calmer dogs, budget-conscious builds | High-energy dogs, puppies, maximum durability |
Customization and Upgrades for Your DIY Pen
One of the greatest benefits of a DIY project is the ability to add custom touches that suit your specific needs. Once the basic structure is complete, consider these upgrades to enhance its functionality and safety.
Adding a Roof or Top Cover
For dogs that are climbers or high jumpers, a top cover is a non-negotiable safety feature. You can construct a simple top frame from the same material as the main pen. For the cover itself, you can use another clear acrylic panel, a mesh screen for better ventilation, or a solid piece of lightweight wood. Ensuring a proper cover can be as important for a dog pen as for your home. Just as you might be concerned about how to stop water running back under metal roof, a secure top prevents your pet from getting out and into trouble.
Flooring and Comfort
While the pen itself doesn’t have a floor, what you place it on matters. To protect your home’s flooring, consider placing the pen on a waterproof mat, a piece of linoleum, or interlocking foam tiles. This also provides a more comfortable surface for your dog and makes cleanup much easier in case of accidents. A cozy bed and favorite toys will make the space feel like a safe and inviting den.
Ensuring Safety and Durability
Once assembly is complete, do a thorough safety check. Run your hands along all edges of the frame and panels to check for any sharp spots, filing them down as needed. Double-check that all screws are tight and that there are no small gaps where a paw or collar could get stuck. Proper construction is just as important for small projects as it is for major home improvements, like when you need to install awning on vinyl siding securely.
Your New DIY Lucidium Pen: A Clear Success
Building your own Lucidium-style dog pen is more than just a home improvement project; it’s an act of love for your pet. You’ve created a space that is not only safe and functional but also beautiful and integrated into your home. You’ve solved the common problem of ugly, prison-like crates without breaking the bank.
This transparent, stylish enclosure will help your dog feel less isolated and more a part of the family, all while protecting your furniture and giving you peace of mind. Stand back and admire your handiwork—a crystal-clear success that you and your furry friend will enjoy for years to come.