How to Rewire a European Lamp to US?
If you have a European lamp that you would like to use in the US, you may need to rewire it to ensure that it is safe and compliant with US electrical standards. Rewiring a European lamp involves replacing the internal and external wiring, as well as the sockets and plug, with components that are suitable for use in the US.
This process is necessary because the electrical systems in Europe and the US have different voltage and frequency standards, and using a foreign lamp without properly rewiring it could be dangerous. In this guide, we will walk you through the steps for rewiring a European lamp to work in the US, including the necessary tools and materials, and the importance of following proper safety procedures.
You'll Learn About
Preparation
Before you begin the process of rewiring a European lamp to work in the US, it is important to gather all the necessary tools and materials. You will need wire strippers, wire connectors, electrical tape, a screwdriver, and a new US plug and socket set. Make sure to choose a socket set and plug that are rated for the wattage of your lamp and are UL approved for use in the US.
It is also important to turn off the power to the lamp before you begin working on it. This will help prevent any accidents or injuries caused by electrical shock. To turn off the power, locate the circuit breaker or fuse box that controls the power to the lamp and switch it off.
Then, remove the bulb from the lamp to make it easier to access the wiring.
Once you have gathered all the necessary tools and materials and turned off the power to the lamp, you can begin the process of rewiring.
Remove the Old Wiring
To remove the old wiring from a European lamp, you will need to first remove the lamp cover or base to access the wiring. Depending on the design of your lamp, this may involve removing a few screws or simply lifting off the cover. Once you have access to the wiring, you will need to disconnect the old wiring from the sockets and switch.
To disconnect the wiring, you may need to loosen the terminal screws on the sockets and switch or simply unplug the wiring from the connectors. Be sure to label the wires or make a note of which wires go where so that you can easily connect the new wiring in the correct place later.
Once you have disconnected the old wiring from the sockets and switch, you can set it aside and prepare to install the new wiring.
Install the New Wiring
To install the new wiring in a European lamp, you will need to start by installing the new sockets and switch according to the manufacturer’s instructions. This may involve attaching the sockets to the lamp base or cover using screws or other fasteners, and connecting the switch to the wiring using wire connectors or terminal screws.
Once the new sockets and switch are installed, you can then connect the new wiring to them. Follow the manufacturer’s instructions for the specific type of socket and switch you are using, and make sure to connect the wires to the correct terminals.
After the new wiring is connected to the sockets and switch, you will need to secure it in place using wire connectors or electrical tape. This will help prevent any accidental disconnections or wire damage.
Once the new wiring is installed and secured, you can move on to installing the new plug.
Install the New Plug
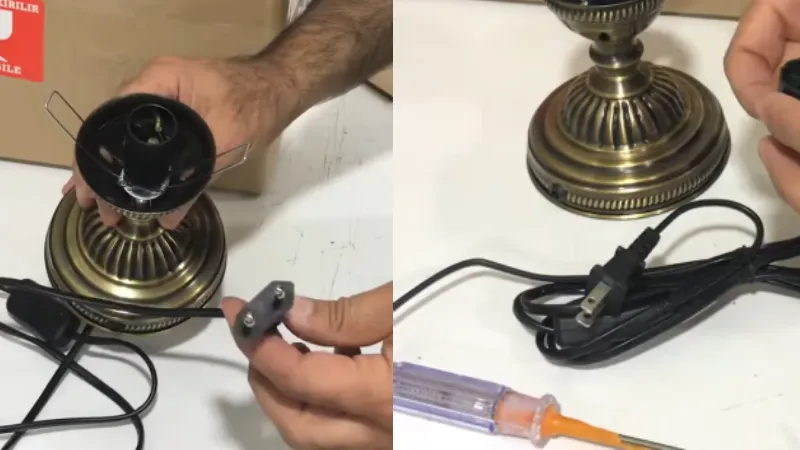
To install the new US plug on a European lamp, you will need to follow the manufacturer’s instructions for attaching the plug to the wiring. This may involve attaching the wires to the terminal screws on the plug using wire connectors or terminal screws, or simply plugging the wiring into the connectors on the plug.
Once the wiring is connected to the new plug, you will need to secure the wires in place by tightening the terminal screws or using wire connectors. Then, cover the plug with the cover or cap that comes with it to protect the wiring and terminal screws from damage.
Once the new plug is installed and secured, you can test the lamp to make sure it is working properly.
Test the Lamp
After you have installed the new wiring, sockets, switch, and plug on a European lamp, it is important to test the lamp to ensure that it is working properly. To do this, you will need to turn the power back on to the lamp by switching the circuit breaker or fuse back on.
Once the power is turned on, you can test the lamp by turning it on using the switch and checking that the bulb is working. If the bulb is not working, you may need to check the connections between the wiring, sockets, and switch to make sure everything is secure and properly connected. If the bulb is working, you can then replace the lamp cover or base and enjoy your newly rewired European lamp in the US.
If you encounter any issues during the testing process, it is important to turn the power back off to the lamp and troubleshoot the problem before attempting to use the lamp again. This will help ensure the safety of the lamp and prevent any accidents or injuries caused by electrical issues.
You can also rewire Siegler Gas Heater’s connections like this.
Final Thoughts
To rewire a European plug to work in the US, follow these steps:
- First, remove the cover of the European plug.
- Loosen the 3 terminal screws.
- Insert the ground wire into the connector hole and tighten the screw.
- Take the neutral wire and put it into the neutral connector hole and tighten the screw.
It is important to completely rewire the entire lamp, including the light sockets and the internal and external wiring, to ensure safety for use in the US. Using a European to US plug adapter is not sufficient and could be dangerous.
It is also important to use UL approved components in the lamp to ensure compliance with safety standards. It is not recommended to simply use a Euro to US plug adapter and assume that it will be safe to use in the US.