Exposed Foundation Footing: The Hidden Danger Under Your Home & How to Fix It FAST
You’re doing some yard work or maybe just inspecting your property when you notice it: a line of concrete at the base of your house that wasn’t visible before. This slab, known as the foundation footing, is meant to be completely buried. Seeing it is an immediate red flag that demands your attention.
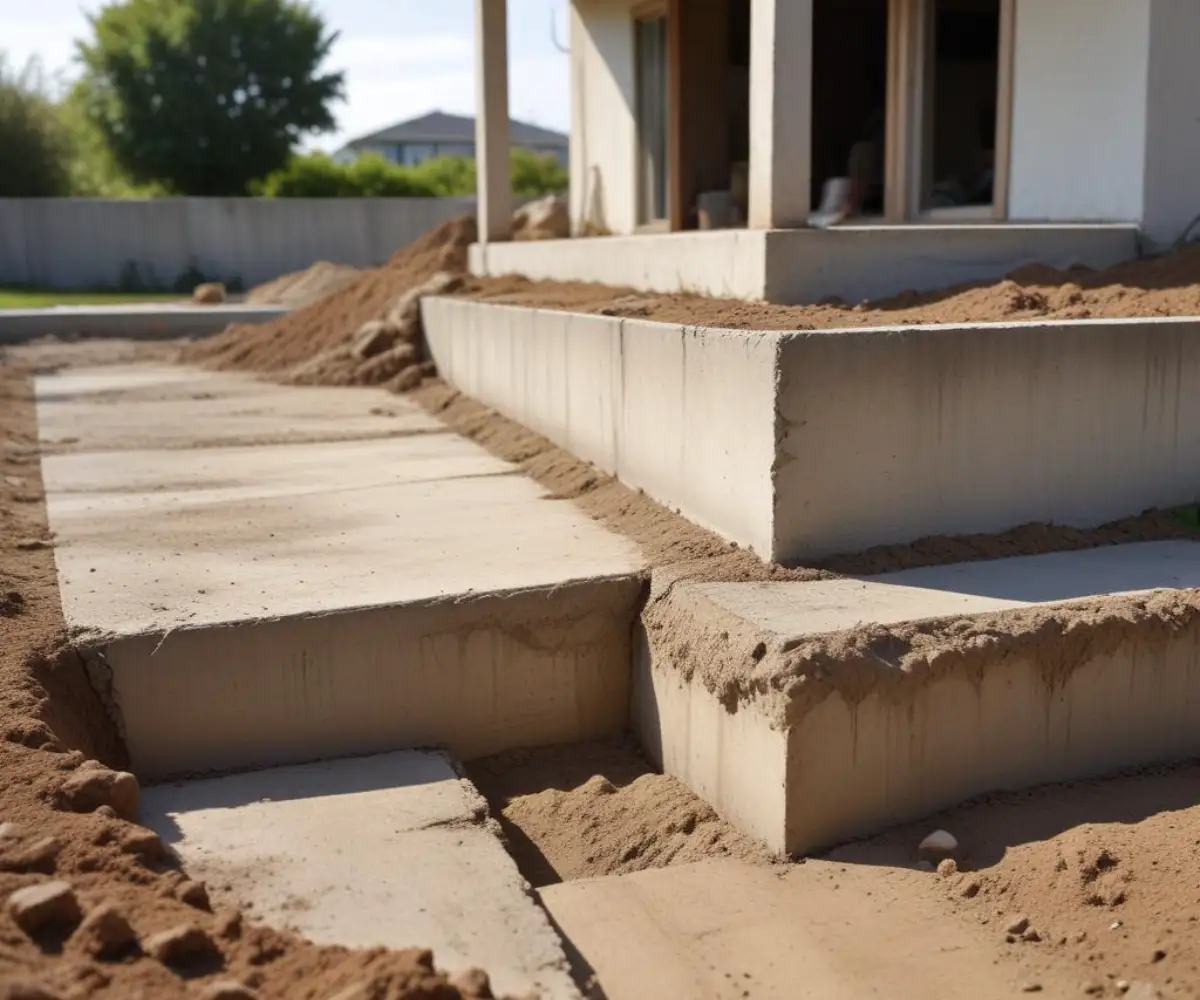
The foundation footing is arguably the most critical structural component of your home. It’s a wide, concrete base that sits beneath your foundation walls, distributing the entire weight of your house evenly onto the soil. When it becomes exposed, it signals a deeper problem that could compromise the very stability of your home.
You'll Learn About
Why Is My Foundation Footing Exposed? Uncovering the Root Causes
An exposed foundation footing is never normal; it’s a symptom of underlying issues that have caused the soil supporting your home to disappear. Understanding these causes is the first step toward a permanent solution. The most common culprits are often related to water and soil management around your property.
Soil Erosion and Poor Drainage
The number one cause of an exposed footing is soil erosion driven by water. When rainwater isn’t properly diverted away from your home, it can act like a slow-motion chisel, gradually washing away the soil around your foundation. This is often due to clogged gutters, downspouts that discharge too close to the house, or a lack of a proper exterior drainage system.
Without effective drainage, water pools against the foundation, saturates the soil, and carries it away with every downpour. Over time, this relentless process lowers the grade level around your house, leaving the footing dangerously exposed to the elements.
Improper Grading
The ground around your home should act like a shield, not a sponge. Proper grading is essential; the soil should slope downwards and away from your foundation, typically a drop of at least six inches over the first ten feet. This gentle slope ensures that surface water from rain and snowmelt flows harmlessly away from your home.
If your home was built on a negative slope or the grading has flattened over time, water will flow back towards the foundation. This pooling water not only causes soil erosion but can create immense hydrostatic pressure against your foundation walls, leading to cracks and leaks.
Landscaping and Construction Issues
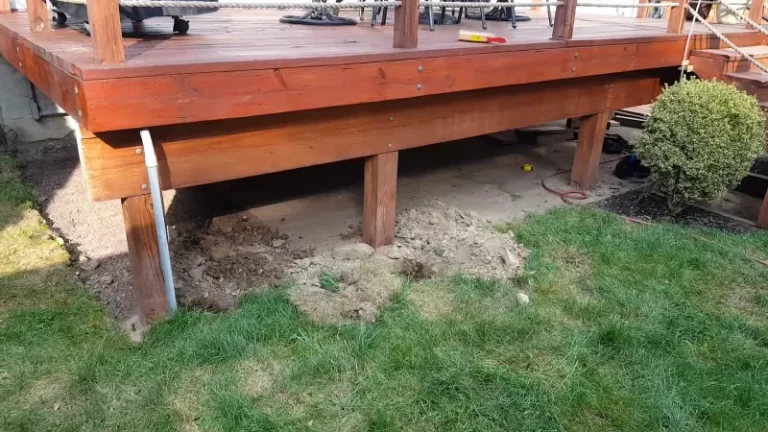
Sometimes, the problem is unintentionally self-inflicted. Aggressive landscaping, like digging new garden beds too close to the house, can disturb the compacted soil that protects the footing. Similarly, any project involving digging near your foundation with a mini excavator must be done with extreme care to avoid undermining its support.
In some cases, the issue dates back to the original construction. If the soil wasn’t properly compacted after the foundation was built, it can settle significantly over time, causing the ground level to drop and expose the footing.
The Alarming Risks of an Exposed Foundation Footing You Can’t Ignore
An exposed footing is more than just a cosmetic issue; it’s a direct threat to your home’s structural integrity and your family’s safety. The soil that once covered it wasn’t just for looks—it provided crucial support and protection. When that protection is gone, a cascade of serious problems can begin.
The most immediate danger is loss of structural support. The footing is designed to rest on and be buttressed by undisturbed, compacted soil. When that surrounding soil erodes, the footing can become undermined, leading to uneven settling, foundation cracks, and bowing walls.
Water Intrusion and Basement Problems
With the footing exposed, water has a much easier path to get under your foundation and into your basement or crawl space. This can lead to persistent dampness, mold growth, and outright flooding. Increased moisture in the lower levels can also elevate radon gas levels, potentially requiring a radon mitigation system without a sump pump to ensure your home’s air quality is safe.
Frost Heave and Foundation Damage
In colder climates, an exposed footing is extremely vulnerable to frost heave. When water in the soil freezes, it expands with incredible force, and it can lift and crack an unprotected footing. Covering the foundation with insulating materials, such as detailed in our guide on styrofoam around house foundation, is one way to mitigate this risk, but the soil itself is the primary insulator.
Pest Infestations
The gap created by an exposed footing is an open invitation for pests. Rodents, insects, and other unwanted critters can easily find their way under the footing and into your home, creating a separate set of problems that can be difficult and costly to resolve.
Your Step-by-Step Guide to Fixing an Exposed Foundation Footing
Addressing an exposed footing is not a task to postpone. While some minor cases can be handled by a diligent homeowner, significant exposure often requires professional intervention. The solution almost always involves two key actions: restoring the lost soil and correcting the water management issues that caused the problem in the first place.
Step 1: Assess the Damage and Address Drainage
Before you do anything else, evaluate the source of the problem. Clean your gutters and extend your downspouts so they discharge at least 4-6 feet away from the foundation. Observe how water flows around your property during the next rainstorm to identify areas where it pools or flows toward the house.
Step 2: Rebuild the Soil Grade (Backfilling)
The core of the repair is to rebuild the soil around your foundation. Do not use just any dirt. You need to use a soil mix that will compact well and resist erosion, typically a clay-loam mixture. Avoid sandy or organic-rich soils, which drain too quickly or will decompose and settle.
Add the new soil in layers, or “lifts,” of about 4-6 inches at a time. After adding each layer, use a hand tamper or mechanical compactor to pack it down firmly. This compaction is critical to prevent the new soil from settling over time and recreating the problem.
Step 3: Establish a Positive Grade
As you add soil, ensure you are building up a slope that directs water away from the foundation. The final grade should be highest right against the house and gradually slope downwards. This positive grading is your best defense against future erosion.
Step 4: Protect the New Grade
Once the grade is corrected, protect it. Planting grass or foundation-friendly shrubs can help hold the soil in place with their root systems. Applying a layer of mulch can also help, but be sure not to pile it directly against your siding, as this can attract pests and trap moisture.
DIY vs. Professional Foundation Repair: Making the Right Choice
While fixing a small area of exposure might seem like a manageable DIY project, it’s crucial to know when to call in the experts. Foundation work is not forgiving, and a mistake can lead to even more significant and expensive damage. The decision often comes down to the scope of the problem and your level of expertise.
| Aspect | DIY Approach | Professional Solution |
|---|---|---|
| Scope | Best for minor erosion in a small, localized area (e.g., a few feet). | Necessary for widespread exposure, signs of cracking, or significant soil loss. |
| Cost | Lower upfront cost (materials only). Average costs for minor DIY repairs can be a few hundred dollars. | Higher cost, ranging from $2,000 to over $7,000 for major grading and repairs, but provides a long-term, warranted solution. |
| Expertise | Requires a solid understanding of soil types, compaction, and proper grading techniques. | Structural engineers and foundation specialists diagnose the root cause and implement engineered solutions. |
| Tools & Materials | Shovels, wheelbarrow, hand tamper, and purchasing the correct soil blend. | Access to heavy equipment like excavators, laser levels for precise grading, and commercial-grade materials. |
| Guarantee | No guarantee; if the problem returns, you bear the full cost of re-doing the work. | Reputable companies offer warranties on their work, providing peace of mind. |
Preventing Future Exposure: Proactive Foundation Maintenance
Once your footing is safely buried again, the work isn’t over. Proactive maintenance is key to preventing a recurrence. Make a habit of walking around your property a few times a year, especially after heavy rains, to inspect the area around your foundation.
Maintain your drainage systems religiously. Keep gutters free of leaves and debris, ensure downspouts are securely attached and directing water far from the house, and address any low spots in your yard that collect water. This simple maintenance is the most effective way to protect your home’s foundation and the investment it represents.