Styrofoam Around House Foundation: The #1 Secret to a Warmer Home
You feel it every winter. A cold, drafty basement that leaches warmth from the rest of your house, sending your energy bills soaring. You might also notice a persistent damp, musty smell or even find small cracks appearing in your foundation walls.
These are not just minor annoyances; they are symptoms of a much larger problem. An uninsulated foundation is like leaving a massive window open all year round, constantly battling your heating and cooling systems.
The earth surrounding your home remains at a relatively constant temperature, which is often significantly different from your home’s interior. This temperature difference causes a continuous flow of heat out of your home in the winter and into your home in the summer, directly through the porous concrete of your foundation.
You'll Learn About
Why Your Bare Foundation is Costing You a Fortune
A home’s foundation can be responsible for up to 50% of its total heat loss. This staggering statistic means that half the money you spend on heating could be seeping directly into the ground. The issue goes beyond just wasted energy and uncomfortable rooms.
Moisture is another critical factor. Concrete is porous and will absorb moisture from the surrounding soil. This moisture can lead to mold, mildew, and a chronically damp basement. In colder climates, this absorbed water can freeze, expand, and cause significant cracks and structural damage over time.
The Proven Solution: Rigid Foam Insulation
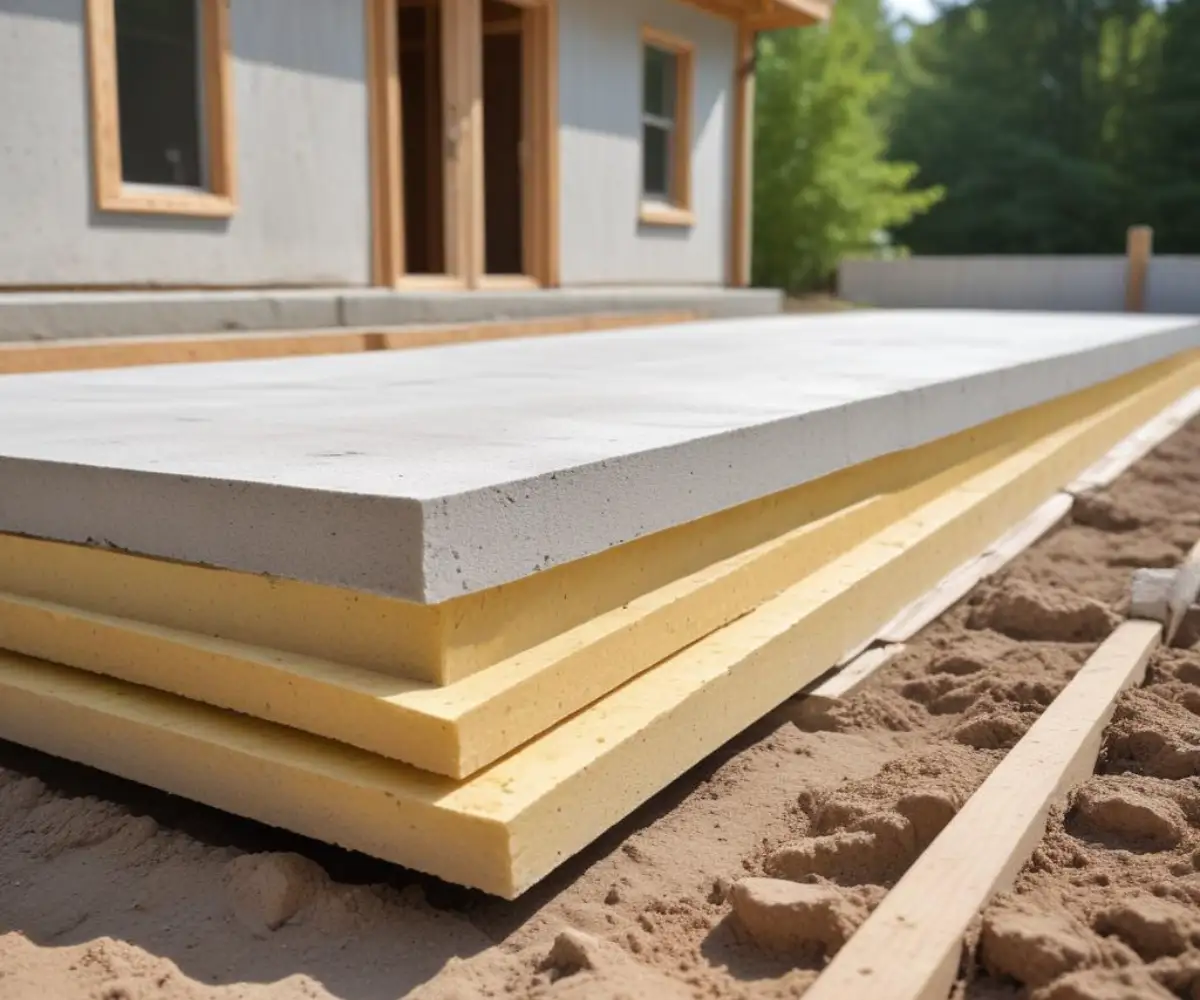
The most effective way to stop this cycle of heat loss and moisture infiltration is by installing rigid foam insulation, commonly known as Styrofoam, around the exterior of your house foundation. This creates a continuous thermal break between your home and the cold, damp earth.
Unlike other insulation types, rigid foam is specifically engineered to handle the harsh below-grade environment. Its high compressive strength withstands the immense pressure of the soil, and its closed-cell structure makes it highly resistant to moisture absorption. This is the definitive solution for a warmer, drier, and more efficient home.
EPS vs. XPS: Choosing the Right Styrofoam for Your Foundation
While “Styrofoam” is a common term, it’s important to understand the two main types of rigid foam used for foundation insulation: Expanded Polystyrene (EPS) and Extruded Polystyrene (XPS). Both are excellent choices, but they have key differences that might make one a better fit for your specific project and budget.
XPS is known for its high R-value per inch and exceptional moisture resistance, making it a premium choice for foundation applications. EPS offers a great balance of performance and cost-effectiveness, providing significant insulating power at a lower price point. For a detailed comparison of leading brands, exploring an R-Tech vs Owens Corning showdown can provide deeper insights into specific product performance.
Expanded Polystyrene (EPS)
EPS is a closed-cell insulation material that is manufactured by expanding small polystyrene beads. It is typically white and is an extremely cost-effective solution. While its R-value per inch is slightly lower than XPS, it provides excellent long-term thermal performance when installed correctly.
EPS is a fantastic value proposition for many homeowners. It offers robust insulation and moisture management capabilities without the premium price tag of XPS, making it an accessible upgrade for a wide range of budgets.
Extruded Polystyrene (XPS)
XPS is also a closed-cell foam, but it is manufactured through an extrusion process that results in a more uniform, denser board. You can typically identify it by its color, which is often pink, blue, or green depending on the manufacturer. XPS boasts a higher R-value per inch and superior resistance to water absorption.
Its high compressive strength also makes it exceptionally durable against soil pressure and the stresses of backfilling. For homeowners in very wet climates or those seeking the absolute highest performance, XPS is the superior choice.
Insulation Comparison: EPS vs. XPS for Foundations
Understanding the core differences is key to making an informed decision. The right choice depends on your climate, soil conditions, and budget.
| Feature | Expanded Polystyrene (EPS) | Extruded Polystyrene (XPS) |
|---|---|---|
| R-Value (per inch) | Approximately R-3.6 to R-4.2 | Approximately R-5.0 |
| Moisture Resistance | Good | Excellent |
| Compressive Strength | Good (Typically 10-25 PSI) | Excellent (Typically 15-100 PSI) |
| Cost | Lower | Higher |
| Common Uses | General foundation walls, above-grade | Below-grade walls, under slabs, critical moisture areas |
How to Install Styrofoam Around Your House Foundation: A Step-by-Step Guide
Installing exterior foundation insulation is a significant undertaking, but it is manageable for a skilled DIYer. Following the correct steps is crucial to ensure a professional result that provides lasting benefits. Proper execution guarantees you won’t just be burying your investment; you’ll be maximizing it.
Step 1: Excavate and Prepare the Foundation Wall
The first step is to carefully excavate the soil around your foundation down to the footing. The width of the trench should be sufficient to work in safely, typically at least 2-3 feet. Once excavated, the foundation wall must be thoroughly cleaned.
Use a pressure washer or a stiff brush to remove all dirt, dust, and loose debris. Inspect the wall for any cracks or damage. This is the perfect time to make repairs, as these areas will soon be covered. A pristine surface is essential for the next step.
Step 2: Apply a Waterproofing Membrane
Before any insulation is attached, you must apply a dedicated waterproofing membrane directly to the concrete. This is a non-negotiable step. While XPS and EPS are moisture-resistant, they are not waterproofers.
A liquid-applied membrane or a self-adhering sheet membrane will create a seamless barrier that prevents water from ever touching your foundation. This two-pronged approach—waterproofing plus insulation—provides the ultimate protection against moisture problems.
Step 3: Attach the Foam Insulation Boards
Once the waterproofing membrane has fully cured, you can begin installing the foam boards. Start at a corner and work your way across the wall. The boards should be pressed tightly against each other to minimize gaps.
Apply a foam-board-compatible construction adhesive to the back of each panel in a serpentine or “S” pattern. Press the board firmly against the wall until the adhesive grabs. For added security, especially on uneven walls, you can use mechanical fasteners designed for concrete applications.
Step 4: Seal All Seams and Gaps
Creating a truly continuous layer of insulation is vital. Use a specialized construction tape designed for foam sheathing to seal all the seams between the boards. This prevents air and water from finding a path through the joints.
Pay special attention to corners and any areas where the foam meets pipes or windows. Use canned spray foam to fill any irregular gaps, ensuring a completely airtight and watertight installation.
Step 5: Protect the Above-Grade Insulation
The portion of the insulation that remains visible above the ground level must be protected from physical damage and sunlight. UV radiation will degrade the foam over time, and it can be easily damaged by lawnmowers or other impacts.
Cover the exposed foam with a durable, protective coating. Options include acrylic-modified stucco, cementitious coatings, or pressure-treated plywood. This finishing layer not only protects the insulation but also provides a clean, aesthetic transition from your siding to the ground.
Beyond the Basics: Secrets to a Flawless Installation
Many guides cover the basics, but a few critical details can elevate your project from good to great. Paying attention to these often-overlooked aspects ensures maximum performance and longevity for your foundation insulation system.
Integrate with Your Drainage System
Your foundation insulation and drainage system must work together. Ensure your weeping tile or French drain at the base of the footing is clean and functional before you backfill. The insulation helps keep the soil warmer and drier, reducing hydrostatic pressure, but a proper drainage system is the primary defense against water buildup.
Placing a dimple mat against the foam board before backfilling can provide an additional drainage plane and a physical cushion for the insulation. This creates a belt-and-suspenders approach to water management.
Don’t Forget the Rim Joist
Insulating the exterior foundation walls is a massive step, but for a complete thermal envelope, you must also address the rim joist. The rim joist—the wooden structure that sits on top of the foundation—is a notorious spot for heat loss and air leakage.
While you have the area exposed, it’s a prime opportunity to air seal and insulate this critical junction. Understanding the rim joist insulation cost and benefits is essential, as sealing this area is one of the highest-impact energy upgrades you can make to complement your new foundation insulation.
Plan for Pest Prevention
One common concern is that insects, particularly termites and carpenter ants, can tunnel into foam insulation. While this is a valid concern, it is easily managed with modern materials and proper installation techniques.
Choose a foam product that is treated with an insect-resistant additive. Additionally, installing a metal termite shield that extends from the foundation wall over the top of the insulation can create an impenetrable physical barrier, giving you complete peace of mind.
The Real-World Benefits of Insulating Your Foundation
The effort and investment put into insulating your foundation pay dividends for years to come. The benefits are not just theoretical; they are tangible improvements you will feel and see every day.
You will experience a dramatic increase in comfort, especially in your basement, which can now be transformed into a comfortable and usable living space. Your entire home will be warmer in the winter, cooler in the summer, and less prone to drafts. This added comfort is matched by a significant reduction in your energy bills, often saving homeowners 15-25% annually.
Finally, you are making a long-term investment in the health of your home. By controlling moisture and reducing freeze-thaw cycles, you are protecting the structural integrity of your foundation, preventing costly repairs down the road. It’s an upgrade that enhances your comfort, saves you money, and protects your most valuable asset. While you’re tackling major insulation projects, don’t overlook smaller but equally important areas; effective closet insulation, for instance, can prevent heat loss and protect stored items.