Tile to Drywall Transition Outside Corner
In any home improvement project, it’s important to pay attention to the transitions between different materials. Smooth transitions help to create a cohesive and polished look, and can also be functional by preventing water or other substances from seeping through cracks or gaps.
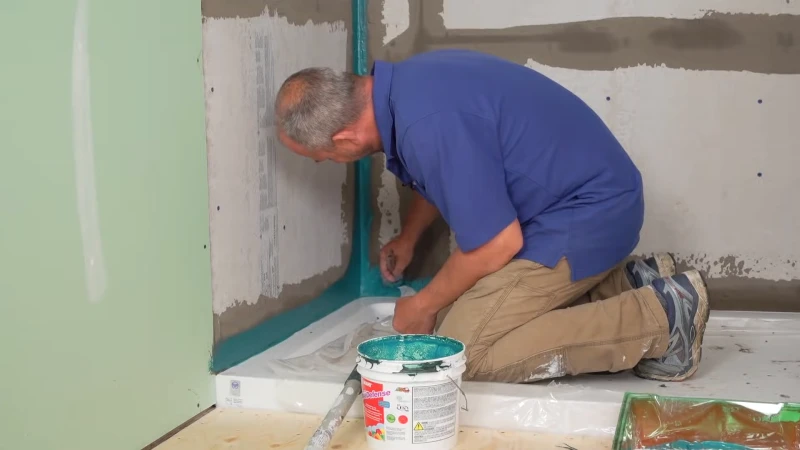
One common challenge that homeowners face is transitioning between drywall and tile at an outside corner, especially in bathroom or shower spaces where water resistance is crucial.
In this blog post, we will explore various options for transitioning between drywall and tile at an outside corner, as well as provide tips for choosing the best solution and a step-by-step guide for installing a corner bead.
You'll Learn About
Tile to Drywall Transition Outside Corner
One option that has been suggested is to use a USG #800 corner bead, which is a strip of metal or plastic that is used to create a smooth, straight edge on a drywall corner. To use a corner bead, you would install it on the drywall first and then install the tile up to the edge of the corner bead.
This can help to create a smooth transition between the two materials. Another option is to use custom trim or trim made with a router, which involves selecting a trim profile that you like and either having it custom made or shaping it yourself using a router.
You can then install the trim along the edge of the tile to create a smooth transition. It is also possible to use joint compound to cover the edge of the backer board, but it may not adhere well and could potentially crack without a tape joint.
When choosing the best solution, it’s important to consider the specific materials and style of your project, as well as the water-resistance and durability of the solution in a bathroom or shower environment.
Options for Transition Solutions
It’s important to consider the specific materials and style of your project, as well as the water-resistance and durability of the solution, when deciding on the best transition solution for your needs.
V Cap Tile
V cap tiles, also known as V-shaped or v-cap tiles, are specially designed tiles that are used to create a smooth transition between two different materials, such as drywall and tile. They are often used at the top of a backsplash or at the edge of a countertop to finish the edge and create a seamless look.
To use V cap tiles at the transition between drywall and tile, you would simply install the V cap tiles along the edge of the tile, making sure to follow the manufacturer’s instructions for installation and to use a suitable adhesive.
Corner Bead
A corner bead is a strip of metal or plastic that is used to create a smooth, straight edge on a drywall corner. To use a corner bead at the transition between drywall and tile, you would install the corner bead on the drywall first and then install the tile up to the edge of the corner bead.
This can help to create a smooth, professional-looking transition between the two materials.
Custom Trim or Trim Made With a Router
Another option for transitioning between drywall and tile is to use custom trim or trim that you have made yourself using a router.
To do this, you would need to select a trim profile that you like and either have it custom made or shape it yourself using a router. You can then install the trim along the edge of the tile to create a smooth transition.
Using Joint Compound to Cover the Edge of the Backer Board
In some cases, it may be possible to use joint compound to cover the edge of the backer board where it overlaps the drywall. However, it’s important to keep in mind that joint compound may not adhere well to the backer board and could potentially crack without a tape joint.
If you do choose to use joint compound, it’s a good idea to cut it back a bit and apply multiple thin layers rather than trying to cover the entire edge in one thick layer.
Tips for Choosing the Best Solution
When choosing the best solution for transitioning between drywall and tile at an outside corner, it’s important to consider the following factors:
The Specific Materials and Style of Your Project
Different transition solutions may work better with certain materials or styles. For example, if you have a sleek, modern bathroom with minimalist tiles, you may want to choose a simple and minimalistic trim solution rather than a more ornate one.
On the other hand, if you have a more traditional bathroom with decorative tiles, you may want to choose a trim solution that complements the overall style of the room.
The Water-resistance and Durability of the Solution
Because the transition between drywall and tile will likely be located in a bathroom or shower, it’s important to choose a solution that is able to withstand moisture. V cap tiles and custom trim solutions are generally more water-resistant than joint compound, which may not hold up well in a wet environment.
The Level of Difficulty and Necessary Skills for Each Solution
Some transition solutions may be easier to install than others, depending on your level of experience and the tools and materials you have available.
For example, installing a corner bead may be a relatively straightforward process, while creating custom trim or shaping it with a router may require more advanced skills and equipment. It’s a good idea to consider your own abilities and resources when deciding on the best solution for your project.
Step-by-step Guide to Installing a Corner Bead
Installing a corner bead is a common method for creating a smooth, straight edge at the transition between drywall and tile. Here is a step-by-step guide to installing a corner bead:
Measure and Mark the Location of the Corner Bead
Use a tape measure to determine the length of the wall where the corner bead will be installed. Then, use a pencil to mark the location of the corner bead on the drywall.
Cut the Corner Bead to Fit the Wall
Using a pair of tin snips or a similar tool, cut the corner bead to the appropriate length. Make sure to leave a small overlap at each end to allow for adjustments.
Score and Snap the Corner Bead Along the Scored Line
Most corner beads have a scored line running down the center, which allows you to easily bend the bead to fit the contour of the wall. Use a utility knife to score along the line, and then snap the bead along the scored line to create a curved shape.
Apply Joint Compound to the Back of the Corner Bead
Using a drywall knife, apply a thin layer of joint compound to the back of the corner bead. This will help to hold the bead in place and create a smooth transition between the drywall and the tile.
Press the Corner Bead Into Place and Smooth It Down With a Drywall Knife
Carefully position the corner bead on the drywall, making sure to align it with the marks you made in step 1. Use a drywall knife to smooth the bead down and remove any excess joint compound.
Allow the joint compound to dry according to the manufacturer’s instructions: Follow the manufacturer’s recommended drying time for the joint compound.
Additional Tips to Consider When Transitioning Between Drywall and Tile
Here are a few additional tips to consider when transitioning between drywall and tile at an outside corner:
- Choose the right thinset or adhesive: It’s important to use a thinset or adhesive that is suitable for the specific materials you are working with. For example, if you are installing ceramic or porcelain tile, you will need to use a thinset that is designed for use with these materials. Make sure to follow the manufacturer’s instructions for proper mixing and application.
- Protect your work area: When working with tiles, it’s important to protect your work area to prevent damage to the tiles or surrounding surfaces. This may include covering the floor with a drop cloth or using a tile saw to cut tiles outside of the shower.
- Consider the size of your tiles: Larger tiles may be more difficult to install at an outside corner, as they may require precise cuts to fit around the corner. If you are working with large tiles, it may be a good idea to use a wet saw or tile nipper to create a custom fit. Drywall installation takes a long time so proceed carefully.
- Use a level and straight edge: To ensure that your tiles are installed straight and level, it’s a good idea to use a level and a straight edge. This can help to ensure that your tiles are evenly spaced and that the transition between the drywall and the tile is smooth and straight.
- Test fit your tiles before installing: Before installing your tiles, it’s a good idea to do a test fit to make sure that they will fit properly around the corner. This will allow you to make any necessary adjustments before you start setting the tiles in place.
Final Words
Transitioning between drywall and tile at an outside corner can be a challenging task, but there are several options available to help create a smooth and seamless transition.
These options include using v cap tiles, installing a corner bead, creating custom trim or trim made with a router, or using joint compound to cover the edge of the backer board. You also need to care about the uneven transition.
When choosing the best solution for your project, it’s important to consider the specific materials and style of your project, as well as the water-resistance and durability of the solution in a bathroom or shower environment.
It’s also important to consider the level of difficulty and necessary skills for each solution, and to follow proper installation techniques to ensure a successful outcome. If you are unsure about your abilities or have any questions, don’t hesitate to ask for help or seek out additional resources.