SWD Circuit Breaker Gone Wrong? Your Ultimate Fix-It Guide
You flip a switch, but the lights stay stubbornly off. You check the panel, and there it is—the circuit breaker handle sits mockingly in the tripped position. For many, this is a familiar frustration, but when the breaker is labeled “SWD,” a layer of uncertainty often complicates the problem.
This tiny acronym holds significant importance for the safety and functionality of your electrical system, yet it remains a source of confusion. Understanding what an SWD circuit breaker is, and why it might be failing, is the first step toward a safe and lasting solution.
You'll Learn About
Unmasking the Culprit: What Is an SWD Circuit Breaker?
An SWD, or Switching Duty, rated circuit breaker is a specialized device engineered for a dual purpose. Like any standard breaker, its primary job is to protect a circuit from overcurrents and short circuits. However, it’s also designed and robustly tested to be used as a regular switch, enduring the wear and tear of frequently turning lights on and off.
The National Electrical Code (NEC) mandates that circuit breakers used for switching 120V or 277V fluorescent lighting circuits must be listed and marked as SWD or HID (High-Intensity Discharge). This is because lighting circuits, especially older fluorescent types, can create demanding electrical conditions when switched on. An SWD breaker is built with more durable components to handle these stresses without compromising its protective capabilities.
Why a Standard Breaker Isn’t a Light Switch
Using a standard, non-SWD breaker as a daily light switch is a common but risky mistake. These breakers are not designed for frequent manual operation. Over time, the internal mechanism can weaken.
This wear can lead to a catastrophic failure where the breaker fails to trip during an overload or short circuit, creating a significant fire hazard. The mechanical parts, including the latching mechanism and springs, are simply not built for the repeated physical stress of being used as a switch.
Decoding the Distress Signal: Why Your SWD Breaker Keeps Tripping
When an SWD circuit breaker trips, it’s doing its job—alerting you to a problem in the circuit. The key is to diagnose the underlying cause. The most common culprits fall into three categories: overloaded circuits, short circuits, or a faulty breaker.
Don’t just keep resetting it. Repeatedly resetting a breaker without addressing the root cause can lead to breaker failure and poses a serious safety risk. Think of it as a smoke alarm; you wouldn’t just fan the smoke away without looking for the fire.
Problem 1: The Overloaded Circuit
A circuit becomes overloaded when you try to draw more electricity than it can safely handle. For SWD breakers, which are typically 15-amp or 20-amp single-pole units, this is a very common issue. This often happens inadvertently when too many high-power devices are plugged into the same circuit.
Imagine a circuit in your workshop designated for fluorescent lights. If you then plug in a large power tool, like a welder, into an outlet on that same circuit, the combined electrical draw can easily exceed the breaker’s limit, causing it to trip.
Problem 2: The Menace of a Short Circuit
A short circuit is a more dangerous issue. It occurs when a “hot” wire comes into direct contact with a “neutral” or “ground” wire. This creates a low-resistance path for the electricity, causing a sudden and massive surge of current that trips the breaker almost instantaneously.
Short circuits can be caused by damaged appliance cords, faulty wiring within a device, or loose connections in an outlet or switch box. You might notice a popping sound or see a spark when the short occurs.
Problem 3: The Worn-Out Guardian
While SWD breakers are built to be tough, they don’t last forever. Like any mechanical device, they can eventually wear out. The internal components can weaken from age, frequent tripping, or even environmental factors like high humidity leading to corrosion.
If your breaker trips even with a minimal load on the circuit, or if the handle feels loose or fails to reset firmly, the breaker itself may be faulty. This is a critical issue, as a failing breaker may not provide the protection your home needs.
Your Step-by-Step Troubleshooting and Solution Blueprint
Now that you understand the potential problems, you can systematically diagnose the issue. Follow these steps to safely identify and resolve why your SWD circuit breaker is tripping.
Step 1: The Great Unplugging – Identifying an Overload
Your first and simplest diagnostic step is to address a potential circuit overload. Go to the room or area controlled by the tripped breaker and unplug everything from the outlets. Turn off all the lights associated with that circuit as well.
Now, go back to your electrical panel and reset the breaker by pushing the handle firmly to the “Off” position before flipping it back to “On.” If the breaker stays on, you’ve likely confirmed an overload was the issue. Begin plugging devices back in one by one until the breaker trips again, and you’ll have found your power-hungry culprit.
Step 2: Inspecting for the Obvious – Finding a Short Circuit
If the breaker trips again immediately, even with everything unplugged, you may have a short circuit. Your next task is a visual inspection. Look at the cords of every device you unplugged. Do you see any frayed wires, melted plastic, or burn marks?
Also, check the outlets themselves for any signs of discoloration or burning. A burning smell near an outlet or switch is a major red flag. If you find a damaged cord or a suspect outlet, this is likely the source of your short.
Step 3: Advanced Diagnostics – The Process of Elimination
If a visual inspection reveals nothing, the short circuit could be within the building’s wiring itself. This is more common in older homes or areas where recent renovations may have damaged a wire inside a wall. At this point, identifying the exact location of the short becomes more complex.
One advanced technique involves disconnecting the wires at each outlet on the circuit one at a time to isolate the fault. However, this should only be attempted by someone with a strong understanding of electrical wiring and safety procedures. For most homeowners, this is the point where calling a professional is the safest and most efficient choice.
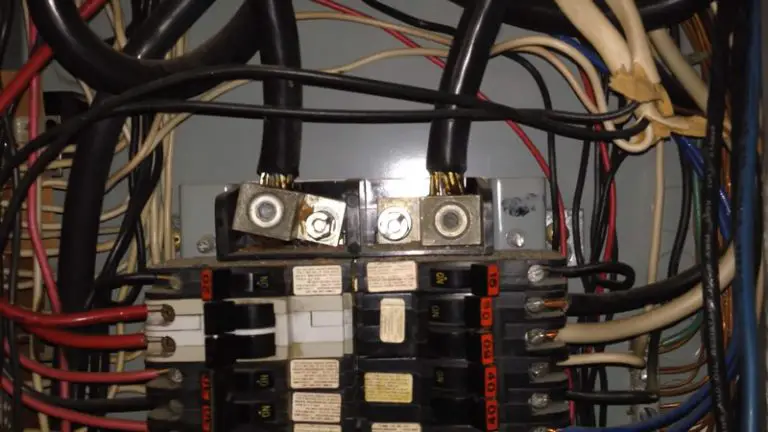
Choosing and Installing a Replacement SWD Breaker
If you’ve determined the breaker itself is faulty, replacing it is necessary. Selecting the correct replacement is crucial for safety and code compliance. You must match the brand, type, amperage, and voltage rating of the old breaker.
Never “upgrade” a 15-amp breaker to a 20-amp breaker without also upgrading the circuit’s wiring. The breaker is sized to protect the wire; installing a larger breaker on undersized wire is a severe fire hazard. If you’re wondering about the meaning of SWD breakers, it’s essential to understand they are specifically tested for this switching application.
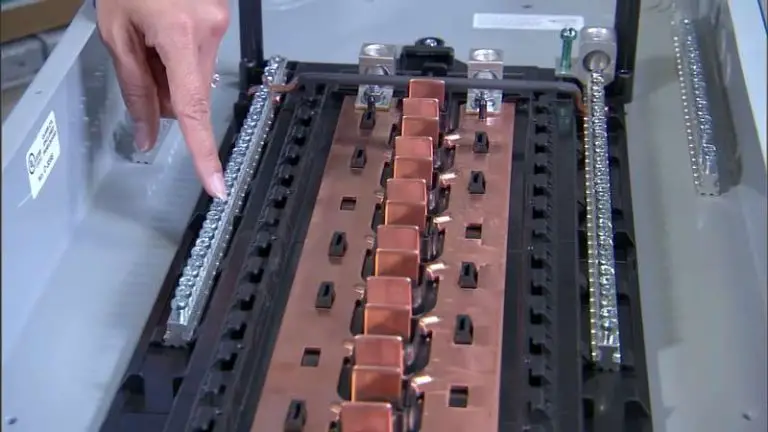
Installation Safety: A Non-Negotiable Priority
Replacing a circuit breaker involves working inside your main electrical panel, which can be extremely dangerous if not done correctly. Always turn off the main breaker to de-energize the entire panel before you begin. Even then, the main lugs where power enters the panel will still be live.
If you are not 100% confident in your ability to perform this task safely, hire a licensed electrician. The cost of a professional is a small price to pay for your safety and peace of mind. After all, dealing with electrical issues is not the time for a DIY project to go wrong, unlike figuring out the nuances of tipping etiquette for service workers.
Sometimes, what seems like a breaker issue is actually a problem elsewhere, such as when you discover that using the wrong product, like 3M blue tape pulling paint off the walls, requires a different solution entirely. Each problem has its own specific fix.
| Problem Symptom | Likely Cause | Recommended Solution |
|---|---|---|
| Breaker trips after a delay when devices are running. | Circuit Overload | Unplug devices and redistribute them to other circuits. Avoid using too many high-power items on one circuit. |
| Breaker trips instantly with a “snap” sound. | Short Circuit | Inspect all cords and plugs for damage. Check outlets for burn marks. Replace any faulty components. |
| Breaker trips with no or very little load on the circuit. | Faulty Breaker | The breaker has likely worn out and needs to be replaced with one of the same specifications. |
| Breaker handle feels loose or won’t reset properly. | Faulty Breaker | The internal mechanism is damaged. Replace the breaker immediately. |
Beyond the Breaker: When the Problem Is Deeper
It’s important to recognize that sometimes, the tripping SWD breaker is just a symptom of a more systemic issue. In older homes, the electrical system itself may be outdated and unable to keep up with the demands of modern appliances. You might have too few circuits, leading to chronic overloading.
Furthermore, issues like voltage fluctuations from the utility company or faulty grounding can also contribute to breaker problems. If you’ve addressed the common causes and continue to have issues, a comprehensive electrical system inspection by a qualified electrician is highly recommended to ensure the safety and reliability of your home’s power.