Stud Finder Beeps But No Stud? The Real Reasons & How to Fix It
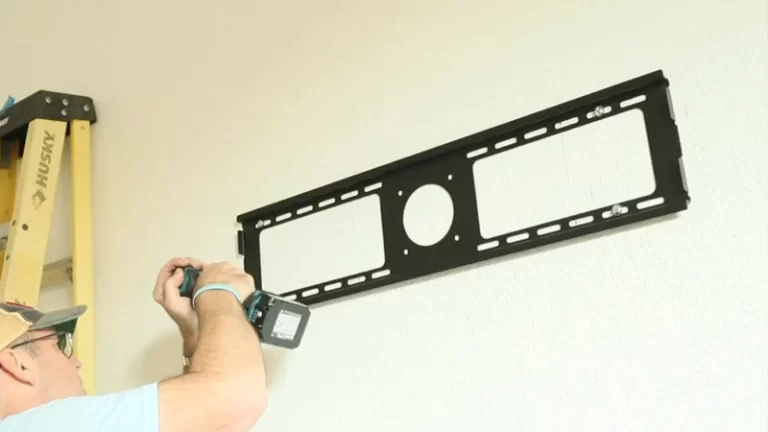
You’ve got your picture, your shelf, your TV mount. You grab your stud finder, slide it across the wall, and it beeps with authority. But when you drill or nail into that exact spot, you hit nothing but air and drywall dust. It’s a frustratingly common scenario: the stud finder beeps but there’s no stud.
This phantom reading, or false positive, can leave you with unnecessary holes and a deep sense of distrust for a tool that’s supposed to make your life easier. Before you condemn your stud finder or give up, understand that there are numerous hidden culprits behind your wall that can trick the device. Unmasking them is the key to finding solid wood framing with confidence.
You'll Learn About
Why Your Stud Finder Lies: Unmasking the Culprits Behind False Beeps
Electronic stud finders don’t actually “find studs.” They work by detecting changes in density behind the wall. When you calibrate the tool, you’re telling it to ignore the density of the empty wall cavity. As you slide it, any significant increase in density will trigger an alert, which is supposed to be a stud but could be something else entirely.
Phantom Menace #1: Hidden Electrical Wires & Conduit
One of the most common reasons for a false positive is electrical wiring. Many stud finders have a feature that specifically detects the electromagnetic field from live, unshielded AC wires. This is a crucial safety feature, but it can also be confusing if you’re only looking for studs.
The detector is sensitive to the capacitance of the wall, and live wires create a distinct electrical field that the tool easily picks up. If the beeping is inconsistent or happens in an area where you wouldn’t expect a stud, there’s a good chance you’ve found wiring. Be especially cautious near outlets and light switches, as wires typically run vertically to and from these fixtures.
Phantom Menace #2: Devious Plumbing Pipes
Your walls are also home to a network of plumbing. Metal pipes, such as copper for water supply or cast iron for drainage, are dense and will almost always trigger a stud finder. Even plastic PEX pipes, when filled with water, can sometimes be dense enough to register a false positive on a sensitive device.
Pipes can run both vertically and horizontally, which can make them harder to differentiate from studs. A key clue is the location; be wary of readings in walls that back onto kitchens, bathrooms, or laundry rooms, as these are prime locations for plumbing infrastructure.
Phantom Menace #3: The Ghost in the Wall – Metal Lath & Plaster
If you live in an older home, your walls may not be made of modern drywall. Plaster and lath walls are a notorious challenge for electronic stud finders. This construction method involves a mesh of metal or wood strips (lath) covered in layers of plaster. The metal mesh creates a widespread field of high density that can confuse a stud finder, making it beep erratically or continuously.
When dealing with these types of walls, a standard electronic stud finder may become nearly useless. The inconsistent density of the plaster combined with the underlying metal lath means you’re more likely to get a false reading than an accurate one. For these situations, knowing how to find studs behind wood paneling and other difficult surfaces involves different techniques.
Phantom Menace #4: Sneaky Drywall Seams & Overlapping Panels
Sometimes, the culprit is the wall itself. Drywall is installed in large sheets, and the seams between them are joined with tape and joint compound (“mud”). This seam area can be significantly denser than the rest of the wall, especially if the mud was applied thickly. A sensitive stud finder can easily mistake this denser seam for the edge of a stud.
Similarly, you may encounter areas with overlapping sheets of drywall, fire-blocking, or previous patches and repairs. All of these create density changes that can lead to a frustrating false positive, fooling your tool into beeping where no stud exists.
Phantom Menace #5: Pesky Insulation (Foil-Faced & Dense-Packed)
Insulation is another hidden variable. While standard fiberglass batt insulation usually doesn’t cause issues, some types can interfere with a stud finder’s sensors. Foil-faced insulation, which has a metallic backing, can create reflective interference that confuses the tool.
Dense-packed cellulose or foam insulation can also, in some cases, create enough density to trigger a false reading. If you suspect insulation is the issue, you may need to rely on other methods to confirm the stud’s location.
Phantom Menace #6: Is Your Stud Finder the Problem?
Before blaming the wall, it’s worth checking your tool. The number one cause of inaccurate readings is often simple: a weak battery. Stud finders require a strong, consistent power source to calibrate and scan properly. A low battery can lead to all sorts of erratic behavior and false positives.
Another common user error is improper calibration. If you calibrate the device over a stud, it will read everything else as a false positive. Always start by placing the tool on a spot you believe to be hollow before pressing the calibrate button. Finally, the quality of the stud finder matters; less expensive models may be more prone to interference from the various “phantoms” hiding in your wall.
From Beeps to Certainty: Your Action Plan for Finding the Real Stud
Getting a false positive is frustrating, but it’s not a dead end. By adopting a more methodical approach and combining technology with some old-fashioned techniques, you can overcome the phantom beeps and locate the framing with precision.
Step 1: Recalibrate, Recalibrate, Recalibrate
Proper calibration is the foundation of an accurate reading. If your stud finder is acting erratically, the first step is always to reset it. Place it flat against the wall in a spot you believe to be empty, press and hold the power/calibrate button until it signals it’s ready, and then begin your scan.
Never start calibrating over a stud or what you suspect is a stud. The device needs to learn the “base” density of the empty wall cavity first. If you get a beep right away, move the tool a few inches to the side and try calibrating again.
Step 2: The “Slide and Mark” Technique for Pinpointing Edges
Don’t just stop at the first beep. A more reliable method is to map out the entire stud. Slide the finder from the left until it beeps, and mark the spot with a pencil—this is the left edge. Then, slide the finder from the right of that mark until it beeps again, and mark that spot—this is the right edge.
A standard wood stud is 1.5 inches wide. If your two marks are about 1.5 inches apart, you have almost certainly found a stud. The center point between these two marks is your target for drilling or nailing.
Step 3: The Cross-Verification Method – Go Horizontal
Studs, wires, and pipes can all run vertically from the floor to the ceiling. This is where a simple change in technique can provide valuable clues. After you’ve scanned horizontally to find what you think is a stud, try scanning vertically up and down that line.
A true stud should give you a consistent reading from floor to ceiling. However, if the beep disappears after a few feet, or if it turns and goes sideways, you’ve likely found a pipe or electrical conduit rather than a continuous piece of framing timber.
Step 4: Leverage Standard Stud Spacing
Building codes dictate that wall studs are placed at standard intervals, most commonly 16 inches or 24 inches on-center. Once you find one stud with certainty, you can use a tape measure to predict the location of the neighboring studs. Measure 16 inches over from the center of the confirmed stud and scan that area.
If your stud finder beeps again at that 16-inch mark, your confidence should soar. This method helps you map out the entire wall and distinguish the rhythmic pattern of studs from the random placement of other hidden objects.
Step 5: The Old-School Manual Checks (When Tech Fails)
When your electronic tool is still giving you mixed signals, it’s time to rely on your senses. These manual methods have been used for decades and are remarkably effective for verification.
- The Tap Test: Make a fist and gently knock on the wall. Listen carefully to the sound. A knock over a hollow cavity will produce a low, resonant, and hollow sound. A knock over a solid stud will sound higher-pitched, sharp, and solid.
- The Flashlight Trick: Place a bright flashlight flat against the wall, shining the beam parallel to the surface. This low-angle light can reveal subtle imperfections, such as the dimples from drywall screws or nails, which are fastened directly into studs.
- The Thin Nail Test: As a final confirmation, take a very thin finishing nail and drive it into the wall at the spot you believe is the stud’s center, preferably near the baseboard where the hole will be less visible. If you feel solid resistance after passing through the drywall, you’ve hit wood. If it pushes through with little effort, you’re in a hollow cavity.
Differentiating False Positives: A Troubleshooter’s Guide
Learning to interpret your stud finder’s signals is key. Different hidden objects produce different types of readings. This table breaks down the common culprits and how to distinguish them.
| Object Detected | Typical Beep/Reading Pattern | Best Verification Method |
|---|---|---|
| Wood Stud | Consistent, clear reading about 1.5 inches wide. Runs vertically floor-to-ceiling. | Measure for 16″ or 24″ spacing to the next stud. |
| Electrical Wiring | Often has a specific AC warning light. The beep can be erratic or wider than a stud. | Use an AC-specific mode on the finder. Check proximity to outlets/switches. |
| Metal Pipe | Strong, narrow, and very consistent signal. May have a metal indicator. | Scan vertically; the signal may turn horizontally. Use metal scan mode if available. |
| Plaster & Metal Lath | Constant, widespread beeping across a large area. Hard to find a clear start/end. | Use a magnetic stud finder or rely on the tap test. |
| Drywall Seam/Patch | A weak or wide reading that doesn’t conform to the 1.5″ stud width. | Use the flashlight trick to look for visual evidence of a seam. |
When a Beep Is More Than Just a Beep
While most false positives are harmless annoyances, some can indicate a more serious issue that requires caution. If your finder alerts you to a very wide object—say, 3-4 inches or more—you could be detecting a header above a door or window, or multiple studs sistered together for support. This is generally a safe place to mount heavy items.
However, sometimes a wide reading can indicate a protector plate. These are steel plates installed over studs to protect plumbing pipes or electrical wires from being punctured by screws and nails. Drilling into one of these will be difficult and is a clear warning to stop. If your stud finder gives a reading across the entire wall, it might indicate a more complex problem. In such cases, understanding why a stud finder says the whole wall is a stud can provide further troubleshooting steps.
Choosing the Right Tool for the Job
Not all stud finders are created equal. Understanding the different types can help you select the best one for your needs and minimize frustration.
- Magnetic Stud Finders: These simple, low-cost devices use a powerful magnet to detect the metal screws or nails that fasten drywall to the studs. They don’t detect the stud itself, but the fasteners within it. They are immune to false positives from non-metallic objects like pipes or wires but are ineffective on plaster and lath walls where fastener depth varies.
- Electronic Edge Finders: This is the most common type. They detect the edges of a stud by sensing density changes. You must mark both edges to find the center.
- Electronic Center Finders: More advanced models will not only find the edges but also pinpoint the center of the stud with a light or sound indicator, taking the guesswork out of the process. Many of these also include modes for detecting metal and live AC wiring.
Ultimately, a high-quality electronic center-finding stud finder combined with the knowledge of how to verify its findings manually is the most effective strategy. By understanding the phantom signals and employing a systematic approach, you can drill with confidence. Once you’re certain you’ve found the stud, the next step is ensuring your hardware is secure, which makes knowing how to properly put an anchor in a stud a critical skill for a safe and secure installation.