Silicone 1 vs 2: Don’t Make This Costly DIY Mistake!
You stand in the hardware store aisle, staring at a wall of sealant tubes. You see “Silicone 1” and “Silicone 2,” and they look almost identical. The problem is, choosing the wrong one isn’t just a small blunder—it’s a mistake that can lead to failed seals, ugly mold growth, and having to redo your entire project from scratch.
This confusion is a common frustration for DIYers and even some professionals. Making the wrong choice can mean a peeling, cracking seal around your bathtub in a few months or a leaking window frame during the next big storm. Understanding the fundamental differences between these two products is the key to a durable, professional-looking finish that lasts for years.
You'll Learn About
What’s the Real Difference? Silicone 1 vs 2 Unmasked
The core difference between Silicone 1 and Silicone 2 lies in their chemical curing process. This chemical reaction determines everything: the smell, where you can use it, how it sticks, and how long it lasts. Getting this right is the most critical step in any sealing project.
One type releases acetic acid as it cures, while the other releases alcohol or another non-corrosive substance. This seemingly small detail has massive implications for your project’s success. Let’s break down what that means for you.
Silicone 1: The Acetic-Cure Powerhouse
Silicone 1 is an acetoxy-cure sealant. As it cures, it releases acetic acid, which is the same compound that gives vinegar its sharp, pungent smell. This is the most traditional type of silicone sealant and is known for its fast curing time and incredibly strong bond to non-porous surfaces.
Its primary advantage is its rapid skinning and curing time; it often becomes tack-free in just minutes. This makes it a go-to choice for projects in controlled, indoor environments where you need a quick, reliable seal. However, the acetic acid it releases makes it corrosive to certain materials.
You should NEVER use Silicone 1 on surfaces like natural stone (marble, granite), concrete, masonry, or certain metals like copper and brass, as the acid can etch, discolor, or corrode them. It is also generally not paintable.
Silicone 2: The Neutral-Cure All-Star
Silicone 2 is a neutral-cure sealant. Instead of acetic acid, it releases substances like alcohol during its curing process, resulting in a much lower, less offensive odor. This neutral curing process makes it far more versatile and compatible with a wider range of materials.
While it may take slightly longer to cure fully compared to Silicone 1, its gentle nature is a significant advantage. It offers excellent adhesion to both porous and non-porous surfaces and is the superior choice for outdoor applications due to its enhanced weather and UV resistance. Silicone 2 is safe for natural stone, metals, and most plastics, and it won’t cause discoloration or corrosion. However, like its counterpart, most Silicone 2 formulations are also not paintable.
The Ultimate Showdown: When to Use Silicone 1 vs Silicone 2
Choosing the right sealant is all about matching the product’s chemistry to the project’s demands. Using the wrong one can lead to adhesion failure, material damage, or a seal that degrades quickly when exposed to the elements. Here is a clear guide to help you make the right call every time.
Projects Perfect for Silicone 1 (Kitchen & Bath)
Think of Silicone 1 as your specialist for indoor, non-porous surfaces, especially in wet areas. Its fast-curing, waterproof, and mold-resistant properties make it ideal for sealing around sinks, bathtubs, and showers where the surrounding materials are typically ceramic tile, glass, or porcelain.
The strong, vinegary odor is a temporary drawback during application, but it dissipates as the sealant cures. If you’re sensitive to strong smells, ensure proper ventilation or explore ways to mitigate the scent, a topic well-covered if you need to know how to get rid of silicone sealant smell. Its powerful bond creates a watertight seal that holds up beautifully in these high-moisture environments.
When to Reach for Silicone 2 (Windows, Doors & More)
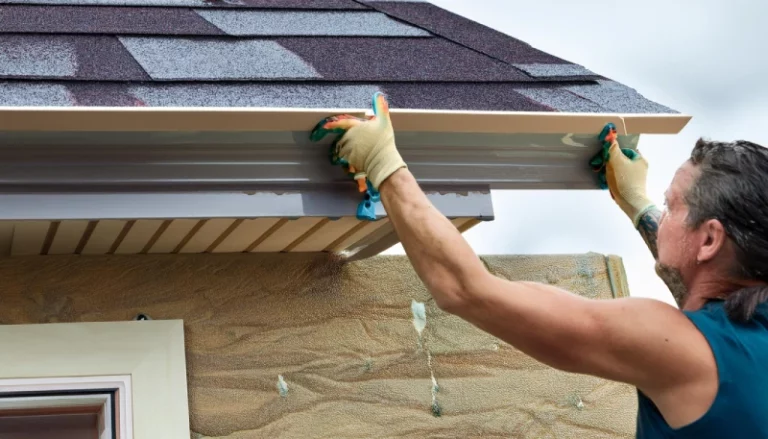
Silicone 2 is the more versatile, multi-purpose option, especially for exterior projects. Its neutral-cure formula offers superior flexibility and adhesion to a vast array of materials, including wood, vinyl siding, metal, concrete, and brick. This makes it the perfect choice for sealing around windows, doors, gutters, and siding.
Its excellent resistance to UV rays and temperature changes means it won’t shrink, crack, or break down when exposed to harsh weather. Whether you’re sealing new sunroom replacement panels or weatherproofing your home’s exterior, Silicone 2 provides a durable, long-lasting seal. The low odor is also a significant benefit, making it much more pleasant to work with, both indoors and out.
Surfaces to Avoid: Critical Mistakes You Must Not Make
The most costly errors happen when sealants are applied to incompatible surfaces. Using Silicone 1 on a marble countertop can permanently etch the stone. Applying it to a copper plumbing fixture can cause corrosion over time.
Conversely, while Silicone 2 is more versatile, ensuring the surface is properly prepared is still crucial for a strong bond. Always read the manufacturer’s label to confirm compatibility, but as a rule of thumb, stick to the guidelines in the table below for guaranteed success.
Quick Comparison: Silicone 1 vs. Silicone 2 at a Glance
Sometimes you just need a quick reference. This table breaks down the essential differences to help you decide which tube to grab for your specific project, ensuring you have the right tool for the job every time.
| Feature | Silicone 1 (Acetoxy-Cure) | Silicone 2 (Neutral-Cure) |
|---|---|---|
| Curing Chemistry | Releases acetic acid (vinegar smell) | Releases alcohol or other non-acidic compounds (low odor) |
| Best For | Kitchens, baths, showers, non-porous surfaces | Windows, doors, gutters, siding, exterior use, various materials |
| Adheres To | Glass, ceramic, porcelain, fiberglass, anodized aluminum | Wood, metal, vinyl, masonry, concrete, stone, plastic, and more |
| Incompatible With | Natural stone (marble, granite), concrete, masonry, copper, brass | Fewer incompatibilities; generally safe for most building materials |
| Cure Time | Faster; tack-free in minutes | Slightly slower cure time |
| Paintable | No | Generally No (check label for specific paintable formulas) |
| Flexibility | Good | Excellent; superior movement capability |
| Weather/UV Resistance | Good | Excellent; ideal for outdoor exposure |
Pro Application Tips for a Flawless, Long-Lasting Seal
Even with the right product, a poor application can ruin your results. A professional-looking seal is clean, smooth, and durable. Following a few key steps in your preparation and application technique will make all the difference between an amateur mess and a pro-level finish.
Step 1: Surface Preparation is Everything
A clean, dry surface is non-negotiable for good adhesion. Any old caulk, soap scum, grease, or dust will prevent the new silicone from bonding correctly. Start by using a utility knife or a specialized caulk removal tool to scrape away all the old sealant.
Once the bulk of it is gone, clean the surface thoroughly with rubbing alcohol to remove any remaining residue and oils. For stubborn mold or mildew, use a bleach-based cleaner, but ensure the area is completely rinsed and bone dry before you begin applying the new silicone. For a project like installing a renter friendly shower door, this clean-up step is crucial for a watertight seal that lasts.
Step 2: Cutting the Nozzle for the Perfect Bead
One of the most common DIY mistakes is cutting the nozzle tip too large. Cut the tip at a 45-degree angle, making the opening just slightly smaller than the gap you intend to fill. A smaller opening gives you more control over the flow of the silicone.
Puncture the inner seal with a long nail or the tool built into your caulk gun. A smooth, consistent bead starts with a properly prepared nozzle. This simple step prevents blobs and ensures you apply the right amount of product.
Step 3: The Art of Tooling for a Professional Finish
Applying the bead is only half the battle. “Tooling” is the process of smoothing the bead after application to press it into the joint and create a clean, concave profile. This step ensures the silicone makes full contact with both surfaces for a waterproof seal.
You can use a caulk finishing tool, a plastic spoon, or your finger dipped in a bit of soapy water (for Silicone 1) or denatured alcohol (for some Silicone 2 types) to smooth the bead. Apply light, consistent pressure and pull the tool along the bead in one continuous motion. Immediately wipe away any excess with a clean, dry cloth before it starts to skin over.
Final Thoughts: Your Project Deserves the Right Sealant
The debate between Silicone 1 vs. Silicone 2 isn’t about which one is “better” overall, but which one is distinctly right for your specific task. Silicone 1 is the fast-curing specialist for classic indoor wet applications on non-porous surfaces. Silicone 2 is the versatile, durable workhorse for everything else, especially outdoor projects exposed to weather and a wider variety of materials.
By understanding their core chemical differences and following proper application techniques, you can avoid the common pitfalls of sealant failure. The next time you’re in that hardware store aisle, you’ll be able to choose with confidence, knowing your project will have a clean, professional, and incredibly durable seal that stands the test of time.