Shower Curb Overhang Mistakes That Will Cost You a Fortune
That small ledge on your shower curb might seem like a minor detail. In reality, the shower curb overhang is a critical component that stands between a stunning, waterproof bathroom and a slow-motion disaster. Get it wrong, and you’re not just looking at a cosmetic issue; you’re facing potential water damage, mold growth, and costly repairs that can spiral into thousands.
Many homeowners and even some contractors overlook the precise requirements for this feature. The result is often a leaky, inefficient, and sometimes hazardous shower enclosure. Understanding the function and proper design of the overhang is the first step toward a successful bathroom renovation.
You'll Learn About
The Hidden Problem: Why Your Shower Curb Overhang Demands Attention
The primary problem with an improper shower curb overhang is water management. A shower is a high-moisture environment, and the curb is the dam holding all that water within the designated wet area. The overhang, which is the part of the curb cap that extends over the curb structure, plays a vital role in directing water back into the shower pan.
When an overhang is too short, non-existent, or incorrectly sloped, water can cling to the edge and seep down the outside face of the curb. This can saturate the surrounding drywall and flooring, leading to structural rot and creating a breeding ground for mold. You might not notice the damage until you see discolored baseboards or that persistent musty odor, which could be a sign of a more serious issue, much like when your bathroom smells like dirt.
Understanding the Mechanics of Water Intrusion
Water possesses a property called surface tension, which allows it to adhere to surfaces. A properly designed overhang creates a “drip edge.” This forces water to detach from the curb cap and fall back into the shower, rather than tracking sideways and escaping onto the bathroom floor.
Without this crucial feature, water can defy gravity, clinging to the underside of the curb cap and traveling outward. This is a subtle but relentless process. Over time, even a small, consistent amount of water escaping the shower can cause significant damage to your home’s structure.
Designing the Perfect Shower Curb Overhang: A Step-by-Step Solution
Achieving a functional and aesthetically pleasing shower curb overhang isn’t about guesswork; it’s about following established best practices and industry standards. The solution lies in careful planning and precise execution during the shower construction phase. A well-built overhang ensures your shower remains a sanctuary, not a source of stress.
From the material choice to the exact dimensions, every detail matters. A successful installation protects your investment and ensures the longevity of your bathroom. The following steps provide a clear roadmap for getting it right the first time.
Step 1: Selecting the Right Material for Your Curb Cap
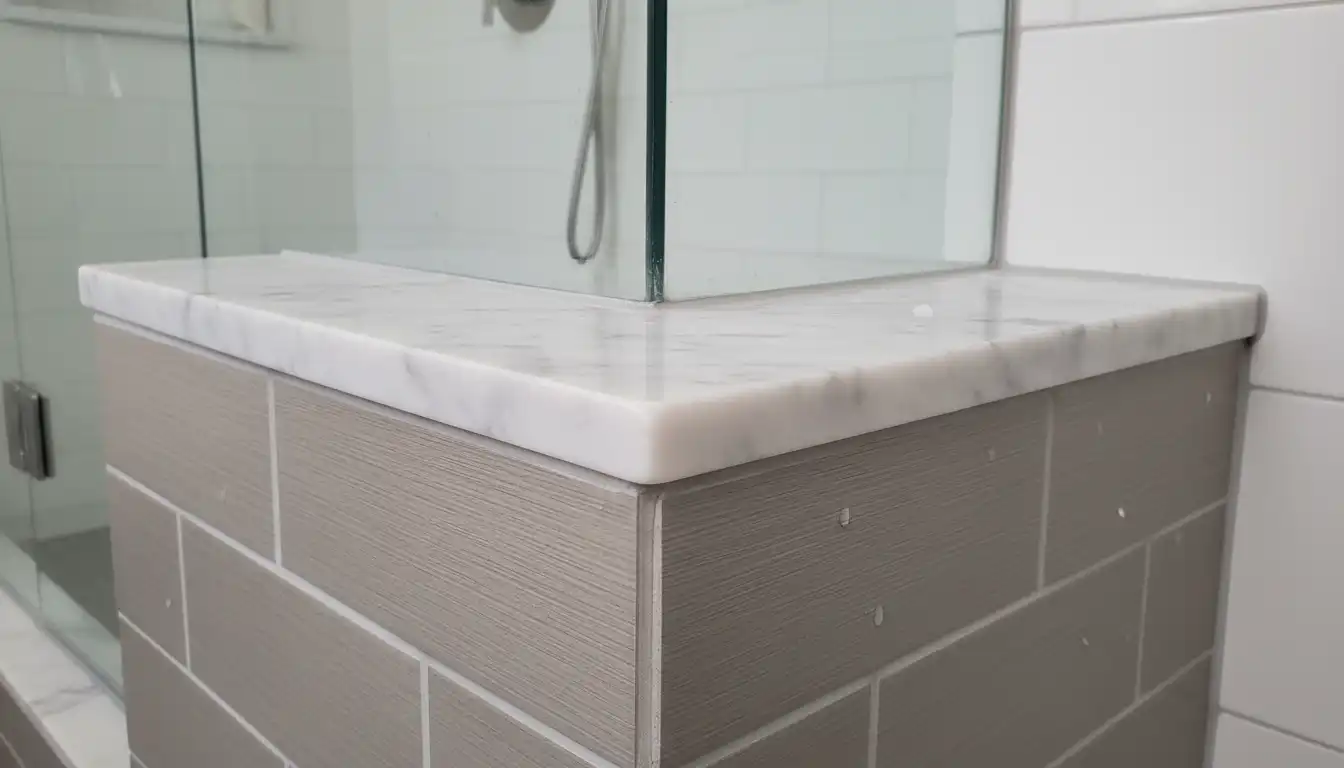
The material you choose for the top of your shower curb, often called the cap or threshold, is your first line of defense. It must be non-porous and durable. While tile can be used, solid surface materials are vastly superior for this application because they eliminate grout lines on the top surface.
Grout is inherently porous and, even when sealed, can eventually allow moisture to penetrate. This can lead to discoloration, mold growth, and eventual failure. Solid surface materials like quartz, marble, or granite provide an unbroken, impervious surface that is easy to clean and offers the best protection against water intrusion.
Step 2: Getting the Dimensions and Slope Just Right
Precision is key when it comes to the overhang’s dimensions. The ideal overhang should extend past the face of the tile on the inside of the curb by a specific amount. This creates the essential drip edge that prevents water from escaping.
A common recommendation is an overhang of approximately 1/4 to 1/2 inch over the tile inside the shower. Furthermore, the top of the curb cap itself must have a slight slope—about 5 degrees—back into the shower. This ensures that any water that lands on the curb flows away from the door and back toward the drain.
| Feature | Standard Recommendation | Reasoning |
|---|---|---|
| Overhang Amount | 1/4″ to 1/2″ (past the inside tile face) | Creates an effective drip edge to direct water back into the shower pan. |
| Curb Cap Slope | Approx. 5 degrees inward | Uses gravity to ensure water flows away from the shower entrance. |
| Material Choice | Solid Surface (Quartz, Marble, Granite) | Provides a non-porous, grout-free surface that prevents water absorption. |
| Sealant | 100% Silicone Caulk | Offers a flexible, waterproof seal at all joints and transitions. |
Step 3: Ensuring a Waterproof Foundation
The most beautiful curb cap will fail if the structure beneath it isn’t completely waterproof. The shower curb must be an integrated part of the overall waterproofing system, which includes the shower pan liner and the wall membranes. The waterproofing membrane should run seamlessly up and over the entire curb structure.
Think of the curb as a crucial part of a boat’s hull. Any gap, tear, or improper seam in the waterproofing layer creates a point of failure. Before any tile or curb cap is installed, a flood test should be performed to guarantee the integrity of the waterproof membrane. This involves plugging the drain and filling the shower pan with water for 24 hours to check for any leaks.
Advanced Considerations for a Flawless Finish
Beyond the basics, several other factors contribute to a long-lasting and effective shower curb. These details often separate a standard installation from a truly professional, high-quality result. Paying attention to these nuances can prevent future headaches and enhance the overall look and function of your shower.
From the type of sealant used to the integration with the shower door, every component must work in harmony. This holistic approach ensures that no weak links exist in your shower’s water defense system. It’s a level of detail similar to considering how exterior elements work together, such as when planning a gutter wrap around corner installation for your home’s exterior protection.
The Critical Role of Silicone Sealant
The joints where the curb cap meets the shower walls and the shower floor are highly vulnerable to water intrusion. It is absolutely essential to use 100% silicone caulk in these areas, not grout or acrylic caulk. Silicone remains flexible, allowing for the slight movements that occur as a house settles and materials expand and contract with temperature changes.
Grout will inevitably crack in these transition planes, creating a direct path for water. Apply a clean, consistent bead of silicone along the entire perimeter of the curb cap. This final seal is one of the most important steps in the entire process.
Integrating with the Shower Door
The shower curb overhang also plays a critical role in the function of the shower door. For frameless glass doors, a continuous curb provides the best surface for the door’s bottom seal or sweep. The overhang helps direct any water that hits the door back into the shower, working in tandem with the door’s seals.
It’s important to coordinate the shower construction with the shower door installation. The width of the curb must be sufficient to accommodate the door track or pivot mechanism. A curb that is too narrow can compromise the stability and effectiveness of the shower door.
The Unspoken Truth About Curb-less Showers
While curbless, or “zero-entry,” showers are a popular trend for their accessibility and sleek look, they present their own complex waterproofing challenges. Achieving proper drainage in a curbless design requires recessing the shower floor structure and creating a continuous, large-format slope across the entire bathroom floor.
For many renovations, a low-profile curb with a proper overhang is a more practical and reliable solution for water containment. It provides a clear physical barrier without the extensive structural modifications required for a true zero-entry design. The visual appeal is still clean and modern, much like the sleek lines found in windows with grills between the glass, offering a blend of style and practicality.
Common Mistakes to Avoid at All Costs
Understanding the theory is one thing, but avoiding common pitfalls during installation is what truly ensures success. Many well-intentioned DIY projects and even some professional jobs go wrong because of a few common, preventable errors. Being aware of these mistakes is the best way to safeguard your project.
From using the wrong materials to taking shortcuts with waterproofing, these errors can turn your dream bathroom into a recurring nightmare. A little extra diligence and refusal to cut corners will pay dividends for years to come.
Mistake #1: Using Tile for the Curb Cap
While it might seem like a cost-effective and aesthetically matched option, using individual tiles on top of the curb is a significant risk. The grout lines, no matter how well sealed, are weak points. They will eventually degrade, absorb water, and become a source for leaks and mold.
Always opt for a solid, one-piece cap. The small additional cost upfront is negligible compared to the cost of tearing out a failed shower curb down the line. A solid surface is non-negotiable for a durable curb.
Mistake #2: Flat or Incorrectly Sloped Curb
A perfectly level curb cap is a mistake. Without a positive slope toward the drain, water will sit on the curb, or worse, be drawn outward by the surface tension we discussed earlier. The slope does not need to be dramatic, but it must be intentional and consistent across the entire length of the curb.
Use a level to check the slope before the setting material fully cures. Small adjustments at this stage are easy; corrections later are impossible without a complete tear-out. This simple check is one of the most crucial quality control steps.
Mistake #3: Penetrating the Waterproofing Membrane
The waterproofing membrane over the curb should never be punctured after it’s installed. This most commonly occurs when attaching a shower door frame or guide. Screws or nails driven through the curb cap and into the underlying structure create holes that completely compromise the waterproof barrier.
Shower doors should be installed so that any necessary fasteners go into the vertical wall tiles, not down into the curb. If a fastener must go into the curb, the hole should be completely filled with 100% silicone before the screw is inserted. This creates a seal around the fastener, but it is a less-than-ideal solution and should be avoided if at all possible.
Your Shower Curb Overhang: The Unsung Hero of Your Bathroom
It’s clear that the shower curb overhang is far more than a simple decorative edge. It is a highly functional component engineered to protect the very structure of your home from water damage. By understanding its purpose and adhering to the best practices for material selection, dimensioning, and installation, you can ensure your shower is a source of relaxation, not repairs.
Investing the time and resources to get this detail right provides peace of mind. It ensures the longevity, safety, and beauty of your bathroom for years to come. Never underestimate the power of this small but mighty feature in creating a truly waterproof and worry-free shower experience.