R-30 Insulation 2×8 [Everything You Need to Know]
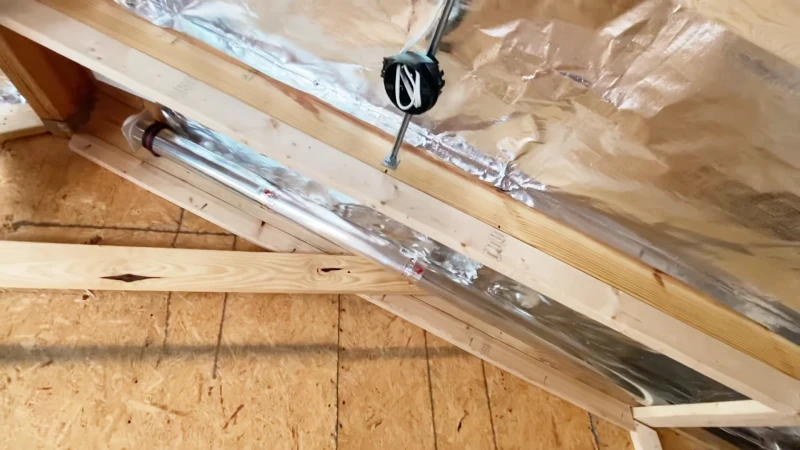
R-30 insulation is a type of insulation that has an R-value of 30, which refers to its ability to resist heat flow. The higher the R-value, the more effective the insulation is at keeping your home warm in the winter and cool in the summer. R-30 insulation is generally used in areas with a moderate climate, such as the southern and central regions of the United States.
The R-value of insulation is important because it determines how effective the insulation is at preventing heat loss or gain. Insulation with a higher R-value is more effective at keeping your home warm in the winter and cool in the summer, which can help reduce your energy bills and make your home more comfortable.
You'll Learn About
R-30 Insulation 2×8, is It Okay?
You might consider adding insulation to a flat roof and are trying to determine the best type of insulation to use. It is important to consider the potential for moisture and ventilation in a flat roof assembly. R-30 insulation requires 9 inches of space, but you only have 7.5 inches to work with.
One option you could consider is using a material like Roxul, which is a moisture-resistant insulation and does not require an air space for ventilation. However, it is important to follow local code requirements and consider the potential for moisture and condensation in your roof assembly.
If you are unsure about the best approach, it may be helpful to consult a professional or refer to local building codes for guidance.
Benefits of R-30 Insulation
There are several benefits to using R-30 insulation in your home:
Energy Savings
R-30 insulation can help reduce your energy bills by keeping your home at a more consistent temperature and preventing heat loss or gain through the walls, ceiling, and floor.
Comfort
Insulating your home with R-30 insulation can help make it more comfortable year-round by reducing drafts and temperature fluctuations.
Durability
R-30 insulation is made of durable materials that can withstand the test of time, making it a long-lasting investment for your home.
Environmental Benefits
Using R-30 insulation can help reduce your carbon footprint by using less energy to heat and cool your home, which can have a positive impact on the environment.
The Challenges of Insulating With 2×8 Framing
One challenge of insulating a ceiling framed with 2x8s is the limited space available for insulation. R-30 insulation typically requires 9 inches of space to properly install, but a ceiling framed with 2x8s only has 7.5 inches of space available.
This can make it difficult to achieve the desired R-value with traditional insulation materials.
Limited Space for Insulation
The limited space available in a ceiling framed with 2x8s can make it difficult to install the recommended amount of insulation. In order to achieve the desired R-value, you may need to use a different type of insulation or install it in a different way.
Potential for Moisture and Ventilation Issues
Another challenge of insulating a ceiling framed with 2x8s is the potential for moisture and ventilation issues. Flat roofs, like the one described in the original question, are more prone to moisture issues because they do not have the ability to allow moisture to evaporate as easily as pitched roofs.
This can lead to condensation and mold growth if the roof assembly is not properly ventilated. It is important to consider these potential issues when selecting and installing insulation in a flat roof assembly.
Options for Achieving R-30 Insulation in a 2×8 Ceiling
There are several options for achieving R-30 insulation in a ceiling framed with 2x8s:
Spray Foam Insulation
Spray foam insulation is a type of insulation that is sprayed onto the surface to be insulated. It expands to fill all gaps and crevices, creating an airtight seal. Spray foam insulation has a high R-value and is effective at preventing heat loss and gain. However, it can be expensive to install and may not be the best option for all budgets.
Rigid Board Insulation
Rigid board insulation is a type of insulation made from rigid materials such as foam, fiberglass, or mineral wool. It comes in sheets or panels and is installed by cutting it to fit the space and attaching it to the framing. Rigid board insulation is relatively inexpensive and easy to install, but it may not be as effective at sealing gaps and crevices as spray foam insulation.
Moisture-resistant Insulation Options
There are several insulation options that are moisture-resistant, such as Roxul, which can be used in a ceiling framed with 2x8s. These types of insulation are more resistant to moisture and can be a good choice for flat roofs or other areas where moisture may be an issue. However, they may not have as high of an R-value as some other options.
It is important to consider the specific needs and constraints of your project when selecting an insulation option. Factors to consider may include performance characteristics, cost, ease of installation, and potential for moisture and ventilation issues.
Cost Comparison of Different Insulation Options
The cost of different insulation options can vary significantly, depending on the type of insulation, the size of the area to be insulated, and other factors. Here is a comparison of the approximate costs of different insulation options for a ceiling framed with 2x8s:
Spray Foam Insulation
Spray foam insulation is generally one of the more expensive options, with an average cost of around $1.50 to $3.00 per square foot. However, it is also one of the most effective options, with a high R-value and the ability to create an airtight seal.
Rigid Board Insulation
Rigid board insulation is generally less expensive than spray foam, with an average cost of around $0.75 to $1.50 per square foot. It is easy to install and relatively inexpensive, but it may not be as effective at sealing gaps and crevices as spray foam insulation.
Moisture-resistant Insulation Options
Moisture-resistant insulation options, such as Roxul, tend to fall in the middle range in terms of cost, with an average price of around $0.75 to $1.25 per square foot. These options are more resistant to moisture and can be a good choice for flat roofs or other areas where moisture may be an issue, but they may not have as high of an R-value as some other options.
It is important to consider your budget and the specific needs of your project when selecting an insulation option. While cost is certainly a factor, it is also important to consider the performance characteristics and potential for moisture and ventilation issues when making your decision.
Factors to Consider When Choosing an Insulation Option
There are several factors to consider when choosing an insulation option for your home:
Performance Characteristics
One important factor to consider is the performance characteristics of the insulation, including its R-value, ability to seal gaps and crevices, and resistance to moisture. Higher R-values and better sealing capabilities generally result in better insulation performance, but these features may also come at a higher cost.
Cost and Budget
The cost of insulation can vary significantly, so it is important to consider your budget when making your decision. While it may be tempting to choose the cheapest option, it is important to also consider the long-term cost savings and potential for increased comfort and energy efficiency that a higher-quality insulation option may provide.
Ease of Installation
Another factor to consider is the ease of installation. Some insulation options, such as spray foam, may require specialized equipment and expertise to install, while others, like rigid board insulation, are relatively easy to install on your own. Consider your own skills and resources when deciding which option is best for you.
It is important to consider all of these factors and weigh their relative importance in your specific situation when choosing an insulation option.
How to Install R-30 Insulation in a 2×8 Ceiling?
Installing R-30 insulation in a ceiling framed with 2x8s requires the following tools and materials:
- Insulation: You will need enough insulation to fill the space between the framing, typically 9 inches for R-30 insulation.
- Measuring tape
- Utility knife or scissors
- Staple gun
- Masking tape
Step-by-step installation instructions:
- Measure the space between the framing to determine how much insulation you will need.
- Cut the insulation to fit the space, using a utility knife or scissors.
- Unroll the insulation and place it between the framing, with the paper facing down.
- Staple the insulation in place along the framing, using a staple gun.
- Repeat the process for all areas of the ceiling that need insulation.
- Use masking tape to seal any gaps or seams in the insulation.
It is important to follow the manufacturer’s instructions for your specific type of insulation and to use caution when handling the insulation and tools. If you are unsure about how to properly install insulation, it is a good idea to consult a professional or refer to local building codes for guidance.
Tips for a Successful Insulation
Here are some tips to help ensure a successful insulation project:
Preparing the Work Area
Before you begin your insulation project, it is important to prepare the work area by removing any debris or obstacles that may be in the way. Make sure you have all of the necessary tools and materials on hand, and wear protective clothing and equipment, such as gloves and a dust mask, as needed.
Cutting and Fitting the Insulation
Properly cutting and fitting the insulation is crucial to the success of your project. Measure the space between the framing carefully and use a utility knife or scissors to cut the insulation to fit. If you are using fiberglass insulation, be sure to use caution when handling it to avoid contact with the fiberglass fibers.
Sealing and Air Sealing
Once the insulation is installed, it is important to seal any gaps or seams to ensure an airtight seal. Use masking tape or another type of sealant to seal the gaps and seams, and be sure to check for any other areas where air may be leaking, such as around electrical outlets or light fixtures. Sealing and air sealing can help improve the energy efficiency of your home and reduce your energy bills.
Maintenance and Future Upgrades
Here are some tips to help ensure a successful insulation project:
- Measure the space between the framing carefully and use a utility knife or scissors to cut the insulation to fit.
- Use masking tape or another type of sealant to seal any gaps or seams in the insulation.
- Check for any other areas where air may be leaking, such as around electrical outlets or light fixtures, and seal these areas as needed.
- Wear protective clothing and equipment, such as gloves and a dust mask, as needed.
- Follow any recommended maintenance procedures, such as checking for and sealing any new gaps or seams that may develop over time.
Once your insulation is installed, it is important to follow any recommended maintenance procedures to ensure it continues to perform effectively. This may include checking for and sealing any new gaps or seams that may develop over time.
You may also want to consider future upgrades, such as adding additional insulation or sealing and air sealing, to continue improving the energy efficiency and comfort of your home. Adding additional insulation can help further reduce your energy bills and improve the overall performance of your home, while sealing and air sealing can help prevent drafts and improve the overall comfort of your home.
Final Words
Installing R-30 insulation in a ceiling framed with 2x8s can be a challenging project, but it can also bring significant benefits in terms of energy efficiency, comfort, and durability. There are several options for achieving R-30 insulation in this type of ceiling, including spray foam, rigid board insulation, and moisture-resistant options. Some people also use R-49 isolation for roof.
It is important to consider the specific needs and constraints of your project when selecting an insulation option, taking into account factors such as performance characteristics, cost, ease of installation, and potential for moisture and ventilation issues.
In conclusion, it is important to properly research and plan your insulation project to ensure a successful outcome. Once your insulation is installed, be sure to follow any recommended maintenance procedures and consider future upgrades, such as adding additional insulation or sealing and air sealing, to continue improving the energy efficiency and comfort of your home.

