Multi Finish Plaster: The Secret to Flawless Walls or a DIY Disaster?
That perfectly smooth, glass-like wall is the dream for any homeowner. It’s the ideal canvas for paint or wallpaper, creating a clean, professional look that elevates any room. The problem is achieving that flawless finish is notoriously difficult, often resulting in visible imperfections, trowel marks, and frustrating cracks that ruin the effect.
Many brave DIY enthusiasts attempt to tackle plastering, only to find themselves facing a lumpy, uneven mess that looks worse than when they started. This is where the professionals’ secret weapon comes in: multi finish plaster. This versatile product is designed to create that coveted smooth surface, but using it correctly is both an art and a science.
This comprehensive guide will demystify multi finish plaster. We’ll explore exactly what it is, why it’s the go-to choice for contractors, and how you can avoid the common pitfalls that lead to DIY disasters. By the end, you’ll have the knowledge to achieve a stunning, professional-quality finish on your walls.
You'll Learn About
What Exactly is Multi Finish Plaster and Why Should You Care?
Before you can master the application, it’s crucial to understand the material itself. Multi finish is a gypsum-based final coat plaster, designed for skimming over a variety of surfaces. Its name comes from its ability to work on multiple background types, from plasterboard to sand and cement undercoats.
This versatility makes it an incredibly efficient and popular product in the construction industry. Instead of needing different products for different walls, plasterers can rely on one bag to get the job done, ensuring a consistent and durable finish throughout a property.
The Pro’s Choice for a Glass-Like Finish
Professionals choose multi finish for several key reasons. Firstly, its fine texture allows for a smooth, polished surface that is perfect for decoration. When applied correctly, it creates a hard, durable wall that resists knocks and scrapes far better than softer jointing compounds.
Secondly, it has a reliable setting time, typically around 90 to 120 minutes. This gives plasterers enough time to work with the material, applying, flattening, and polishing it before it becomes unworkable. This controlled set is vital for achieving a seamless finish across large areas.
Multi Finish vs. Skim Coat: Is There a Difference?
The terms are often used interchangeably, which can be confusing. A “skim coat” or “skimming” is the process of applying a thin layer of plaster to a wall to make it smooth. Multi finish is a specific type of plaster product used for skimming.
So, while you might “skim” a wall using multi finish plaster, you could technically use other products as well. However, products like British Gypsum’s Thistle MultiFinish are specifically formulated for this exact purpose and are the industry standard for achieving the best results.
The #1 Mistake Amateurs Make: Skipping Surface Preparation
Here is the hard truth: if you fail to prepare your wall correctly, your plastering project is doomed before you even open the bag. Proper surface preparation is the single most important factor in achieving a strong bond and a flawless finish. Rushing or skipping this stage is the number one cause of plastering failures like cracking, blistering, and poor adhesion.
The goal of preparation is to control suction. If a background is too porous (high suction), it will suck the water out of the plaster mix too quickly, causing it to set before you can finish it. If it’s not porous enough (low suction), the plaster won’t adhere properly. The key is to create a consistent, moderately porous surface across the entire wall.
Assessing and Preparing Different Wall Types
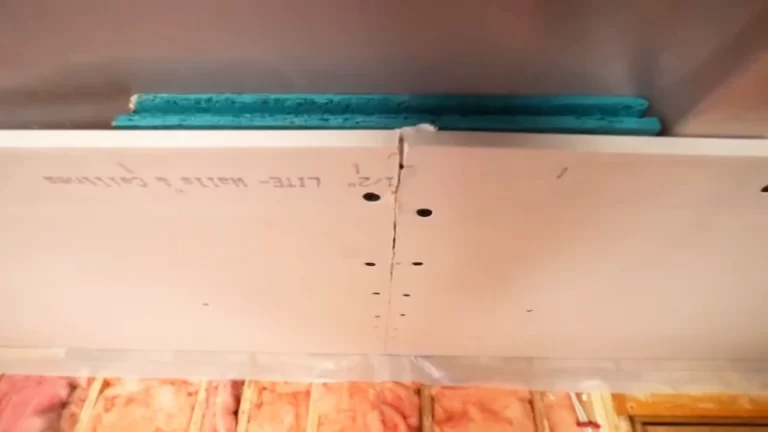
Your preparation method will depend on the surface you’re plastering over. Plasterboard is a low-suction background, but you must tape all the joints with plasterer’s scrim tape to prevent cracks from forming later. For older, existing plaster walls, you need to remove any loose material and fill any significant cracks.
Dealing with very porous or dusty surfaces requires sealing. A common method is to apply a diluted solution of PVA glue. This creates a film that controls the suction and helps the new plaster bond effectively. Renovating older homes often presents unique challenges, especially when tasks like a full house rewire are involved, as the chasing of cables can damage the old plaster, requiring careful preparation before skimming.
Your Step-by-Step Guide to Applying Multi Finish Plaster
With your walls properly prepared, it’s time to start the plastering process. This requires the right tools, the perfect mix, and a methodical approach. Don’t rush; plastering is all about timing and technique.
Tools of the Trade: Don’t Skimp on Quality
Having the right equipment is essential. You will need a high-quality plastering trowel, a hawk board to hold the plaster, a powerful paddle mixer, a clean bucket for mixing, and a spray bottle for water. Investing in good tools will make the job significantly easier and contribute to a better final result.
Mixing Multi Finish to the Perfect Consistency
The perfect mix is crucial. Always add the plaster powder to clean water, never the other way around, to avoid lumps. The ideal ratio is approximately 11.5 liters of water per 25kg bag of multi finish, but it’s best to add the powder gradually until you reach the desired consistency.
You’re aiming for a thick, creamy texture, often compared to melted chocolate or whipped cream. It should be smooth and lump-free, and stiff enough to stay on your trowel when turned upside down. Use a paddle mixer to ensure everything is thoroughly combined, and make sure your bucket is perfectly clean to avoid contaminating the mix.
The Two-Coat System: Application and Flattening
Multi finish plaster is typically applied in two thin coats. The first coat should be about 1-2mm thick and applied evenly across the entire surface. Start at the top left of the wall and work your way across and down, maintaining a “wet edge” to avoid join lines.
Once the first coat has been applied, you must let it “take up” or firm up slightly. This is the crucial waiting period. After about 20-30 minutes, when the plaster is firm to the touch but not yet dry, you can apply the second, slightly thinner coat. This second layer fills in any minor imperfections from the first, creating the foundation for a truly flat surface.
Troweling: The Secret to a Glass-Like Finish
After the second coat is on, the real skill of plastering begins. As the plaster continues to set, you will perform a series of troweling passes. With each pass, the plaster will get harder, and you will apply more pressure with your trowel.
This process systematically removes trowel marks and smooths the surface. You can use your water spray bottle to lightly moisten the wall on the final passes, which helps to lubricate the trowel and achieve that final, polished look. Knowing the right time to trowel is something that comes with experience, so it’s wise for beginners to start on a small, inconspicuous area first.
| Feature | Thistle MultiFinish Plaster | All-Purpose Joint Compound | Venetian Plaster |
|---|---|---|---|
| Primary Use | Final skim coat over various backgrounds | Taping and finishing drywall joints | Decorative, polished, marble-like finish |
| Layer Thickness | Thin skim coat (approx. 2mm) | Can be applied in thicker layers, feathered out | Multiple very thin, burnished layers |
| Setting/Drying Time | Sets chemically in 90-120 minutes | Air dries, 12-24 hours per coat | Varies, multiple coats required over days |
| Durability | Very hard and durable once cured | Softer, more prone to dents and scratches | Extremely hard and durable |
| Application Skill | High skill level required | Moderate skill level | Very high, specialized skill level |
| Final Finish | Smooth, flat surface ready for paint | Smooth, flat surface, requires extensive sanding | Polished, often with depth and sheen |
Common Problems and How to Fix Them Like a Pro
Even with careful preparation, issues can arise. Understanding why they happen and how to fix them is key to a successful outcome. Most problems stem from incorrect timing, poor preparation, or a bad mix.
Cracks Appearing as it Dries? Here’s Why
Hairline cracks are often a sign that the plaster dried too quickly. This goes back to controlling the suction of the background wall. If the wall is too thirsty, it rapidly draws moisture from the mix, leading to shrinkage and cracking.
To prevent this, ensure you have adequately sealed any high-suction surfaces with PVA or a suitable primer. If small cracks do appear after drying, they can usually be filled with a fine surface filler before painting, but prevention is always the best approach.
Dealing with Blisters and Bubbles
Blisters or bubbles are pockets of trapped air or moisture between the plaster and the background. This indicates a failure of adhesion, often caused by a dusty or improperly prepared surface. It can also happen if you overwork the plaster during the final troweling stages while it’s still very wet.
Small blisters can sometimes be cut out and filled once the plaster is dry. However, widespread blistering is a sign of a serious adhesion problem, and in the worst-case scenario, the affected area may need to be removed and re-plastered.
Finishing Touches: Painting and Decorating Your New Plaster
Once you’ve achieved a smooth, flat finish, the final step is to let it dry completely before decorating. This is a waiting game, but it’s a vital one. Applying paint to damp plaster will trap moisture, leading to peeling paint and potential mold issues down the line.
The Waiting Game: How Long Before You Can Paint?
Fresh plaster needs to dry thoroughly, which can take anywhere from a few days to several weeks depending on the thickness, humidity, and ventilation in the room. A good visual indicator is the color; the plaster will turn from a dark brown/pink to a uniform, pale pink color when fully dry.
Before applying your final paint color, it’s essential to apply a “mist coat.” This is a coat of water-based emulsion paint diluted with water (typically 70% paint to 30% water). This acts as a primer, soaking into the porous new plaster and creating a stable base for your top coats to adhere to.
Decorating Your Flawless Walls
With the plaster cured and primed, you have the perfect canvas for your design vision. The smooth surface is ideal for any paint finish, from matte to high gloss. It also provides a fantastic base for wallpaper or more intricate decorative finishes.
A perfectly plastered wall is also the ideal starting point for architectural details. For homeowners looking for a traditional or classic style, installing wainscoting can add character and elegance to a room. Should your tastes change later on, understanding how to remove finishes is also useful. For different surfaces and projects, it’s important to know which products work best; for example, a Citristrip paste vs gel comparison shows how different formulations are suited for different stripping jobs.
Is DIY Plastering Worth It? A Final Verdict
Plastering with multi finish is undeniably a challenging skill to master. It requires patience, practice, and a good understanding of the material’s properties. For a complete beginner, the risk of a poor finish is high.
However, the satisfaction of achieving a perfectly smooth wall yourself is immense, and the potential cost savings are significant. If you’re considering taking on the challenge, start small. Practice on a small, unimportant wall or even a piece of plasterboard to get a feel for the timing and troweling techniques before tackling a main living area.
For large or complex jobs, or if you simply want a guaranteed professional result, hiring an experienced plasterer is always the wisest investment. But for the determined DIYer, mastering multi finish plaster is a rewarding skill that can transform your home.