L Shaped Deck Framing (Beginners Guide)
Building a deck can be a rewarding and fulfilling project that adds value and usable space to your home. Whether you are an experienced builder or a DIY enthusiast, there are a few key things to consider when framing a deck.
From choosing the right materials and planning the layout to following building codes and ensuring a stable and safe structure, framing a deck requires careful planning and attention to detail.
In this guide, we will go over the steps involved in framing a deck and provide tips on how to ensure a successful project.
You'll Learn About
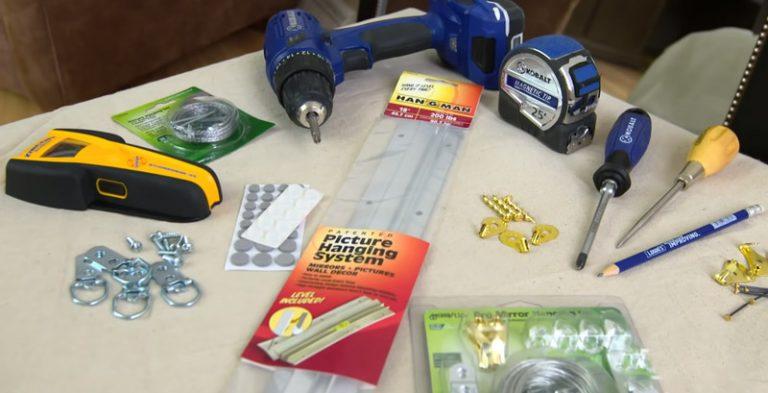
Tools Needed
There are several tools that are essential for framing a deck. These tools will help you to accurately measure, cut, and fasten the various components of the deck together. Some of the most important tools to have on hand when framing a deck include:
- Tape measure: A tape measure is essential for accurately measuring the various components of the deck and making sure that everything is properly spaced and aligned.
- Level: A level is a crucial tool for ensuring that each piece of the deck is properly aligned and level. This is important for creating a stable and safe structure.
- Circular saw: A circular saw is a versatile tool that is useful for cutting boards to length and making angled cuts as needed.
- Hammer: A hammer is essential for driving nails or framing anchors into place.
- Screw gun: A screw gun is a power tool that is useful for quickly and easily driving screws into place.
- Chalk line: A chalk line is a handy tool for marking straight lines on wood and can be useful for marking out the locations of joists and other components of the deck.
- Square: A square is a useful tool for ensuring that corners are properly squared and can be used to check that the frame of the deck is properly aligned.
Overall, having the right tools on hand is essential for a successful deck-building project. By having these tools, you can accurately measure, cut, and fasten the various components of the deck together, resulting in a sturdy and functional outdoor space.
Step By Step Guide to Frame an L-shaped Deck
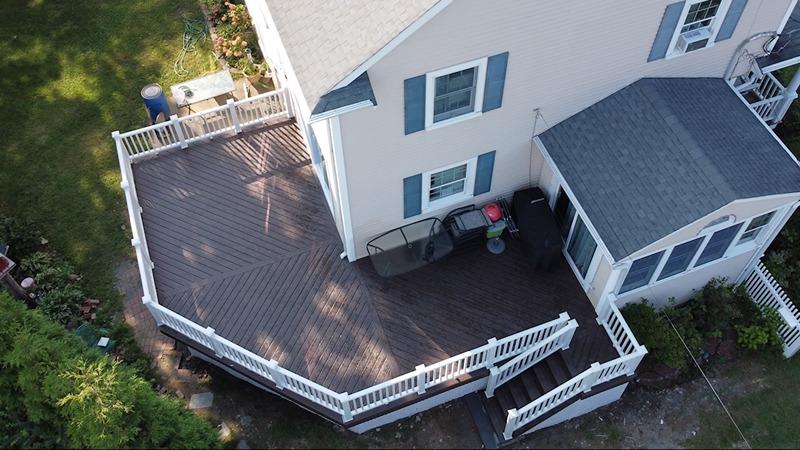
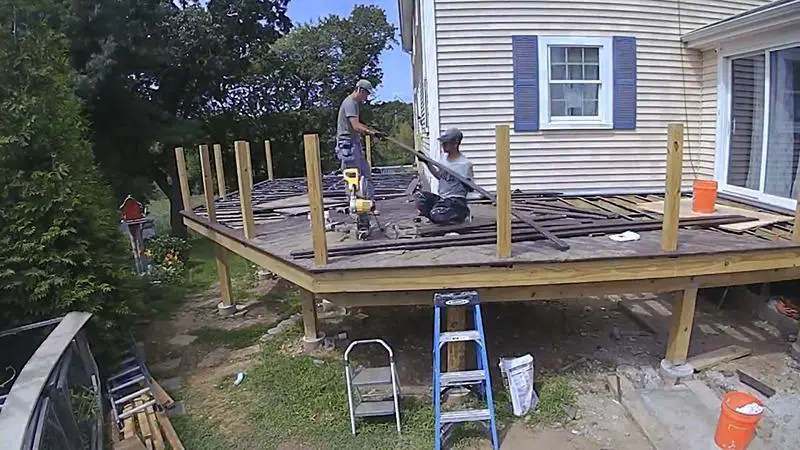
An L-shaped deck is a popular choice for homeowners who want to add outdoor living space to their home. The deck’s shape allows for more usable space and can provide a unique design element to a home’s outdoor space. In order to build an L-shaped deck, there are several steps that must be followed to ensure a safe and sturdy structure.
Fix the Ledger Board
The first step in framing an L-shaped deck is to install a ledger board. This is a horizontal board that is attached to the house and provides a base for the deck to be attached to. It is important to properly install the ledger board to ensure that the deck is properly supported and secured.
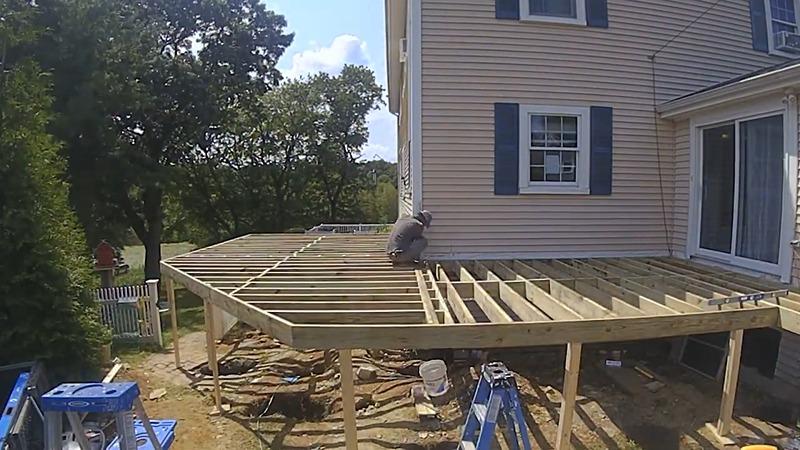
Setup Your Floor Joist
The next step is to install the floor joists. These are the horizontal pieces of wood that support the decking boards. It is important to use the proper size and spacing for the floor joists to ensure that the deck can support the weight of people and objects placed on it.
Leveling
Once the floor joists are in place, it is important to ensure that the deck is level. This can be done using a level tool and making adjustments as needed.
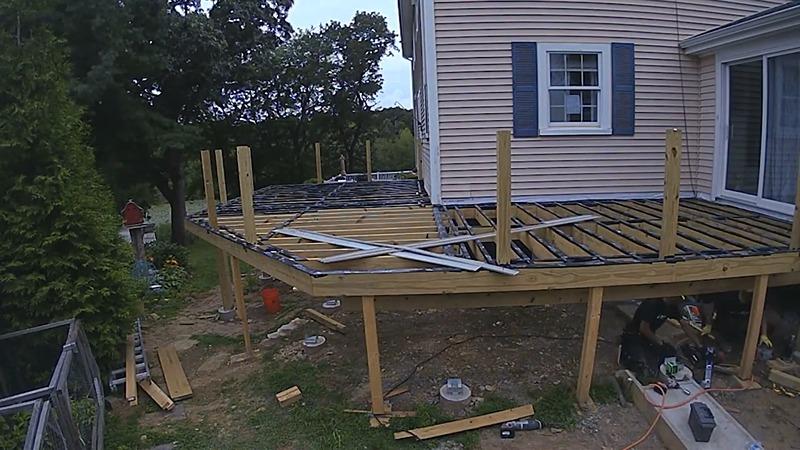
Attach Beams
The next step is to install the beams. These are the large, horizontal pieces of wood that run perpendicular to the floor joists and provide additional support for the deck.
Footings
In order to ensure that the deck is stable, it is important to install footings. These are concrete structures that are dug into the ground and provide a solid base for the deck to rest on.
Picture Framing
Once the footings are in place, the next step is to add picture framing. This involves adding additional boards around the perimeter of the deck to give it a finished look.
Attach the Rim Joists
The final step is to attach the rim joists. These are the horizontal pieces of wood that run along the edges of the deck and provide additional support and stability.
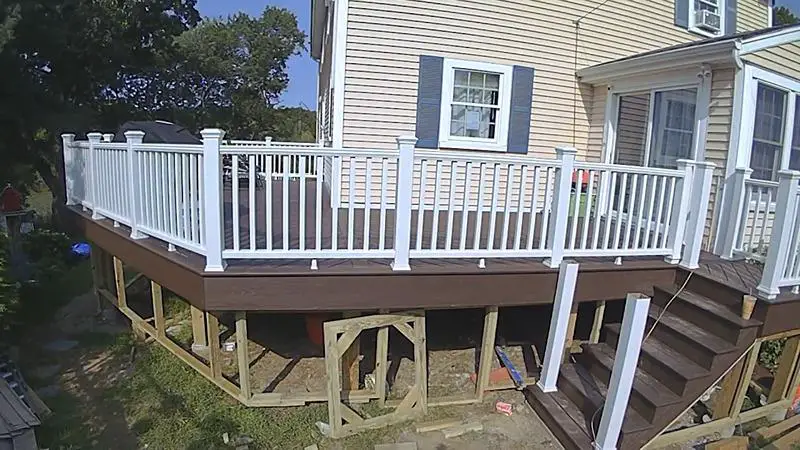
Overall, framing an L-shaped deck requires a certain level of expertise and can be a time-consuming process. However, with careful planning and attention to detail, it is possible to build a beautiful and functional outdoor space that will be enjoyed for years to come.
How Do You Frame a Deck Radius?
Building a deck radius, or a curved portion of a deck, can add visual interest and a unique element to your outdoor space. However, it does require a bit more planning and attention to detail than building a straight deck. Here is a step-by-step guide on how to frame a deck radius:
Mark the radius
The first step in building a deck radius is to mark out the desired curve. This can be done using a string and a framing square or by drawing a template onto the ground.
Install the joists
With the footings, posts, beams, and ledgers in place, the next step is to install the joists. These are the horizontal pieces of wood that support the decking boards and should be spaced appropriately according to the size of the decking boards and the load that the deck will be supporting.
Trim the joists
Once the joists are in place, they may need to be trimmed to follow the curve of the radius. This can be done using a circular saw or a handsaw.
Make angled cuts with a chain saw
Depending on the size of the radius, it may be necessary to make angled cuts on the ends of the joists. This can be done using a chain saw, making sure to wear appropriate safety gear.
Mark the blocking
Blocking is the short pieces of wood that are used to provide additional support between the joists. In a radius deck, it is important to mark out the location of the blocking to ensure that it is properly spaced and follows the curve of the radius.
Test-fit the blocking
Before fastening the blocking into place, it is a good idea to test-fit it to make sure that it fits properly and follows the curve of the radius.
Coat cut the edges
If necessary, use a circular saw or a jigsaw to cut the edges of the blocking to ensure that they fit smoothly against the curve of the radius.
Fasten the blocking
Once the blocking has been cut to fit the curve of the radius, it can be fastened into place using deck screws or nails.
Overall, building a deck radius requires careful planning and attention to detail. By following these steps, you can create a beautiful and unique outdoor space that will be enjoyed for years to come.
What Happens if a Deck Frame is Not Square?
Difficulty Installing Decking Boards
One of the main issues that can occur if a deck frame is not square is difficulty in installing the decking boards. If the frame is not square, the boards may not fit properly and may require a lot of force to get them into place. This can result in damaged boards and a poor overall finish for the deck.
Uneven Surface
Another issue with a non-square deck frame is that the surface of the deck will be uneven. This can make it difficult to walk on the deck and can also cause problems with furniture or other items placed on the deck.
Structural Instability
If a deck frame is not square, it can also lead to structural instability. This is because the frame is not evenly supported, which can cause it to shift or sway. This can be especially dangerous if the deck is attached to a house and could potentially cause damage to the structure.
Difficulty Installing Railings
Another problem that can occur if a deck frame is not square is difficulty in installing railings. Railings are typically attached to the frame of the deck and if the frame is not square, it can be difficult to get the railings to fit properly.
Inaccurate Measurements
Finally, if a deck frame is not square, it can also lead to problems with taking accurate measurements. This can be especially problematic if you are trying to install features such as a pergola or other outdoor structure, as it will be difficult to get the measurements right if the frame is not square.
Standard L-shaped Deck vs Freestanding L-shaped Deck
Standard L-shaped decks and freestanding L-shaped decks are two popular options for adding outdoor living space to a home. While both types of decks have their advantages, there are some key differences between the two.
Here is a comparison table outlining the main differences between standard and freestanding L-shaped decks:
| Standard L-shaped Deck | Freestanding L-shaped Deck |
|---|---|
| Requires attachment to a house or other structure | Does not require attachment to a house or other structure |
| More stable and durable | Less stable and durable |
| More expensive to build | Less expensive to build |
| Requires higher level of expertise to build | Easier to build |
In summary, standard L-shaped decks are attached to a house or other structure and are generally more stable and durable than freestanding L-shaped decks. However, they also require a higher level of expertise to build and tend to be more expensive.
Freestanding L-shaped decks, on the other hand, do not require attachment to a house and are generally easier and less expensive to build. However, they may not be as stable or durable as standard L-shaped decks.
Can You Use 2×4 to Frame a Deck?
2x4s can be used to frame a deck, but they are not the most ideal choice for several reasons.
Firstly, 2x4s are not strong enough to span long distances without bending or breaking. This means that if you are planning to build a large deck, you will need to use larger joists or additional supports to ensure that the deck is safe and stable.
Secondly, 2x4s are not as sturdy as other options, such as 2x6s or 2x8s. This means that if you are planning to build a deck that will be used to support heavy loads, such as furniture or a hot tub, 2x4s may not be strong enough to hold the weight.
Finally, using 2x4s can result in a bouncier deck. Because they are not as sturdy as other options, they may flex more under the weight of people walking on the deck. This can make the deck feel less stable and may not be ideal for people who are looking for a solid and stable outdoor space.
Overall, while it is possible to use 2x4s to frame a deck, they may not be the best choice for all situations. It is important to consider the size and intended use of the deck before deciding on the best type of joists to use.
Additional Tips While You are Working
Here are some additional tips for framing a deck:
- Plan ahead: Before you start building your deck, it is important to create a detailed plan that includes the size and shape of the deck, the materials you will use, and any special features you want to include. This will help to ensure that you have everything you need and can avoid any delays or mistakes during the building process.
- Use a level: One of the most important tools for framing a deck is a level. It is essential to ensure that each piece of the deck is level and properly aligned to create a stable and safe structure.
- Check local building codes: Before you start building your deck, it is important to check the local building codes and make sure that you are following all of the necessary regulations. This includes obtaining any necessary permits and following guidelines for things such as spacing and height requirements.
- Use proper fasteners: It is important to use the appropriate fasteners, such as deck screws or nails, to ensure that your deck is securely attached. Avoid using nails, as they are prone to popping out over time, and opt for screws instead.
- Add additional supports: Depending on the size and intended use of your deck, you may need to add additional supports, such as beams or posts, to ensure that the structure is sturdy and stable.
- Protect the wood: To help extend the life of your deck, it is a good idea to apply a wood protector or sealant to the wood before you install the decking boards. This will help to protect the wood from weathering and decay and can help to maintain the appearance of your deck.
Final Words
Framing a deck requires careful planning and attention to detail. From choosing the right materials and following local building codes to ensuring a stable and safe structure, there are many factors to consider when building a deck. It’s not an easy procedure like a hinged shed ramp.
By following the steps outlined in this guide and using the tips provided, you can successfully frame a deck that will provide you with a beautiful and functional outdoor space for years to come.