How to Make a Gutter Cleaner Out of PVC Pipe: The Ultimate Guide
Clogged gutters are a homeowner’s nightmare. What starts as a small collection of leaves and twigs can quickly escalate into a serious problem, leading to water damage, foundation issues, and even pest infestations. The traditional method of climbing a ladder and scooping out debris by hand is not only tedious but also incredibly dangerous.
Each year, thousands of people are injured in ladder-related accidents. Professional gutter cleaning services offer a safer alternative, but the costs can add up, especially for homes with extensive gutter systems. Fortunately, there is a simple, affordable, and highly effective solution that you can build yourself:
a DIY gutter cleaner made from PVC pipe. This guide will provide you with everything you need to know about how to make a gutter cleaner out of PVC pipe, transforming a dreaded chore into a quick and easy task.
This project is perfect for the DIY enthusiast looking for a practical solution to a common problem. It requires minimal tools, inexpensive materials, and can be assembled in an afternoon.
The result is a custom-made tool that allows you to clean your gutters safely from the ground, using the power of water to flush away debris. Say goodbye to precarious ladder balancing acts and hello to clean, free-flowing gutters.
You'll Learn About
Why Your Gutters Get Clogged and the Dangers of Neglect
Before we dive into building our PVC gutter cleaner, it’s important to understand why gutters get clogged and the potential consequences of ignoring the problem. Gutters are designed to channel rainwater away from your home’s foundation, siding, and landscaping. When they become blocked, water has nowhere to go but over the sides, leading to a cascade of potential issues.
Common Causes of Gutter Clogs
The primary culprits behind clogged gutters are organic materials from surrounding trees. Leaves, pine needles, twigs, and seeds are constantly shed and find their way into your gutter system. Other contributors can include:
- Shingle Grit: As asphalt shingles age, they shed their granular surface, which can accumulate in gutters and form a heavy sludge.
- Nesting Critters: Birds, squirrels, and insects often find gutters to be an ideal place to build their nests, creating significant blockages.
- Improper Gutter Slope: If your gutters are not pitched correctly, water can pool instead of flowing towards the downspouts, allowing debris to settle and accumulate.
Over time, this combination of debris and moisture can decompose into a thick, heavy muck that is difficult to remove. This is precisely the kind of blockage our DIY PVC gutter cleaner is designed to tackle.
The High Cost of Ignoring Clogged Gutters
Neglecting clogged gutters can lead to costly and extensive home repairs. When water overflows, it can seep into the fascia boards and soffits, causing wood rot and structural damage. It can also saturate the ground around your foundation, leading to cracks and basement flooding.
In colder climates, clogged gutters can contribute to the formation of ice dams in the winter. These ridges of ice at the edge of the roof prevent melting snow from draining properly, forcing water back under the shingles and into your home. This can lead to damaged insulation, ceilings, and walls.
Much like a frozen plumbing line, which might require you to figure out how do you unfreeze a sewer vent pipe, preventing the problem in the first place is always the better course of action.
Designing Your DIY PVC Gutter Cleaner: Tools and Materials
Now for the main event: building your own gutter cleaning tool. This design uses a simple ‘U’ or candy cane shape at the end, which allows you to hook it over the edge of the gutter and direct a powerful stream of water to blast away debris. The length of the main pipe can be customized to match the height of your home, ensuring you can reach even second-story gutters with ease.
Gathering Your Supplies
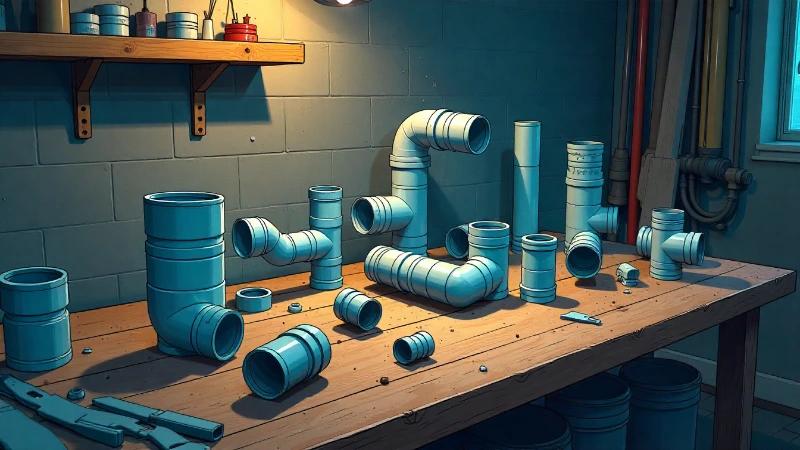
The beauty of this project lies in its simplicity and the accessibility of materials. You can find everything you need at your local hardware or home improvement store. Here’s a comprehensive list of what you’ll need:
- PVC Pipe: The most common choice is 3/4-inch or 1-inch Schedule 40 PVC pipe. The 3/4-inch size offers slightly higher water pressure, while the 1-inch size provides more rigidity for taller applications. You’ll need at least one 10-foot section.
- PVC Fittings: The specific fittings will shape your tool. You will need two 90-degree elbows, two 45-degree elbows, and one hose adapter fitting (a female hose thread to slip PVC adapter).
- PVC Primer and Cement: This is crucial for creating strong, watertight seals at all the joints. Don’t skip this step!
- Hose Shut-off Valve: A simple ball valve attachment for your garden hose will give you precise control over the water flow without having to run back to the spigot.
- Tools: You’ll need a tape measure, a marker, and a way to cut the PVC pipe. A PVC pipe cutter is the best tool for the job, but a hacksaw will also work.
Choosing the Right PVC Pipe Diameter
The diameter of the PVC pipe you choose will affect both the water pressure and the tool’s rigidity. Here’s a quick comparison to help you decide which is best for your needs.
| PVC Pipe Diameter | Advantages | Disadvantages | Best For |
|---|---|---|---|
| 3/4-Inch | Higher water pressure, lighter weight, less expensive. | More flexible/less rigid over long lengths, which can make it harder to control. | Single-story homes or situations where maximum water pressure is needed. |
| 1-Inch | More rigid and stable, especially when extended to clean second-story gutters. | Slightly lower water pressure, heavier, and more expensive. | Two-story homes or when a sturdier, more robust tool is desired. |
Step-by-Step Assembly Instructions
With your materials gathered, it’s time to assemble your gutter cleaner. Follow these steps carefully for a sturdy, leak-proof tool. Always work in a well-ventilated area when using PVC primer and cement.
Step 1: Cut Your PVC Pipe Pieces
First, you’ll need to cut your 10-foot PVC pipe into several sections. Precision is key, so measure twice and cut once.
- Main Wand (A): This will be the longest piece and determines your reach. For a single-story home, 6-8 feet is usually sufficient. For a two-story home, you may need the full 10 feet or even need to couple two pieces together (though this will reduce rigidity).
- Handle Section (B): Cut a piece about 4-5 feet long. This will form the lower part of the tool where you’ll attach the hose.
- Curved Hook Pieces (C & D): You’ll need two smaller pieces to form the ‘U’ bend at the top. A 6-inch piece and a 4-inch piece are good starting points.
- Nozzle Piece (E): A final short piece, about 3 inches long, will serve as the nozzle.
Step 2: Dry Fit All the Components
Before you get out the cement, it’s essential to do a “dry fit.” Assemble all the pieces without any primer or glue to ensure they fit together correctly and create the desired shape. The configuration should be as follows:
- Attach a 90-degree elbow to the top of your main wand (A).
- Connect the 6-inch piece (C) to the other end of that elbow.
- Attach the second 90-degree elbow to the end of piece C, facing the opposite direction of the first elbow to create the hook shape.
- Connect the 4-inch piece (D) to the second elbow.
- Finally, attach the 3-inch nozzle piece (E) to the end of piece D. This completes the top hook.
- At the bottom of the main wand (A), attach a 45-degree elbow.
- Connect the handle section (B) to this elbow.
- Attach the second 45-degree elbow to the bottom of the handle section. This creates a comfortable and ergonomic grip.
- Attach the female hose adapter to the final 45-degree elbow.
Hold the assembled tool to check its length and feel. Make any adjustments to the pipe lengths now before the connections become permanent.
Step 3: Glue the PVC Pieces Together
Once you are satisfied with the dry fit, it’s time to make it permanent. This process needs to be done quickly, as PVC cement sets fast. Work one joint at a time.
- Apply PVC primer to the outside of the pipe end and the inside of the fitting socket. The primer cleans and softens the PVC, allowing for a stronger weld.
- Immediately apply a thin, even layer of PVC cement to both surfaces.
- Push the pipe into the fitting with a slight twisting motion until it bottoms out. Hold the joint firmly in place for about 30 seconds to prevent the pipe from pushing back out.
- Wipe away any excess cement with a rag.
- Repeat this process for all joints, working methodically from one end of the tool to the other.
Allow the assembled gutter cleaner to cure for the time recommended by the cement manufacturer, typically a few hours, before you introduce any water pressure.
How to Use Your New PVC Gutter Cleaner Safely and Effectively
Using your new tool is straightforward, but a few tips will ensure you get the best results without making a huge mess.
Getting Started
First, attach your garden hose to the PVC tool’s adapter. It’s highly recommended to add a ball valve shut-off at this connection point. This gives you on/off control right at your fingertips. Attach the other end of your hose to the spigot and turn on the water.
The Cleaning Process
- Start at the end of the gutter closest to the downspout. This prevents you from pushing debris into an area you’ve already cleared.
- Hook the curved end of the tool over the edge of the gutter, with the nozzle pointing away from the downspout, towards the clog.
- Slowly open the ball valve. The high-pressure stream of water will begin to break up and push the leaves, sludge, and other debris.
- Work your way down the length of the gutter, pushing the debris towards the downspout. Use a back-and-forth sweeping motion.
- Once you’ve cleared the main channel, direct the water stream directly into the downspout opening to ensure it is clear. If you see water backing up, you may have a clog in the downspout itself that needs to be addressed.
Be mindful of where the debris is falling. You may want to lay a tarp down below to make cleanup easier. Also, be aware of windows, doors, and anything else you don’t want to be splattered with gutter muck. It’s a messy job, but this tool keeps the mess at a distance.
Advanced Modifications and Customizations
Once you’ve mastered the basic design, you might consider a few upgrades to enhance your tool’s performance. For instance, you could add a specialized nozzle to the end instead of just using the open pipe. A flattened PVC end or a cap with small holes drilled into it can create a more powerful, fan-like spray.
Some DIYers even experiment with adding a second handle for better stability on very long wands. The project is highly customizable, much like how one might need to figure out how to extend stove wire_bai1 for a specific kitchen layout. The principles are the same: start with a solid plan and adapt it to your unique needs.
Another consideration is the material itself. While PVC is the standard for this project due to its low cost and ease of use, it’s interesting to note how material choices evolve in other industries. For example, understanding why is copper no longer used for busbars in some high-power electrical applications in favor of aluminum reveals a similar balance of cost, performance, and weight. For our gutter cleaner, PVC remains the undisputed champion for DIY applications.
Final Thoughts: A Safer, Cheaper, and More Effective Solution
Building your own gutter cleaner from PVC pipe is more than just a money-saving project; it’s a significant upgrade in safety and efficiency. By allowing you to keep your feet firmly on the ground, you eliminate the single greatest risk associated with gutter maintenance.
The tool is powerful, effective, and custom-built for the height of your home. With just a few dollars in materials and an hour or two of your time, you can create a durable, long-lasting solution to the perennial problem of clogged gutters. Take control of your home maintenance, protect your property from water damage, and tackle this essential chore with confidence and ease.

