How to Install Siding Around Electric Meter?
Installing siding around an electric meter can be a challenging task, as it requires careful planning and attention to detail to ensure that the meter is properly sealed and protected from the elements.
At the same time, it’s important to allow easy access to the meter for maintenance and repairs, which means finding a way to work around the utility box without disrupting its function.
In this article, we’ll provide step-by-step instructions on how to install siding around an electric meter, including tips and best practices to help you achieve a professional and long-lasting finish.
You'll Learn About
Preparing for the Installation
Before you can begin installing the new siding around your electric meter, you’ll need to prepare the area by uninstalling the old siding and cutting it flush around the meter. Here’s what you need to do:
Uninstall the Old Siding
If you are re-siding your house, the first step is to remove the old siding. This can be done by pulling out any nails or staples that hold the siding in place, and then carefully removing the siding panels one by one.
Cut the Old Siding Flush Around the Meter
Once the old siding has been removed, use a circular saw or jigsaw to cut the old siding flush around the electric meter. Be sure to make the cuts straight and even, as this will help ensure a clean and professional finish.
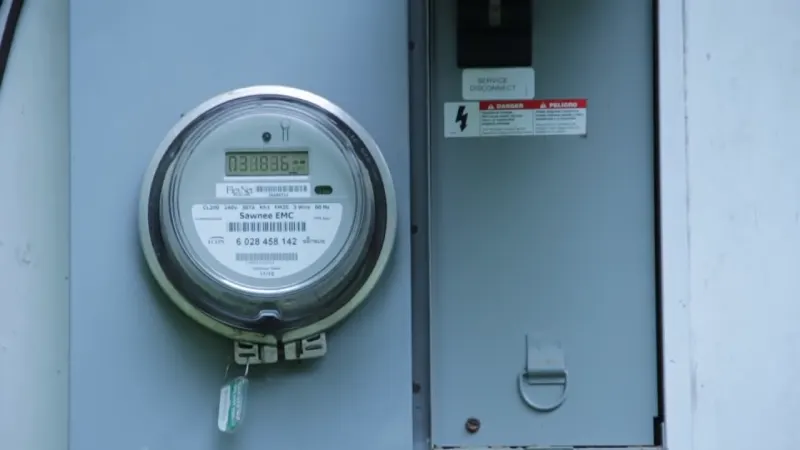
Measure the Dimensions of the Meter
Before installing the new siding, it’s important to measure the dimensions of the electric meter. This will help you determine the size of the trim pieces that you need to install around the meter. Be sure to measure the width, height, and depth of the meter to ensure that you have accurate measurements.
By following these steps, you’ll be well on your way to installing the new siding around your electric meter. In the next section, we’ll cover how to install the J-channel, which will provide a protective layer and a finished look around the meter.
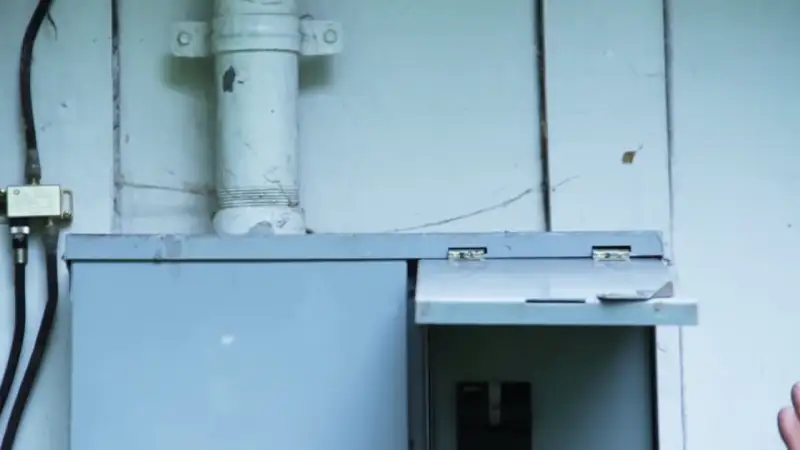
Installing the J-channel
Once you have prepared the area by uninstalling the old siding and cutting it flush around the electric meter, the next step is to install the J-channel. The J-channel is a trim piece that is attached to the wall around the electric meter, and serves several important purposes:
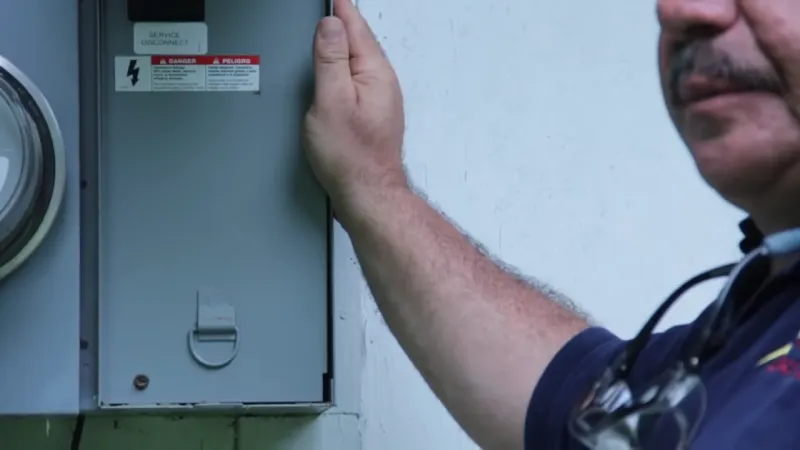
Protecting the Meter
The J-channel provides a protective layer around the meter, helping to prevent water and other elements from getting inside. This is especially important if you live in an area with heavy rainfall or snowfall, as the J-channel will help to keep the meter dry and functioning properly.
Providing a Finished Look
In addition to protecting the meter, the J-channel also gives the installation a clean and finished look. The J-channel hides any rough edges or gaps around the meter, creating a seamless transition between the siding and the meter.
To install the J-channel, follow these steps:
Attach the J-channel to the Bottom of the Meter
Start by attaching the J-channel to the bottom of the meter, using nails or screws. Be sure to use enough fasteners to hold the J-channel securely in place.
Work Your Way Up to the Top of the Meter
Once the bottom of the J-channel is securely attached, continue working your way up to the top of the meter. Be sure to overlap the J-channel properly, and use enough fasteners to hold it securely in place.
By following these steps, you’ll be able to install the J-channel around your electric meter, providing a protective layer and a finished look. In the next section, we’ll cover how to apply silicone sealant around the meter to create a watertight seal.
Applying Silicone Sealant
Once you have installed the J-channel around your electric meter, the next step is to apply silicone sealant to create a watertight seal. This is an important step, as it helps to prevent moisture from getting inside the meter and causing damage. Here’s how to apply silicone sealant:
Determine the Areas to Be Sealed
Before you begin applying sealant, take a moment to identify the areas that need to be sealed. This typically includes the edges of the meter where the J-channel meets the siding, as well as any gaps or seams around the meter.
Cut the Tip of the Sealant Tube
Once you know where to apply the sealant, cut the tip of the sealant tube to the appropriate size, using a utility knife. A small, narrow tip is usually sufficient for most applications.
Apply the Sealant
Holding the sealant tube at a 45-degree angle, apply a bead of sealant along the edges of the meter where the J-channel meets the siding. Be sure to apply a continuous bead of sealant, rather than several small dots, as this will create a stronger seal.
Smooth the Sealant
Once you have applied the sealant, use a putty knife or similar tool to smooth it out and remove any excess. Be sure to smooth the sealant carefully, as it will be difficult to remove once it has dried.
By following these steps, you’ll be able to apply silicone sealant around your electric meter, creating a watertight seal that will help protect the meter from moisture. In the next section, we’ll cover how to trim and install the siding around the meter.
Trimming and Installing the Siding
Once you have applied silicone sealant around your electric meter, the next step is to trim and install the siding. This involves cutting the siding panels to size and attaching them to the J-channel, taking care to overlap the panels properly to create a seamless finish. Here’s how to do it:
Cut the Siding Panels to Size
Measure and mark the siding panels to the appropriate size, using a straight edge and a pencil. Then, use a circular saw or jigsaw to cut the panels to size. Be sure to make straight and even cuts, as this will help ensure a clean and professional finish.
Attach the Siding to the J-channel
Once the siding panels have been cut to size, attach them to the J-channel using nails or screws. Be sure to use enough fasteners to hold the siding securely in place, and follow the manufacturer’s recommendations for the spacing and placement of the fasteners.
Overlap the Panels Properly
As you install the siding, be sure to overlap the panels properly to create a seamless finish. The specific overlap requirements will depend on the type of siding you are using, so be sure to consult the manufacturer’s instructions for guidance.
By following these steps, you’ll be able to trim and install the siding around your electric meter, creating a professional and long-lasting finish. In the next section, we’ll cover some tips and best practices to help ensure a successful installation.
Another Method of Installing Siding
Installing siding around an electric meter can be a bit tricky, as you need to ensure that the meter is properly sealed and protected from the elements while also allowing easy access for maintenance and repairs. Here are the steps to follow when installing siding around an electric meter:
Uninstall the Old Siding
If you are re-siding your house, the first step is to remove the old siding. This can be done by pulling out any nails or staples that hold the siding in place, and then carefully removing the siding panels one by one.
Cut the Old Siding Flush Around the Meter
Once the old siding has been removed, use a circular saw or jigsaw to cut the old siding flush around the electric meter. Be sure to make the cuts straight and even, as this will help ensure a clean and professional finish.
Measure the Dimensions of the Meter
Before installing the new siding, it’s important to measure the dimensions of the electric meter. This will help you determine the size of the trim pieces that you need to install around the meter.
Install J-channel Around the Meter
Begin installing the new siding by attaching J-channel around the electric meter. This will help protect the meter from water and other elements, and will also provide a clean and finished look. Start at the bottom of the meter and work your way up, attaching the J-channel with nails or screws.
Apply Silicone Sealant Around the Meter
Once the J-channel has been installed, apply a bead of silicone sealant around the edges of the meter. This will help create a watertight seal and prevent moisture from getting inside.
Trim the Sidings
After the J-channel and sealant have been applied, it’s time to trim the sidings to fit around the electric meter. Measure and cut the siding panels to the appropriate size, and then attach them to the J-channel with nails or screws.
Install the Sidings
Finally, continue installing the siding around the electric meter, following the manufacturer’s instructions and taking care to overlap the panels properly and create a seamless finish.
By following these steps, you can properly install siding around an electric meter and protect it from the elements while also maintaining easy access for maintenance and repairs.
Conclusion
Installing siding around an electric meter requires careful planning and attention to detail, as it is important to protect the meter from the elements while also allowing easy access for maintenance and repairs.
By following the steps outlined in this article, you can properly install siding around your electric meter, ensuring that it is protected and functioning properly for years to come. Some tips for a successful installation include following the manufacturer’s instructions, using the right tools, and taking the time to properly prepare the area and apply silicone sealant.
By following these guidelines, you can achieve a professional and long-lasting finish that will protect your electric meter and enhance the appearance of your home.
![Taco Zvc404 C Wire [Locating, Connecting, Troubleshooting]](https://fixitinthehome.com/wp-content/uploads/2023/02/Taco-Zvc404-C-Wire-768x432.webp)