Flashing Where Siding Meets Concrete [Sealing, Fixing, Prevention]
Flashing is a thin, weather-resistant material that is used in construction to prevent water from entering the gaps and cracks between different building materials. It is often installed where siding meets a concrete foundation, as well as in other areas where different materials come together, such as around windows and doors.
The purpose of flashing is to direct water away from the building and prevent it from seeping into the gaps between the materials, which can lead to water damage and rot. Proper installation of flashing is essential in protecting a home from water damage and ensuring the longevity of the building materials.
You'll Learn About
Flashing Where Siding Meets Concrete
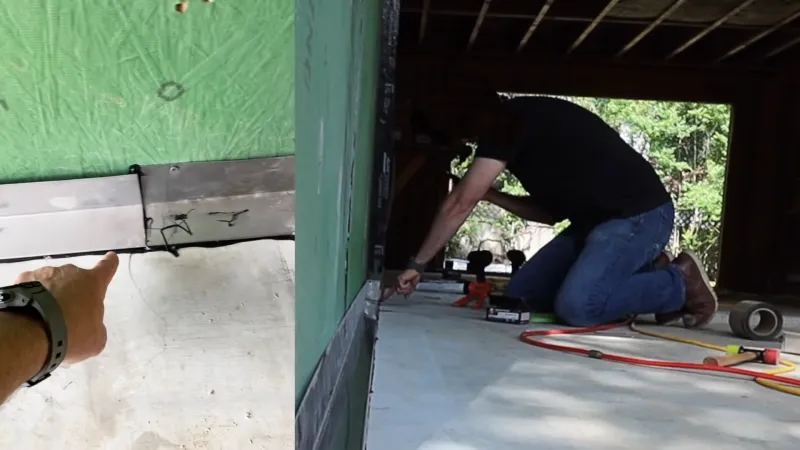
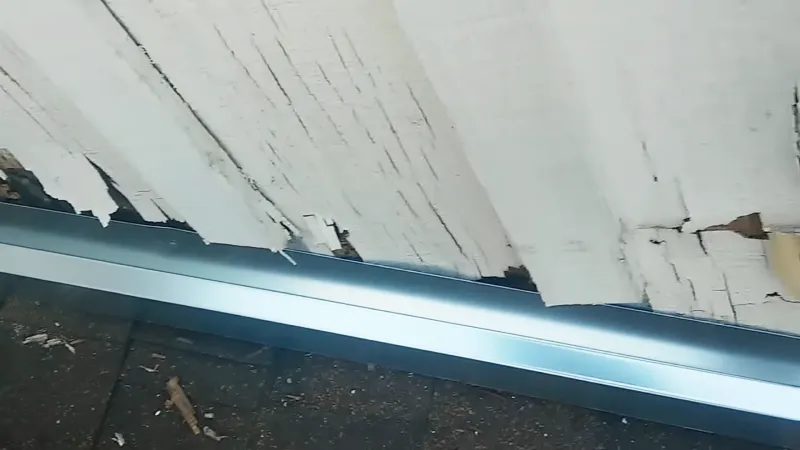
You might have a situation where the siding on your patio addition is in contact with the concrete slab and this is causing the siding to rot. To fix this problem, you will need to separate the siding from the concrete by installing flashing.
There are several options for installing flashing between the siding and concrete to keep the siding dry and prevent it from rotting. One option is to cut the siding away from the concrete and install a metal flashing between the siding and the concrete. You could also use a PVC trim board topped with a z-flashing on the lower part of the siding to keep it above grade.
Another option is to install step flashing. This involves cutting the siding away from the concrete, installing flashing between the siding and concrete, and covering the gap with a removable trim board. This will allow water to flow down the flashing and away from the siding.
It’s important to follow the manufacturer’s instructions when installing flashing and to ensure that the flashing is properly sealed to prevent water from entering the gaps between the siding and flashing. Proper installation of flashing can help to extend the life of your siding and protect your home from water damage.
Where Flashing is Typically Installed
Flashing is typically installed where siding meets a concrete foundation, as well as in other areas where different building materials come together. This includes areas such as:
- Roofing: Flashing is often used around roof penetrations, such as chimneys, vents, and skylights, to prevent water from entering the gaps between the roofing material and the penetration.
- Windows: Flashing is used around windows to prevent water from seeping into the gaps between the window frame and the wall.
- Doors: Flashing is also used around doors to prevent water from entering the gaps between the door frame and the wall.
In addition to these areas, flashing may also be used in other locations where different building materials come together, such as where stucco meets wood or where brick meets wood. Proper installation of flashing is essential in protecting a home from water damage and ensuring the longevity of the building materials.
Types of Flashing Materials
There are several different types of materials that can be used for flashing in construction:
Metal
Metal flashing is often made from aluminum or copper, and it is durable and resistant to corrosion. Metal flashing is often used in areas that are exposed to harsh weather conditions, such as around roof penetrations.
Pvc
Polyvinyl chloride (PVC) flashing is a synthetic plastic material that is often used in areas where metal flashing may not be suitable. It is lightweight, easy to install, and resistant to moisture, making it a popular choice for flashing in residential construction.
Rubber
Rubber flashing is made from a flexible, waterproof material that is often used in areas where metal or PVC flashing may not be suitable. It is often used around doors and windows, as it is able to conform to irregular shapes and can be easily cut to size.
Each type of flashing material has its own advantages and disadvantages, and the best choice will depend on the specific needs of the project. Factors to consider when selecting flashing materials include the location and exposure to the elements, the type of building materials being used, and the budget for the project.
How Flashing Works
Prevent Water From Entering
Flashing is used in construction to prevent water from entering the gaps between different building materials and causing water damage. It is typically installed in areas where two different materials meet, such as where siding meets a concrete foundation.
Directing Water Away
Flashing works by directing water away from the building and preventing it from seeping into the gaps between the materials. It is usually installed in such a way that it slopes downward, allowing water to flow down and away from the building. This helps to prevent water from accumulating and causing damage to the building materials.
Seal the Gaps Between the Materials
In addition to directing water away from the building, flashing also helps to seal the gaps between the materials to prevent water from entering. This is particularly important in areas that are exposed to harsh weather conditions, such as around roof penetrations or in areas that receive a lot of rainfall. Proper installation of flashing is essential in protecting a home from water damage and ensuring the longevity of the building materials.
How to Install Flashing Between Siding and Concrete
Installing flashing between siding and concrete is a relatively simple process that can be completed with a few basic tools. Here is a step-by-step guide for installing flashing in this area:
Gather the Necessary Tools
You will need a utility knife, a hammer, nails, and the flashing material of your choice (e.g. metal, PVC, rubber).
Measure and Cut the Flashing
Measure the area where the siding meets the concrete, and cut the flashing to the appropriate size using a utility knife.
Install the Flashing
Slide the flashing under the siding and position it so that it covers the gap between the siding and the concrete. Secure the flashing to the siding using nails or another appropriate fastening method.
Seal the Flashing
Use a sealant to seal the edges of the flashing and prevent water from entering the gaps between the siding and the flashing.
Test the Flashing
Once the flashing has been installed, test it to ensure that it is properly directing water away from the building. If water is not flowing away from the building as it should, make any necessary adjustments to the flashing to correct the issue.
It is important to follow the manufacturer’s instructions when installing flashing, as different types of flashing may have different installation requirements. Proper installation of flashing is essential in protecting a home from water damage and ensuring the longevity of the building materials.
Maintenance and Repair of Flashing
Proper maintenance and repair of flashing are essential in protecting a home from water damage and ensuring the longevity of the building materials. Here are some tips for maintaining and repairing flashing:
Inspect the Flashing Regularly
It is important to regularly inspect the flashing on your home to identify any potential problems or damage. Look for signs of wear or damage, such as rust, cracks, or holes, and make any necessary repairs as soon as possible.
Clean the Flashing
Over time, debris can accumulate on the flashing, blocking water from flowing properly and potentially causing damage. To prevent this, it is important to regularly clean the flashing to remove any debris.
Repair Small Damages
If you notice small damages, such as cracks or holes, in the flashing, you may be able to make repairs using sealant or patching material. This can help to prevent further damage and extend the life of the flashing.
Replace Damaged Flashing
If the flashing is severely damaged or has reached the end of its useful life, it may be necessary to replace it. This is especially important in areas that are prone to water damage, such as around roof penetrations or in areas that receive a lot of rainfall.
By regularly inspecting and maintaining the flashing on your home, you can help to prevent water damage and extend the life of your building materials.
Prevention
- To prevent the siding from rotting away quickly, you should cut the siding about 8 inches above the concrete and install L-shaped flashing along the concrete.
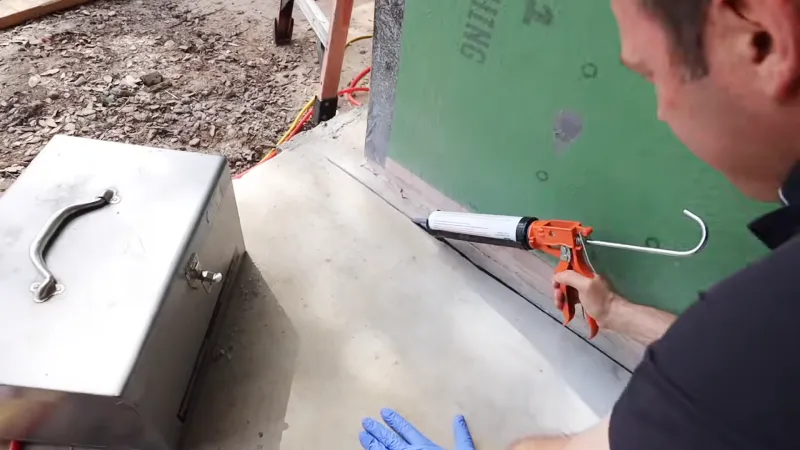
- Apply a bead of sealant on the concrete and set the flashing into it, then fasten it to the framing.
- On the inside, install 2×4 blocking horizontally between the studs and behind the cut edge of the siding, and fasten the blocking to the framing.
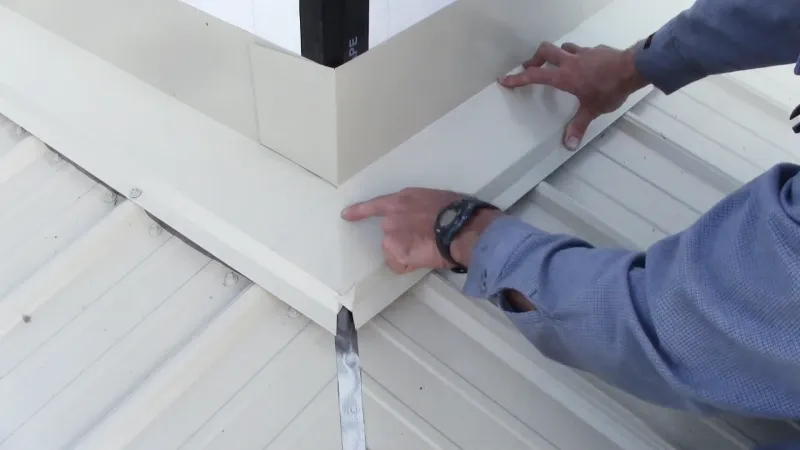
- On the outside, slip a Z-flashing up under the cut edge of the siding and install a PVC 1×8 over the flashing. Finally, renail the siding to the studs and the new blocking.
How to Seal the Flashing at a Wall Meeting a Concrete Slab?
Why It’s Needed: Sealing the flashing is necessary to prevent water from penetrating the wall and causing damage to the siding and framing. By installing Z-flashing, L-shaped flashing, and PVC 1×8, the wall will be protected from moisture and protected from rot, and decay.
Tools Needed:
- Skilsaw
- Nails or screws
- Chalk line
- Sealant
- Tape measure
- Safety glasses
Step by step guide:
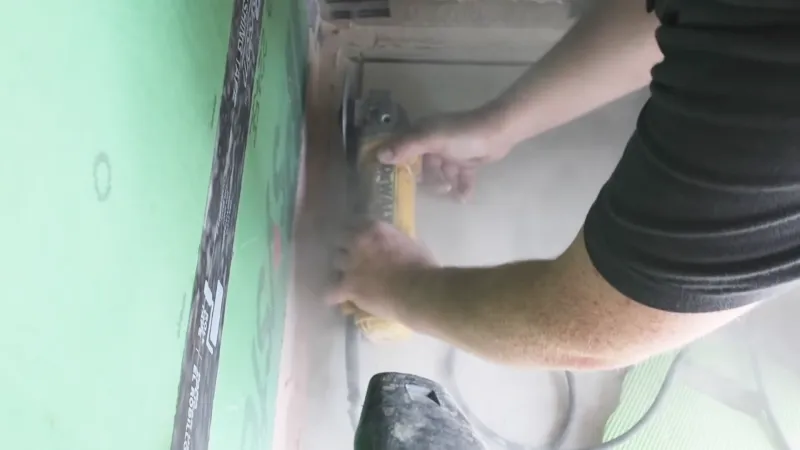
- Cut off the Siding: Snap a chalk line about 8 inches above where the siding meets the concrete and cut off the siding using a Skilsaw.
- Install Blocking: On the inside of the wall, install 2×4 blocking horizontally between the studs and behind the cut edge of the siding. Fasten the blocking to the framing using nails or screws.
- Install Z-flashing: Outside the wall, slip a Z-flashing under the cut edge of the siding. Allow a 1/2 inch gap between the cut edge of the siding and the flashing to allow for painting. Renail the siding to the studs and the new blocking.
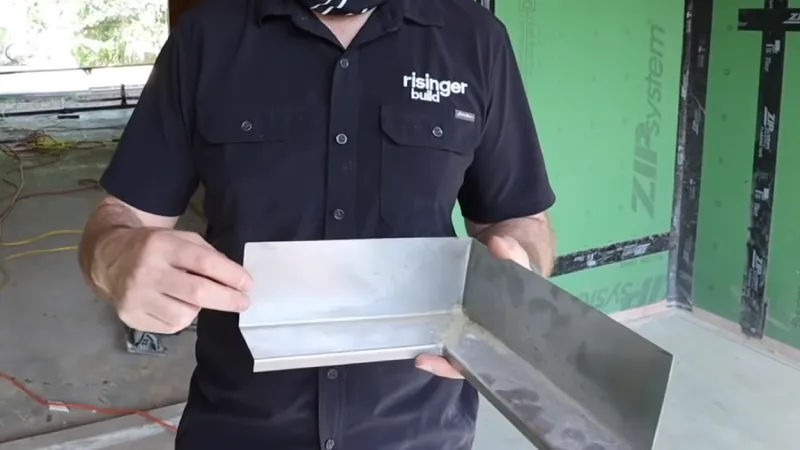
- Install L-shaped Flashing: At the point where the concrete meets the building, install an L-shaped flashing.
- Seal the Concrete: Run a bead of sealant on the concrete and set the L-shaped flashing into it. Fasten the flashing to the framing using nails or screws.
- Install PVC 1×8: Install a PVC 1×8 over the L-shaped flashing and under the Z-flashing.
How to Install Z-flashing?
Z-flashing is used to redirect water away from joints and penetrations in the roofing system. It is installed along the sides of the roof, in a “Z” shape, to protect it from water damage and leaks. Z-flashing is necessary to ensure the longevity of the roofing system and protect the interior of the building from water damage.
Tools Needed:
- Tin snips or metal cutting blade
- Roofing nails
- Flashing cement
- Starter strip
- Trowel or your finger
- Measuring tape
Prepare the Surface
Clean the surface where the Z-flashing will be installed, removing any dirt, debris or previous coatings. Ensure the surface is dry and free of moisture.
Measure and Cut Z-flashing
Measure the length of the surface where the Z-flashing will be installed. Cut the Z-flashing to the appropriate length using tin snips or a metal cutting blade.
Install Starter Strip
Install a starter strip along the surface where the Z-flashing will be installed. The starter strip acts as a base for the Z-flashing. Nail the strip in place.
Apply Flashing Cement
Apply a generous amount of flashing cement along the surface where the Z-flashing will be installed, making sure to cover the entire surface.
Place Z-flashing
Place the Z-flashing on top of the starter strip and press it down into the flashing cement to ensure proper adhesion.
Secure Z-flashing
Secure the Z-flashing in place by nailing it to the surface with roofing nails. Space the nails evenly along the length of the Z-flashing, making sure not to overdrive them.
Apply More Flashing Cement
Apply a generous amount of flashing cement over the nails to ensure a watertight seal. Smooth the cement with a trowel or your finger.
Inspect and Clean
Inspect the installation to ensure that the Z-flashing is securely installed and the flashing cement has been applied evenly. Clean any excess flashing cement that may have gotten on the surface.
How to Install L-shaped Flashing?
Tools needed:
- Measuring tape
- Utility knife
- Pliers or metal brake
- Primer
- Sealant
- Roofing nails or screws
- Caulking gun
Installing L-shaped flashing requires a few steps and some tools. Here is a step-by-step guide to help you with the installation process:
Prepare the Area
Clean the surface where the L-shaped flashing will be installed. Ensure it’s dry and free of debris.
Measure the Area
Measure the area where the L-shaped flashing will be installed and make a template of the flashing to be cut.
Cut the Flashing
Cut the L-shaped flashing to the size of the template. Ensure the cut is straight and smooth.
Bend the Flashing
Use a pair of pliers or a metal brake to bend the flashing to the desired shape, ensuring that the bend is sharp and clean.
Apply Primer
Apply a primer on the surface where the L-shaped flashing will be installed. This will help the flashing adhere better to the surface.
Apply Sealant
Apply a generous amount of sealant to the surface and place the L-shaped flashing into the sealant. Make sure it’s centered and level.
Secure the Flashing
Use roofing nails or roofing screws to secure the L-shaped flashing to the surface. Ensure that the nails or screws are spaced evenly and driven securely into the surface.
Clean Up
Clean up any excess sealant or debris.
By following these steps, you can successfully install L-shaped flashing to protect your roof from water damage.
Final Words
Installing L-shaped flashing is an important step in protecting your home against water damage. This process involves measuring the area where the flashing will be installed, cutting the flashing to the right size, and attaching it to the wall or roof with a sealant.
Using the proper tools and materials is crucial to ensure a secure and long-lasting installation. By following these steps, you can help prevent leaks and protect your home from water damage.
Flashing where siding meets concrete is essential to prevent water infiltration and damage. Proper installation and sealing can extend the life of your siding and foundation. For more home improvement tips, check out our guide on premixed thinset vs. mix-it-yourself. If you’re working on flooring projects, our insights on using OSB for attic flooring and unmodified thinset for porcelain tile can be valuable.