Cabinet Falling Off Wall? Emergency Fix & Prevention
That horrifying moment when you see a gap forming between your wall cabinet and the wall is a homeowner’s nightmare. It’s not just a cosmetic issue; it’s a serious safety hazard that signals an impending collapse. A falling cabinet can cause severe injury and extensive damage to your kitchen.
The good news is that you can often fix this problem yourself before disaster strikes. This guide will walk you through the warning signs, the root causes, and the precise steps to re-secure your cabinet, making it stronger than ever before.
You'll Learn About
Warning Signs: Is Your Cabinet a Ticking Time Bomb?
An impending cabinet failure rarely happens without warning. Your home will send you subtle clues that something is wrong. Learning to spot these signs is the key to preventing a catastrophe.
Visible Gaps and Tilting
The most obvious red flag is a visible gap opening up between the back of the cabinet and the wall. You might notice it at the top or bottom first. The cabinet may also appear to be tilting or leaning forward, a clear sign the fasteners are losing their grip.
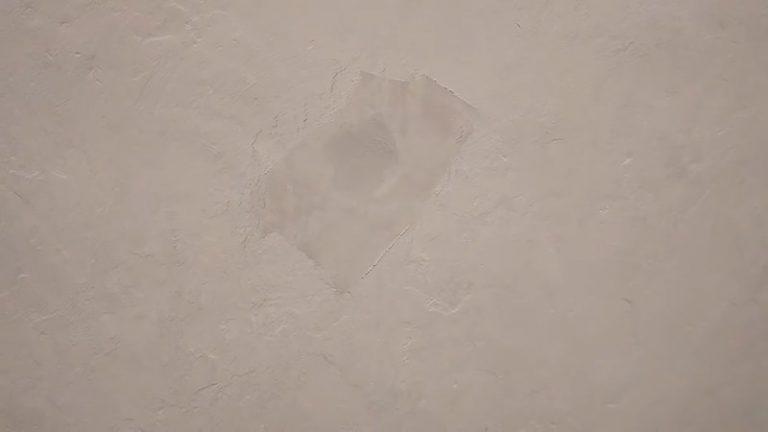
Fine Drywall Dust
Have you noticed a fine, white powder on the countertop directly beneath your upper cabinets? This isn’t just regular dust. It’s drywall dust, created as the screws pull through the wall material under the cabinet’s weight.
Sticking or Misaligned Doors
If your cabinet doors suddenly start sticking, won’t close properly, or look crooked, it’s a strong indication the entire cabinet box is shifting. This warping puts uneven stress on the mounting points, accelerating the failure.
Sagging Shelves
While a sagging shelf itself might not cause a collapse, it’s a symptom of a larger problem: overloading. Consistently exceeding the weight capacity puts immense strain not just on the shelf, but on the screws holding the entire unit to the wall.
Why Do Cabinets Fall? Uncovering the Root Causes
Understanding why your cabinet is failing is crucial to implementing a permanent fix. In almost every case, the issue can be traced back to a few common culprits related to installation and usage.
Improper Installation: The Number One Culprit
The single most common reason for cabinet failure is improper installation. Wall cabinets must be anchored directly into the wooden wall studs, which form the structural frame of your home. Attaching a heavy cabinet only to drywall is a recipe for disaster, as drywall itself has very little holding power.
Installers might also fail to use enough screws or place them incorrectly. A standard wall cabinet should have at least two screws driven firmly into two separate studs through its reinforced top hanging rail.
The Wrong Fasteners for the Job
Even if an installer hits the studs, using the wrong type of screw can lead to failure. Standard drywall screws are brittle and not designed to bear heavy, shearing loads. They can snap under the constant strain of a loaded cabinet. Cabinet installation requires specific cabinet screws, which have a larger head (for better holding power) and are made of stronger, more ductile steel.
Weight Overload: Exceeding Your Cabinet’s Limits
Every cabinet has a weight limit, which is influenced by its construction and how well it’s mounted. Standard wall cabinets are typically rated to hold around 50 to 60 pounds per linear foot. Loading them up with heavy stacks of plates, glassware, and bulk food items can easily exceed this limit.
Wall Material and Condition
The condition of your wall plays a significant role. Older plaster walls can be brittle, and repeated moisture exposure from cooking or leaks can soften drywall, compromising its integrity. Poor wall integrity is sometimes related to bigger issues; for example, if your house has no insulation how to fix insulate properly_gem1, you might face condensation problems that weaken the wall structure over time.
Cabinet Age and Material Failure
The cabinet itself can be the point of failure. Over time, the glue and staples holding cheaper particleboard or MDF cabinets together can degrade. The screws might hold firm in the wall, but they can pull right through the flimsy backing material of the cabinet.
Your Immediate Action Plan: What to Do RIGHT NOW
If you suspect your cabinet is actively falling, you need to act immediately to ensure everyone’s safety. Do not wait. Follow these steps without delay.
Step 1: Empty the Cabinet Immediately. Carefully remove every single item from the cabinet to take all the weight off the failing fasteners. Start with the heaviest items on the bottom shelves.
Step 2: Temporarily Support the Cabinet. Once empty, brace the cabinet from underneath. You can use a stack of books, a sturdy box, a bar stool, or cut a piece of 2×4 lumber to the exact height to wedge it securely between the countertop and the cabinet bottom.
The Ultimate Guide to Re-Securing Your Wall Cabinet
With the immediate danger averted, you can now focus on a permanent and secure repair. Taking the time to do this correctly will ensure your cabinet is safe for years to come. Do not simply drive more screws into the same area; you need to address the root cause.
Gathering Your Tools and Materials
Before you begin, assemble everything you need. This will make the process smoother and prevent you from leaving a cabinet unsecured while you search for a tool.
You will need a stud finder, a drill with various bits, a level, a pencil, clamps (if securing to an adjacent cabinet), and protective eyewear. For materials, get high-quality #10 x 3-inch cabinet screws (with built-in washer heads), wood shims, and potentially some L-brackets for extra reinforcement.
Step 1: Locate the Wall Studs
This is the most critical step of the entire process. Use an electronic stud finder to locate the vertical wooden studs behind the drywall. Mark the center of at least two studs within the cabinet’s width with a pencil.
Verify the stud locations by drilling a tiny pilot hole. If you feel solid wood after passing through the drywall, you’ve found your anchor point. If not, patch the small hole and try again.
Step 2: Prepare and Position the Cabinet
With the cabinet still supported from below, remove the old, failing screws. Now, push the cabinet firmly so it sits flush against the wall. If the wall is bowed, slide thin wood shims into the gaps at the top or bottom until the cabinet is plumb (perfectly vertical), which you can check with your level.
Step 3: Drill Pilot Holes and Drive New Screws
Through the sturdy, reinforced hanging rail inside the top of the cabinet, drill a pilot hole (slightly smaller than your screw’s diameter) at each marked stud location. Driving the new cabinet screws will be much easier and prevent the wood from splitting.
Using your drill, drive a 3-inch cabinet screw through each pilot hole until it is snug. The screw should penetrate at least 1.5 inches into the stud itself. Do not overtighten, as this can strip the wood or damage the cabinet.
Step 4: Add Extra Reinforcement (Optional but Recommended)
For peace of mind, especially with a heavily loaded cabinet, add more support. You can install metal L-brackets on the inside, securing one side to the top or bottom of the cabinet and the other into a wall stud. You can also drive screws through the cabinet’s bottom rail into the studs for additional stability.
Choosing the Right Hardware: A Pro’s Guide
The success of your repair depends heavily on using the right fasteners. Not all screws are created equal. The table below breaks down the best choices for securing your cabinets based on your wall type.
| Fastener Type | Best Use Case | Wall Type | Holding Power |
|---|---|---|---|
| Cabinet Screw | The gold standard for all installations. | Drywall into Wood Stud | Excellent |
| Lag Screw | For extremely heavy loads or concrete walls. | Wood Stud / Concrete Block | Maximum |
| Toggle Bolt | Use only when a stud is not available. | Hollow Drywall / Plaster | Good |
| SnapToggle Anchor | A modern, stronger version of the toggle bolt. | Hollow Drywall / Plaster | Very Good |
Prevention is the Best Medicine: How to Stop it From Happening Again
Once your cabinet is securely back in place, adopt a few best practices to ensure it stays there. A little bit of awareness goes a long way in preventing future problems.
Respect Weight Limits
Be mindful of what you’re storing in your wall cabinets. Heavy items like cast iron cookware, small appliances, or large sets of dishes are best stored in base cabinets where their weight is supported by the floor. Distribute weight as evenly as possible.
Perform Regular Inspections
About once a year, take a moment to inspect your cabinets. Look for any new gaps forming or doors that have gone out of alignment. Gently try to wiggle the cabinet to see if it feels loose. Catching issues early makes the fix much easier.
Focus on Proper Installation From the Start
If you’re installing new cabinets, insist on proper, professional techniques. The principles are the same for other wall-mounted items. Whether you’re learning how to flush mount a frameless mirror_gem1 or hanging shelves, always anchor into studs.
When to Call a Professional
While this is a manageable DIY project for many, there are times when it’s best to call a professional carpenter or handyman. If you see significant damage to the wall or the cabinet itself, if multiple cabinets are loose, or if you simply don’t feel confident in your ability to secure it safely, make the call.
Professionally repairing a cabinet can cost between $150 and $500, depending on the extent of the damage and labor rates in your area. This is a small price to pay for safety and peace of mind.
Fixing a loose cabinet is a task that brings immediate relief. It turns a source of anxiety into a testament to your capability as a homeowner. Just like tackling other home frustrations, such as when you i hate the color of my new roof_gem1, addressing problems head-on protects your investment and makes your house feel more like a secure, well-cared-for home.