How to Diagnose Refrigerator Problems?
Diagnosing a refrigerator problem requires several steps. Firstly, check to ensure that the refrigerator is properly plugged in and that there is no power issue in the kitchen. If everything looks good, inspect the temperature gauge inside the appliance to see if it has been bumped, causing the temperature to rise.
Then, check the vents between the freezer and refrigerator and the drain tube for debris and ice, as clogged vents can prevent the proper flow of air. Additionally, test the door seals by placing a piece of paper between the seals and the appliance.
If the paper can be easily removed, the seals may be worn out. Finally, test the continuity of the refrigerator’s components, such as the condenser fan, the overload protector, and the compressor relay and motor, using a multimeter.
A fault in any one of these components can cause the refrigerator to cycle improperly and affect its cooling ability.
You'll Learn About
Step 1: Ensure Proper Power Supply
A functioning refrigerator requires a proper power supply to operate correctly. The first step in diagnosing refrigerator problems is to check if the appliance is properly plugged in and receiving power. If you find that the refrigerator is not properly plugged in, simply plug it into an electrical outlet to see if that resolves the issue.
Check if the Refrigerator is Properly Plugged in
The most common cause of a refrigerator not working is simply being unplugged. Before you start checking any other parts of the refrigerator, make sure that it is properly plugged into an electrical outlet.
If the plug is loose, this can cause the refrigerator to stop working. To properly plug in the refrigerator, make sure the plug is fully inserted into the outlet and the outlet is turned on.
Check the Kitchen Circuit for Power Issues
Another reason why a refrigerator may not be working is due to power issues in the kitchen circuit. Before you start checking any parts of the refrigerator, check the circuit breaker to see if it has tripped.
If it has, simply reset the breaker and see if the refrigerator starts working again. If the circuit breaker is not tripped and the refrigerator is still not working, you may have a more serious issue with your kitchen electrical system and should consult a licensed electrician.
Checking the proper power supply is the first step in diagnosing refrigerator problems. By checking if the refrigerator is properly plugged in and the kitchen circuit for power issues, you can ensure that the appliance has the proper power supply to function correctly. If you find that the power supply is not the issue, move on to the next step in diagnosing the problem.
Step 2: Check the Temperature Gauge
The temperature gauge inside the refrigerator is a critical component that helps regulate the temperature within the appliance. If the gauge is not set correctly, it can result in the refrigerator not cooling enough, which can cause food spoilage and other problems.
How the Gauge Can Affect the Temperature
The temperature gauge is used to set the desired temperature for the refrigerator. If the gauge is set too high, the refrigerator will not be cold enough, causing food and drinks to spoil. On the other hand, if the gauge is set too low, the refrigerator will be too cold, causing food and drinks to freeze.
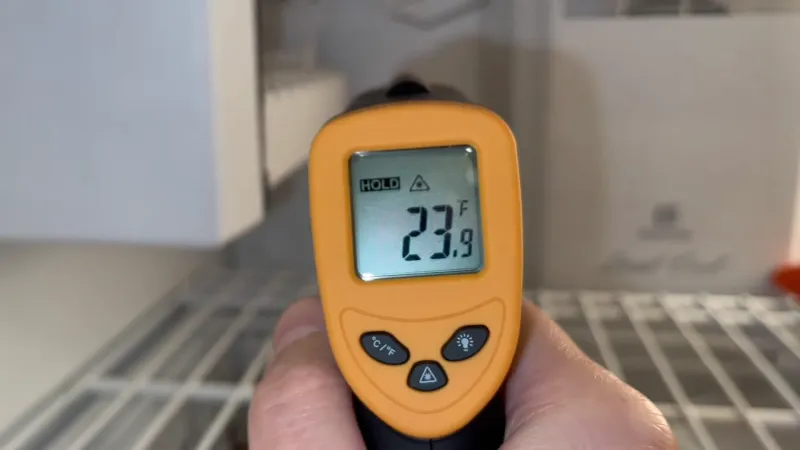
How to Properly Check the Gauge
To properly check the temperature gauge, start by unplugging the refrigerator and finding the gauge, which is typically located on the interior of the appliance. The gauge is usually a dial or digital display that can be adjusted to the desired temperature.
To check the gauge, set it to the recommended temperature, typically between 37 and 40 degrees Fahrenheit for the refrigerator and 0 to 5 degrees Fahrenheit for the freezer. Once the gauge is set correctly, plug the refrigerator back in and wait 24 hours to see if the temperature stabilizes.
Checking the temperature gauge is a crucial step in diagnosing refrigerator problems. If the gauge is not set correctly, it can result in the refrigerator not cooling enough, causing food spoilage and other problems.
By properly checking the gauge and setting it to the recommended temperature, you can help ensure that the appliance is working correctly and keeping your food and drinks at the proper temperature.
Step 3: Inspect the Vents
The vents between the freezer and refrigerator and the drain tube play an important role in the proper functioning of the refrigerator. Clogged vents can cause the appliance to not cool enough and result in other problems.
How Clogged Vents Can Cause Problems
The vents between the freezer and refrigerator and the drain tube help circulate air and remove moisture, which is critical to keeping the refrigerator at the proper temperature. If the vents become clogged with debris or ice, air circulation will be restricted, and the refrigerator will not cool properly. In addition, clogged vents can cause the buildup of excess moisture, leading to the growth of mold and bacteria, which can result in unpleasant odors and food spoilage.
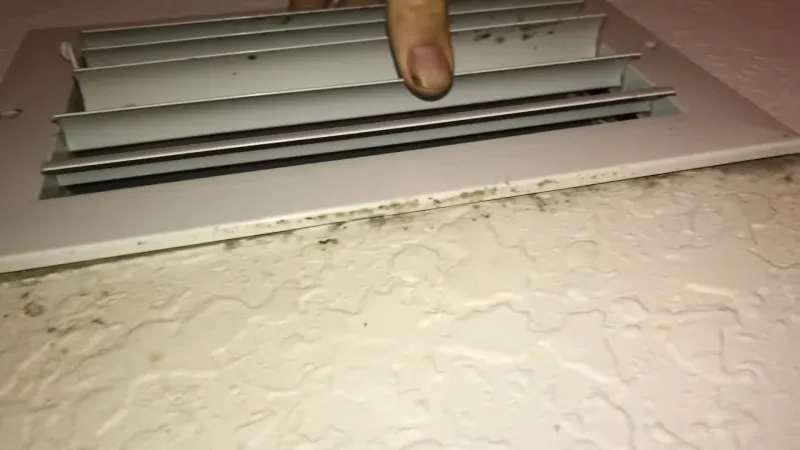
Inspect the Vents Between the Freezer and Refrigerator and the Drain Tube
To inspect the vents, start by unplugging the refrigerator and locating the vents, which are typically located near the top of the appliance. Check the vents for any debris, such as food particles or dust, and remove it.
Also, check for any signs of ice buildup and remove it if necessary. To inspect the drain tube, locate it near the bottom of the appliance and check for any signs of clogging, such as debris or ice. If you find any clogs, remove them to restore proper air circulation and remove excess moisture.
Inspecting the vents is a critical step in diagnosing refrigerator problems. Clogged vents can cause the appliance to not cool properly and result in other problems, such as the buildup of excess moisture and the growth of mold and bacteria.
By regularly inspecting the vents and removing any debris or ice buildup, you can help ensure that the refrigerator is functioning correctly and keeping your food and drinks at the proper temperature.
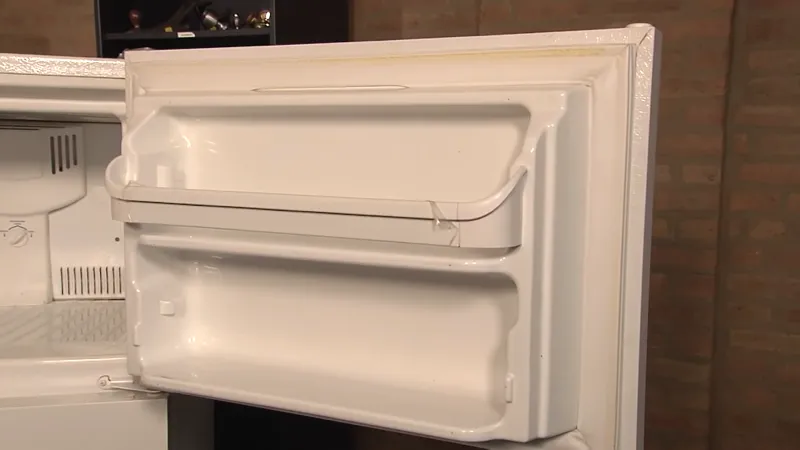
Step 4: Test the Door Seals
The door seals of a refrigerator play a critical role in ensuring that the appliance can maintain the correct temperature. The seals prevent cold air from escaping and warm air from entering the appliance, which can affect the cooling. If the door seals are worn out or damaged, the cold air will escape, and the warm air will enter, causing the appliance to work harder to maintain the temperature, leading to increased energy consumption and higher bills.
How to Test the Door Seals With a Piece of Paper
To test the door seals, you can use a piece of paper. Close the refrigerator door and insert the piece of paper between the door and the appliance, making sure it’s in contact with the seal. If you can easily remove the paper, it means that the seal is not providing a tight fit and needs to be replaced.
A simple way to test if the door seals are working correctly is to place a piece of paper between the seal and the door and try to pull it out. If you can easily remove the paper, the seals are not tight and may need to be replaced.
Ensuring that the door seals are in good condition is a crucial step in diagnosing refrigerator problems. A simple test with a piece of paper can determine if the seals need to be replaced, which can help keep your refrigerator running smoothly and efficiently.
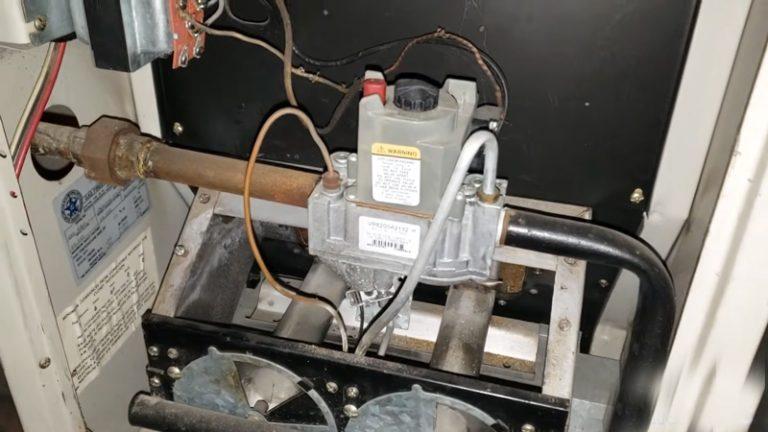
Step 5: Test the Components
A functioning refrigerator has several components that work together to keep your food and drinks at the right temperature. The components include the condenser fan, the overload protector, the compressor relay and motor, among others. If one of these components is not working properly, it can cause your refrigerator to cycle improperly and result in suboptimal cooling.
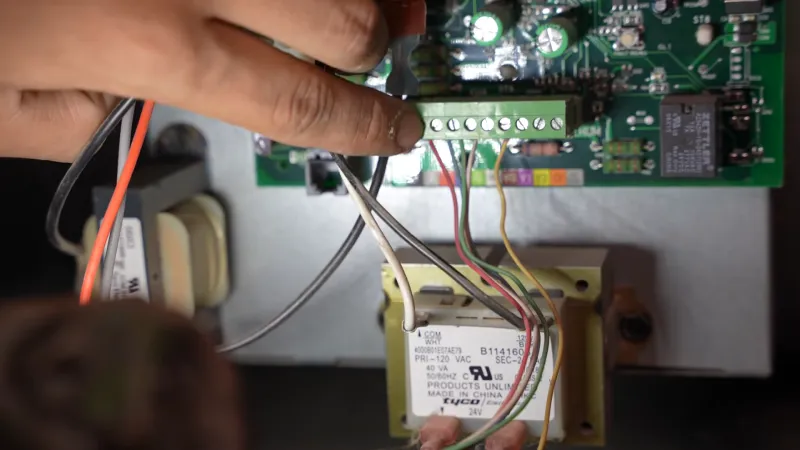
How to Test the Components Using a Multimeter
To test the components, you will need to use a multimeter. A multimeter is an electronic testing tool that measures various electrical properties of a component, including continuity, resistance, and voltage.
To use a multimeter to test the components of your refrigerator, you need to know how to set it to measure continuity. Once you have set it to continuity mode, touch the multimeter probes to the terminals of each component and see if it shows continuity.
If the multimeter shows continuity, the component is working properly. If not, it may be faulty and needs to be replaced.
Components to Test
Condenser Fan
This component helps to dissipate heat from the refrigerant. To test the condenser fan, unplug the refrigerator and remove the fan cover. Touch one probe of the multimeter to each of the fan’s two wires and see if the multimeter shows continuity.
If it does, the fan is functioning properly.
Overload Protector
The overload protector is responsible for protecting the compressor from damage due to excessive current. To test it, unplug the refrigerator and locate the overload protector near the compressor. Touch one probe of the multimeter to the overload protector’s two terminals and see if the multimeter shows continuity.
If it does, the overload protector is functioning properly.
Compressor Relay and Motor
The compressor relay is responsible for turning the compressor on and off, and the motor is responsible for compressing the refrigerant. To test the relay and motor, unplug the refrigerator and locate the relay near the compressor.
Touch one probe of the multimeter to the relay’s two terminals and see if the multimeter shows continuity. If it does, the relay is functioning properly. Next, touch one probe of the multimeter to each of the motor’s two wires and see if the multimeter shows continuity.
If it does, the motor is functioning properly.
Diagnosing and fixing refrigerator problems can be a simple and straightforward process if you follow these steps. If you’re not comfortable with using a multimeter or if the problem persists after you have completed these steps, it is best to call a professional repair service for further assistance.
Bosch 800 Series Refrigerator Problems and Solutions
Conclusion
Diagnosing refrigerator problems can seem like a daunting task, but by following these five steps, you can easily identify and resolve any issues with your appliance. Ensuring proper power supply, checking the temperature gauge, inspecting the vents, testing the door seals, and testing the components are all important steps to take to keep your refrigerator functioning properly.
Taking the time to diagnose and resolve any issues can save you money and prevent food waste in the long run. Remember to always unplug the refrigerator before making any repairs and if you are unsure of what to do, it is best to seek the help of a professional.