House Loses 1 Degree Per Hour? The #1 Reason Your Home is Leaking Money
It’s a frustratingly common scenario for homeowners. You feel a chill, check the thermostat, and see the temperature has dropped yet again, forcing the furnace to kick on. If you’ve noticed your house loses 1 degree per hour, or even faster, you’re not just imagining it. This is a clear sign that your home is struggling to retain heat, a problem that directly impacts both your comfort and your wallet.
This steady temperature drop is more than a minor annoyance; it’s a symptom of a larger issue known as building envelope inefficiency. Your home is essentially leaking the expensive, heated air you’re paying for into the outdoors. Understanding the causes behind this heat loss is the first step toward creating a more comfortable and energy-efficient living space.
You'll Learn About
Is Losing 1 Degree Per Hour a Serious Problem?
While some heat loss is inevitable in any home, a consistent drop of one degree every hour indicates that your home’s heat retention is significantly compromised. In milder weather, this might be less noticeable, but during a cold snap, it means your heating system is working overtime, leading to astronomical energy bills and excessive wear and tear on the equipment.
The “normal” rate of heat loss depends on factors like the age of your home, its size, and the severity of the outdoor weather. However, a modern, well-insulated, and properly sealed home should lose heat much more slowly. If your home feels drafty and the temperature plummets the moment the furnace shuts off, it’s time to investigate the underlying causes.
The Primary Culprits: Unmasking Your Home’s Heat Thieves
Heat always moves from warmer areas to cooler areas, and it will always find the path of least resistance. When your house loses heat rapidly, it’s because there are multiple easy pathways for it to escape. Identifying these “heat thieves” is crucial to solving the problem.
The Insulation Breakdown
Insulation is the single most important barrier against heat loss. Its effectiveness is measured in R-value—the higher the R-value, the better it resists heat flow. When insulation is old, compressed, damaged by moisture, or simply insufficient, its R-value plummets, and heat escapes through your ceilings and walls.
Many older homes were built with minimal insulation, and even newer homes can have gaps or settled areas. If your house has no insulation in key areas like the attic, the problem will be severe. The attic is a primary culprit, as warm air naturally rises and will escape directly through an under-insulated ceiling.
Air Leaks: The Invisible Enemy
You can have the best insulation in the world, but if your home is riddled with small cracks and gaps, heated air will flow right out. This process, known as air infiltration or leakage, can account for up to 40% of a home’s heating and cooling costs. Air leaks are the invisible enemy of energy efficiency.
These leaks commonly occur around window and door frames, through electrical outlets and switch plates on exterior walls, in recessed lighting fixtures, and at the attic access hatch. Even tiny gaps can collectively allow a massive amount of heated air to escape while letting cold air in, creating uncomfortable drafts.
Underperforming Windows and Doors
Windows and doors are essentially giant holes in your home’s insulated barrier. Older, single-pane windows offer very little resistance to heat transfer. The difference between a single-pane and a modern double-pane, low-E window is dramatic in terms of preventing heat loss.
Even with double-pane windows, a failed seal between the panes can compromise their insulating ability, often indicated by condensation or fogging on the inside surfaces. Likewise, worn-out weatherstripping and door sweeps create significant gaps that allow drafts and accelerate heat loss.
Foundation and Sill Plate Gaps
An often-overlooked area of significant heat loss is the foundation. The sill plate, where the wooden frame of your house rests on the concrete foundation, is a notorious spot for air leakage. Without proper sealing, cold air can infiltrate this gap and cool your entire home from the ground up.
Furthermore, an uninsulated basement or crawlspace foundation acts as a heat sink, constantly pulling warmth from the floor above. Properly insulating this area is a critical step in creating a truly warm home. For some, adding insulation like Styrofoam around the house foundation can provide a significant thermal break.
Your Step-by-Step Diagnostic Plan: Become a Heat Loss Detective
Before you can fix the problem, you need to find the specific areas where your home is losing heat. You can uncover a surprising amount of information with a few simple DIY tests before deciding if you need to call in a professional.
Step 1: The DIY Visual Inspection
Start by performing a thorough walkthrough of your home. Look for visible cracks or gaps in the caulking around windows and doors, both inside and out. Check the weatherstripping on all exterior doors; is it compressed, cracked, or missing in spots? Also, inspect the insulation in your attic. It should be evenly distributed and free of dirty or dusty spots, which can indicate air is filtering through it.
Step 2: The Incense Stick Test for Air Leaks
This simple test is remarkably effective for pinpointing drafts. On a cool and slightly windy day, turn off your furnace and any fans to make the air in your home as still as possible. Light an incense stick and carefully hold it near common leak points.
Pass the incense stick along window and door frames, around electrical outlets, and near the edges of the floor along exterior walls. If you see the smoke waver, get drawn into a crack, or get blown into the room, you’ve found an air leak that needs sealing.

Step 3: When to Call for a Professional Energy Audit
While DIY methods are a great start, the gold standard for diagnosing heat loss is a professional home energy audit. An energy auditor uses specialized equipment, including a blower door and an infrared camera, to provide a comprehensive and scientific assessment of your home’s performance.
The blower door test depressurizes your home, making it easy to feel and measure all the air leaks. The infrared camera creates a visual map of your home’s temperature, instantly revealing where heat is escaping through walls, ceilings, and around windows, as seen in the thermal image above. This provides an exact roadmap for making the most impactful improvements.
The Ultimate Heat-Saving Blueprint: Solutions That Work
Once you’ve identified the culprits, you can implement a targeted plan to stop heat loss in its tracks. The most effective approach combines air sealing with insulation upgrades for a comprehensive solution.
Sealing the Envelope: Your First Line of Defense
Air sealing is often the most affordable and impactful improvement you can make. Use a high-quality caulk to seal any stationary cracks and gaps around window and door trim. For moving parts, like the opening sections of doors and windows, install new weatherstripping.
Pay special attention to plumbing and wiring penetrations in exterior walls and use expanding foam sealant to close larger gaps. Don’t forget the attic hatch; apply weatherstripping around the opening and add rigid foam insulation to the back of the hatch itself. This is your first and best defense against drafts.
Upgrading Your Insulation: A Long-Term Investment
Adding insulation, especially in the attic, provides one of the highest returns on investment of any home improvement project. The goal is to meet or exceed the recommended R-values for your specific climate zone. A well-insulated attic acts like a warm hat for your house, keeping the heat where it belongs.
While wall insulation is more complex to upgrade, it can be done by professionals who can blow dense-pack insulation into the wall cavities. Below is a table showing the Department of Energy’s recommended home insulation R-values based on climate zone.
| Climate Zone | Attic R-Value | Wall R-Value | Floor R-Value |
|---|---|---|---|
| Zone 1 | R30 to R49 | R13 to R15 | R13 |
| Zone 2 | R30 to R60 | R13 to R15 | R13 to R19 |
| Zone 3 | R30 to R60 | R13 to R15 | R19 to R25 |
| Zone 4 | R38 to R60 | R13 to R15 | R25 to R30 |
| Zone 5 | R49 to R60 | R13 to R21 | R25 to R30 |
| Zone 6 | R49 to R60 | R13 to R21 | R30 to R38 |
| Zone 7 & 8 | R49 to R60 | R21+ | R30 to R38 |
Window and Door Strategies
If new windows aren’t in the budget, you can dramatically improve the performance of your existing ones. Applying insulating window film can reduce heat loss by up to 30%. In colder climates, installing exterior storm windows or interior window insulation panels can create an effective second barrier.
For doors, ensure a tight seal with a new threshold and a full set of weatherstripping. A simple door snake placed at the bottom can also help block drafts. For sliding glass doors, heavy thermal curtains can make a world of difference, especially at night.
Beyond the Basics: Advanced Heat Retention Strategies
To truly optimize your home’s performance, it’s worth considering some advanced concepts that go beyond simple sealing and insulating. These strategies tackle less obvious sources of heat loss that can make a big impact.
The Unseen Heat Loss: Thermal Bridging
Thermal bridging occurs when heat is transferred through the very frame of your house. Wood studs, while better than metal, still have a much lower R-value than the insulation between them. This means that every stud in your wall is a “bridge” for heat to escape.
One of the most effective ways to combat this is by adding a layer of continuous rigid foam insulation to the exterior of the house, typically done when replacing siding. This thermal break covers the studs and dramatically improves the overall R-value of the entire wall assembly, not just the cavities.
Optimizing Your HVAC and Ventilation
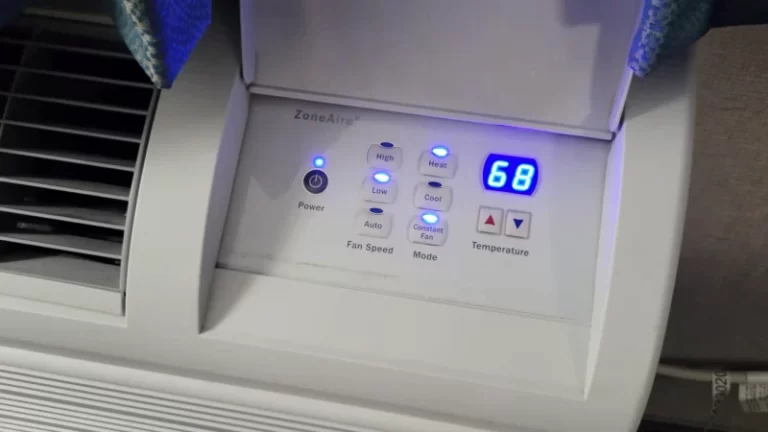
Sometimes, rapid temperature swings are exacerbated by an oversized or inefficient heating system. A furnace that is too large for the space will heat it up very quickly and then shut off, a cycle known as short-cycling. This can lead to noticeable temperature drops between cycles and is highly inefficient.
As you tighten your home by sealing air leaks, it’s also important to consider mechanical ventilation. A super-tight home needs a way to bring in fresh air without losing all its heat. A Heat Recovery Ventilator (HRV) or Energy Recovery Ventilator (ERV) is a system that exhausts stale air while using its heat to pre-warm the incoming fresh air, providing ventilation with minimal energy penalty.
In the quest for warmth, avoid risky temporary solutions. Overloading circuits with multiple space heaters is a significant fire hazard. Never use an appliance with a frayed or damaged cord, and be cautious about where you source your equipment. Using a proper, heavy-gauge wire like a Romex extension cord is critical for high-power devices, but even that is not a permanent solution for a home’s fundamental heating issues.
Conclusion: Reclaiming Your Comfort and Your Wallet
A house that loses 1 degree per hour is not just a drafty house—it’s an inefficient and expensive one. The constant battle between your heating system and the cold outdoors is one you are paying for every single month on your utility bill.
By taking a systematic approach—diagnosing the sources of heat loss, meticulously sealing air leaks, and strategically upgrading insulation—you can transform your home. You can create a comfortable, stable indoor environment that stays warm long after the furnace has turned off. Stop paying to heat the neighborhood and start investing in a home that holds its warmth and protects your budget.