Convert Flood Light to Outlet? Unlock Hidden Power Outside
Running out of outdoor power outlets is a common frustration. You have holiday lights to hang, power tools for a weekend project, or maybe a speaker for the patio, but nowhere convenient to plug them in. Often, the perfect spot for an outlet is already occupied by an outdoor flood light. This guide solves that exact problem.
This article provides a detailed, step-by-step process to safely convert an existing flood light fixture into a fully functional, weatherproof outdoor outlet. Tapping into this existing wiring is an efficient way to add the convenience of power right where you need it most, without the much larger project of running a brand new electrical circuit from your panel.
You'll Learn About
Why Convert a Flood Light to an Outlet?
The primary benefit of this conversion is convenience. Outdoor outlets enhance the functionality of your yard, patio, and garden spaces. Having accessible power opens up possibilities for decorative lighting, outdoor entertainment systems, and makes yard work with electric tools significantly easier. By using the flood light’s location, you are placing an outlet in a strategic, often elevated, position perfect for a variety of uses.
This project leverages existing infrastructure, making it a cost-effective solution. The wiring is already in place, which means you avoid the complex and costly task of running new wires through walls and conduit from your home’s main electrical panel. It’s an intelligent upgrade that adds real value and utility to your property.
Understanding the Basics First: Safety and Feasibility
Before beginning any electrical work, safety is the absolute top priority. This project is manageable for a DIYer with a basic understanding of electrical wiring, but it’s crucial to be honest about your skill level. If you are ever unsure, hiring a licensed electrician is the safest choice.
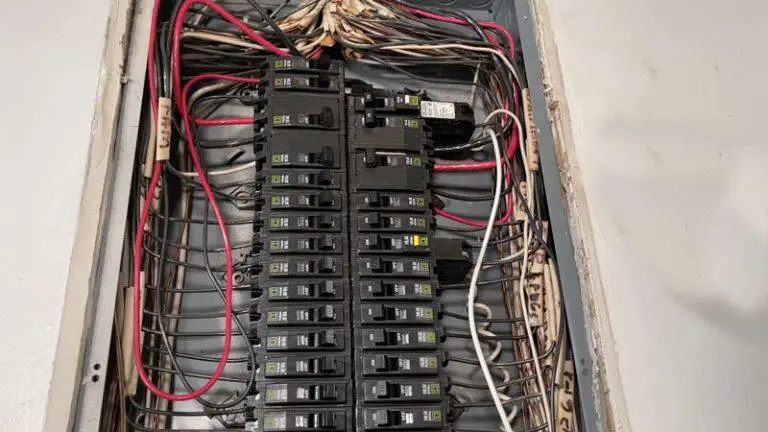
First, you must confirm that the circuit can handle the additional load of an outlet. Lighting circuits are typically 15-amp circuits. While this is sufficient for most outdoor applications like string lights or small tools, you should avoid plugging in high-power devices that could overload the circuit. Check your circuit breaker panel to identify the amperage of the circuit connected to your flood light.
Another key consideration is that the new outlet will be controlled by the same switch that operated the flood light. This means the switch inside your home must be in the “on” position for the outlet to have power. For some, this is a useful feature, acting as a quick shut-off. For others, it may be an inconvenience. One solution is to place a childproof safety cover over the switch indoors to prevent it from being turned off accidentally.
Tools and Materials You’ll Need
Gathering all your tools and materials before you start will make the process smooth and efficient. Having the right equipment is not just about convenience; it’s a critical part of ensuring the job is done safely and correctly.
Properly equipping yourself minimizes return trips to the hardware store and helps you adhere to safety standards for outdoor electrical work. A non-contact voltage tester, for example, is non-negotiable for verifying that power is truly off before you touch any wires.
Essential Equipment for the Conversion
Having the correct components, especially those rated for outdoor use, is vital for a durable and safe installation. Weatherproof boxes and “in-use” covers are designed to protect the electrical connections from rain, snow, and moisture, preventing short circuits and corrosion.
Using a GFCI (Ground Fault Circuit Interrupter) outlet is a mandatory safety requirement for almost all outdoor receptacles. It provides crucial protection against electric shock by instantly cutting power if it detects an imbalance in the current, which can happen if moisture enters the system. Do not skip this critical safety device.
| Item | Description | Purpose |
|---|---|---|
| GFCI Outlet | 15-amp or 20-amp, weather-resistant (WR) rated | Provides essential shock protection for outdoor use. |
| Weatherproof Outlet Box | Round or rectangular, depending on mounting surface | Encloses the wiring and outlet to protect from elements. |
| Weatherproof “In-Use” Cover | A deep cover that protects plugs while in use | Ensures protection from moisture even when items are plugged in. |
| Non-Contact Voltage Tester | Pen-style tester | Safely confirms that electrical power is off before you begin work. |
| Screwdrivers | Phillips and flat-head | For removing the old fixture and installing the new box and outlet. |
| Wire Strippers/Cutters | Standard electrical tool | To strip insulation from wires for clean connections. |
| Wire Connectors (Wire Nuts) | Assorted sizes | To securely connect the existing wires to the new outlet. |
| Caulk or Sealant | Exterior-grade silicone | To seal the gap between the new electrical box and the wall. |
Step-by-Step Guide to Converting Your Flood Light
Follow these instructions carefully to ensure a safe and successful conversion. Each step is designed to guide you through the process logically, from initial safety checks to the final testing of your new outlet.
Remember to work slowly and deliberately. Rushing through electrical work can lead to mistakes that compromise safety and function. Double-check your connections at each stage.
Step 1: Shut Off the Power Completely
This is the most critical step for your safety. Go to your main electrical panel (breaker box) and locate the circuit breaker that controls the flood light. Switch it to the “OFF” position. If your breakers are not clearly labeled, you may need to turn on the flood light and then switch off breakers one by one until the light goes out.
After flipping the breaker, go back to the flood light’s wall switch and flip it to the “ON” position. Then, use your non-contact voltage tester at the fixture itself to confirm there is absolutely no power. The tester should not light up or make any noise. This double-check ensures the circuit is dead.
Step 2: Remove the Old Flood Light Fixture
With the power confirmed off, you can safely remove the old fixture. Most flood lights are held in place by one or two mounting screws. Carefully unscrew these while supporting the fixture to prevent it from falling.
Once the fixture is loose, gently pull it away from the wall to expose the electrical wiring. You will typically see three wires: a black (hot), a white (neutral), and a bare copper or green (ground) wire. These will be connected with wire nuts. Carefully unscrew the wire nuts to disconnect the fixture completely and set it aside.
Step 3: Prepare the Electrical Box and Wiring
Inspect the existing electrical box. If it’s a standard box suitable for an outlet and is in good condition, you can reuse it. However, many flood lights are mounted on round “pancake” boxes that are too shallow. In this case, you will need to replace it with a standard weatherproof box.
Mount your new weatherproof electrical box securely to the wall, feeding the existing wires through the opening in the back. Use exterior-grade caulk to seal the top and sides of the box against the wall to prevent water from getting behind it. Inspect the ends of the wires; if they are frayed or damaged, use your wire strippers to trim them and expose about 3/4 inch of fresh copper.
Step 4: Wire the GFCI Outlet
A GFCI outlet has specific terminals for “LINE” and “LOAD.” The incoming power wires must be connected to the “LINE” terminals. The “LOAD” terminals are used only if you are extending the circuit to protect other outlets downstream. For this project, you will only use the LINE terminals.
Connect the black (hot) wire from the wall to the brass screw on the LINE side of the GFCI outlet. Connect the white (neutral) wire to the silver screw on the LINE side. Connect the bare copper or green (ground) wire to the green ground screw on the outlet. Ensure all connections are tight and secure.
Step 5: Install the Outlet and Weatherproof Cover
Gently fold the wires back into the electrical box. Carefully push the GFCI outlet into the box and secure it with the provided mounting screws. Do not overtighten, as this can crack the outlet.
Next, install the weatherproof “in-use” cover over the outlet according to the manufacturer’s instructions. These covers are essential for outdoor safety, as they protect the outlet from rain and moisture even when a cord is plugged in. Ensure the gasket provides a tight seal against the box.
Step 6: Restore Power and Test Your New Outlet
With the outlet and cover securely installed, go back to your electrical panel and switch the breaker back to the “ON” position. Return to the wall switch that previously controlled the flood light and turn it on.
Your GFCI outlet should have a small indicator light; check that it is on (usually green), indicating it has power and is working correctly. Press the “TEST” button on the outlet. You should hear a click, and the power should cut off. Then, press the “RESET” button to restore power. Finally, plug in a small device, like a lamp or a phone charger, to confirm the outlet is fully functional.
Advanced Considerations and Best Practices
Beyond the basic installation, there are other factors to consider for a truly professional and robust setup. Understanding the circuit’s limitations and choosing the right materials for your specific climate can make a big difference in the longevity and safety of your new outlet.
For instance, while a standard lighting circuit is fine for light-duty use, being mindful not to overload it is crucial. This is especially important during holidays when multiple strings of lights might be used. If you know you’ll have high-power needs, such as for large power tools or an electric smoker, consulting an electrician about adding a dedicated circuit might be a better long-term solution.
Circuit Load and Switched Power
Always be aware that your new outlet is on a shared lighting circuit. Before you begin, take a moment to identify what other lights or devices are on the same circuit to avoid accidentally overloading it. Lighting circuits are generally not designed for heavy-duty appliances.
The fact that the outlet is controlled by a switch can be both a pro and a con. It offers a convenient way to turn off power to anything plugged in, which is great for holiday lights. However, if you’re using it to power something like a security camera, you’ll need to ensure the switch is never accidentally turned off. A simple switch guard can prevent this issue.
Maintaining Your Outdoor Outlet
Regular inspection and maintenance will ensure your outdoor outlet remains safe and functional for years. Periodically check the weatherproof cover for cracks or damage and ensure the gasket is still sealing properly. It’s also a good practice to test the GFCI functionality every few months.
If you live in an area with extreme weather, such as heavy rain or snow, more frequent checks are advisable. Proper maintenance is a key part of outdoor electrical safety, much like ensuring you have proper yard drainage with systems like a French drain to prevent water damage. For related issues with water management, you might find our article on uphill drainage solutions helpful.
When to Call a Professional Electrician
While this is a feasible DIY project for many, there are clear signs that it’s time to call in a professional. Electrical work carries inherent risks, and there is no shame in deferring to an expert for your safety and peace of mind.
If you encounter anything unexpected, such as old or damaged wiring (like cloth-insulated wires), an overloaded circuit, or if you simply don’t feel confident at any point in the process, stop immediately and consult an electrician. A professional can quickly and safely handle the conversion, ensuring it’s done to code. Sometimes, what seems like a simple task can reveal underlying issues, similar to how a seemingly minor leak might point to a bigger plumbing problem. It is always better to be safe. For example, if your sump pump isn’t working correctly, it’s a sign of a larger issue that needs a pro.