45 Degree Drywall Corner Nightmare? Here’s the Pro Fix
Angled walls, soaring vaulted ceilings, and elegant bay windows add character to a home. But they also introduce one of the most feared tasks in drywall finishing: the 45-degree corner.
Unlike simple 90-degree angles, these off-angle corners are notoriously difficult to finish perfectly. They are prone to cracking, bubbling, and looking amateurish if not handled with the right tools and techniques.
This guide breaks down the professional process for conquering both outside and inside 45-degree corners, turning a potential disaster into a sharp, seamless feature.
You'll Learn About
Why 45-Degree Corners Are a DIY Drywall Disaster Waiting to Happen
The core problem with a 45-degree corner, also known as a splayed or off-angle corner, lies in physics and tool limitations. These corners concentrate structural stress differently than their 90-degree counterparts, making them susceptible to cracking from building movement.
Furthermore, standard drywall knives and tools are designed for 90-degree angles, making it awkward to apply compound smoothly and consistently. This often results in a lumpy, rounded finish that sticks out instead of blending in.
Common failures include bubbles forming under the tape, corner bead that won’t sit flush against the drywall, and uneven mud application that creates a wavy, unprofessional look.
Choosing Your Weapon: The Best Corner Bead for a Flawless 45-Degree Angle
Your success begins with selecting the correct material. While you can use simple paper tape, a dedicated off-angle corner bead provides superior strength and a crisper line. These are specifically designed to flex to the correct angle and provide a durable nose for the corner.
Paper-Faced and Composite Beads (The Pro’s Choice)
Paper-faced composite beads are often the top choice for professionals. They consist of a sturdy composite plastic core laminated with paper, offering the perfect blend of rigidity and adhesion.
The paper facing integrates seamlessly with joint compound, creating a monolithic bond that is highly resistant to cracking and chipping. This type of bead is installed by embedding it in a layer of mud, eliminating the need for nails or screws that can create bumps.
Flexible and Roll-On Corner Beads
Another excellent option is a flexible corner bead, which often comes in a roll. This product can be cut to length and folded to fit any angle, inside or out.
Made from materials like vinyl or composite plastics, these beads are also embedded in mud. Their versatility is a major advantage, but they can require a bit more skill to keep perfectly straight over long runs.
Metal and Vinyl Corner Beads
Traditional nail-on or clinch-on metal and vinyl beads are also available for off-angles. They provide a very durable and rigid corner but can be more challenging to install perfectly.
These beads must be fastened securely, and any slight imperfection in the framing can cause them to sit unevenly. They also require more mud to feather out the edges smoothly compared to their paper-faced counterparts.
| Corner Bead Type | Best Use Case | Installation Method | Primary Advantage |
|---|---|---|---|
| Paper-Faced Composite | High-stress areas, long runs | Embedded in mud | Superior crack resistance and adhesion |
| Flexible Roll-On | Unusual angles, inside and outside corners | Embedded in mud | Highly versatile and adaptable |
| Nail-On Metal/Vinyl | High-traffic areas needing impact resistance | Nails, screws, or staples | Extreme durability and rigidity |
The Step-by-Step Pro Guide to Finishing an Outside 45-Degree Corner
Finishing an outside 45-degree angle is a process that demands precision. Rushing any of these steps will compromise the final result. Follow this method for a professional-grade finish.
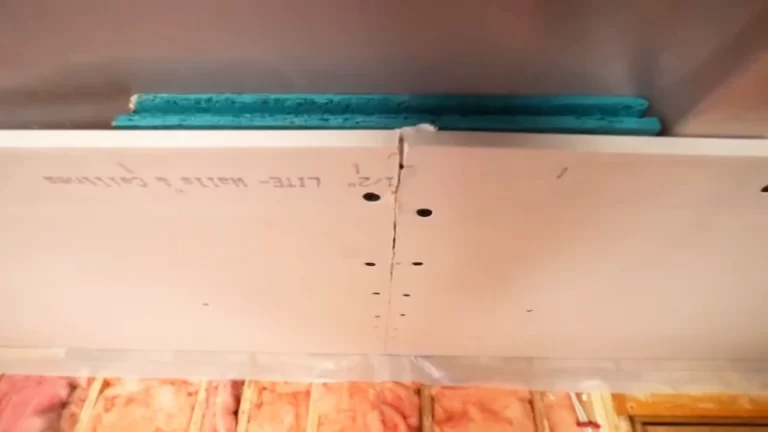
Step 1: Preparation is Everything
Before you even think about mud, inspect the corner. Ensure the drywall sheets are fastened securely to the framing, with no loose edges or popped screws. Gaps larger than 1/8 inch should be pre-filled with a setting-type compound (hot mud) and allowed to set.
The surface must be clean and free of dust, which can interfere with adhesion. A stable and clean foundation is critical; sometimes you have to fix drywall around vents or other nearby issues first to ensure the entire wall system is sound.
Step 2: Measure and Cut Your Corner Bead
Measure the length of the corner carefully and transfer that measurement to your corner bead. For paper-faced and vinyl beads, a pair of sharp tin snips or heavy-duty shears will provide a clean cut.
Always follow the “measure twice, cut once” rule. A bead that is too short will create a weak point, and one that is too long will not fit properly.
Step 3: The “Mud Bed” – A Non-Negotiable Step
For paper-faced or flexible beads, the mud bed is the most critical step. Using an all-purpose joint compound, apply a generous, consistent layer of mud to both sides of the drywall corner.
This mud acts as both the adhesive and a filler for any inconsistencies in the drywall. A proper mud bed ensures there are no air pockets and that the bead makes full contact with the wall surface, creating a powerful bond.
Step 4: Setting and Embedding the Bead
Gently press the corner bead into the wet mud. Apply even pressure along the entire length to seat it firmly against the corner’s apex.
Using a 5 or 6-inch taping knife, press firmly and wipe down both sides, starting from the center and moving toward the ends. The goal is to squeeze out the excess mud from underneath the bead’s flanges, leaving a thin, tight coat over the top. This process fully embeds the bead and removes all air bubbles.
Step 5: The First Coat – Tapering the Edges
Once the bead is embedded, immediately apply a tight first coat of compound over the flanges. Use your taping knife to feather the outer edges of the mud smoothly onto the wall surface.
The objective is not to build up a thick layer but to create a smooth transition from the raised bead to the flat wall. This initial coat sets the foundation for a seamless final finish.
Mastering the Inside 135-Degree Corner (The 45’s Counterpart)
An inside corner that opens to 135 degrees is the inverse of an outside 45-degree corner and requires a different technique. For these, specialized flexible or paper tape is the best solution.
First, apply a smooth layer of joint compound to both sides of the corner. Cut a piece of paper tape to length and fold it along its center crease. Press the tape firmly into the corner with your fingers, then use a taping knife or an inside corner tool to embed it, wiping away the excess mud.
The key is to ensure the tape is tight against the corner with no bubbles. This process is very similar to finishing a standard 90-degree inside corner but requires a lighter touch to avoid creating a groove in the soft mud.
Coating, Sanding, and Achieving Perfection
Whether it’s an inside or outside corner, the finishing process is the same after the bead or tape is set. It’s all about building thin, wide layers of mud to make the corner disappear.
The Art of the Skim Coat
You will need to apply at least two more coats of joint compound. With each subsequent coat, use a wider taping knife (e.g., 8-inch then 10 or 12-inch) to feather the mud further out onto the wall.
For the final coat, consider using a lighter-weight topping compound. It is smoother to apply and much easier to sand, reducing the risk of damaging the corner while you perfect the finish.
Sanding Without Wrecking Your Work
Once the final coat is completely dry, it’s time to sand. Instead of aggressive sanding with coarse paper, use a fine-grit sanding sponge. This gives you more control and helps prevent you from accidentally sanding into the paper tape or scuffing the corner bead’s nose.
Hold a bright work light at a low angle to the wall to reveal any minor imperfections, tool marks, or ridges. Touch up these areas with a very thin skim of topping compound if needed, let it dry, and sand one last time.
Pro-Level Troubleshooting for 45-Degree Corners
Even with careful work, you might encounter issues. If your corner bead isn’t perfectly straight, try to adjust it gently while the mud is still wet. If you find an air bubble after the mud has dried, you must cut it out with a utility knife, fill the void with compound, and recoat the area.
If the corner looks too rounded, it means too much mud was applied directly over the apex. The secret is to build up the sides and feather them out, keeping the very tip of the corner as clean as possible during the coating process.
Beyond Drywall: When Other Materials Are a Better Fit
Perfecting a drywall corner is a mark of quality craftsmanship. However, it’s important to use the right materials for the job. While some people experiment with alternatives, these often come with serious drawbacks.
For instance, some might consider using foam board instead of drywall for insulation, but it lacks the fire resistance and structural integrity of gypsum board and is not a safe substitute. A beautiful corner is just one part of a larger system. Often, the project isn’t truly complete until you know how to properly finish an exposed drywall edge for a clean, professional termination point.
Conclusion: A Sharp Corner is a Sign of Quality
Finishing a 45-degree drywall corner is a true test of patience and skill, but it is not impossible. The key to success is a combination of meticulous preparation, choosing the right corner bead for the application, and building up thin, wide coats of compound.
By following these professional techniques, you can transform a challenging architectural feature into a crisp, seamless transition. You can achieve a finish that not only looks great but will also resist cracking and stand the test of time.