Vinyl Plank to Carpet on Concrete? Here’s the Fail-Proof Fix
You’ve just installed beautiful new luxury vinyl plank (LVP) flooring, but now you’re facing the final boss: creating a clean, safe, and durable transition to the existing carpet. This common home improvement hurdle becomes even more challenging when you’re working with a concrete subfloor. A poorly executed transition isn’t just an eyesore; it’s a tripping hazard waiting to happen.
Many homeowners find that the standard, flimsy transition strips just don’t cut it, leading to a frustrating cycle of repairs. The core of the problem lies in the different heights of the flooring, the unique challenges of securing materials to concrete, and the need to properly terminate the carpet edge to prevent fraying. But don’t worry, achieving a professional-grade transition is entirely possible with the right knowledge and tools.
You'll Learn About
Why Transitions on Concrete Are So Tricky
Creating a seamless join between vinyl plank and carpet is more than just covering a gap. On a concrete slab, the challenges are magnified. Concrete can be uneven, prone to moisture, and notoriously difficult to drill into or adhere to, making standard installation methods less effective.
Furthermore, vinyl plank flooring is typically a “floating floor,” meaning it needs space to expand and contract with temperature changes. Securing a transition strip incorrectly can restrict this movement, leading to buckling or gaps. The goal is to bridge the height difference while allowing the LVP to float and providing a secure anchor for the carpet edge.
The Height Difference Dilemma
One of the biggest issues is the height variance between plush carpet and relatively thin LVP. A simple T-molding, designed for floors of equal height, won’t work. You need a transition piece specifically designed to accommodate this difference, often called a reducer or an end cap.
Ignoring this height difference can result in a dangerous lip that people can trip over. It also puts undue stress on the transition strip itself, causing it to crack, loosen, or fail over time. A proper transition creates a gentle, safe slope from the higher carpet down to the lower vinyl plank.
Choosing Your Weapon: The Right Transition Strip
The success of your project hinges on selecting the correct type of transition strip. With several options available, it’s crucial to understand their purpose and how they function, especially on a concrete subfloor. Making the right choice here will save you headaches down the road, and if you’re ever unsure about material costs, remember you can sometimes find room to negotiate. Learning how to negotiate flooring prices can free up your budget for higher-quality materials.
Let’s break down the most common and effective solutions for a vinyl-to-carpet transition on concrete.
Your Top Transition Choices
Each type of transition has its ideal use case. For this specific scenario, a reducer is often the best choice, but understanding all your options is key. Some modern LVP systems come with matching vinyl-wrapped transition pieces that click into a metal channel, offering a seamless look.
Alternatively, durable metal strips offer a classic and robust solution. These are often preferred for high-traffic areas due to their longevity and secure installation methods. Consider both aesthetics and durability when making your choice.
| Transition Type | Material | Best Use Case | Installation Method on Concrete |
|---|---|---|---|
| Reducer Strip | Vinyl, Metal, Wood | Transitioning between floors of different heights (e.g., LVP to carpet). | Adhesive (construction adhesive) or screws with plastic anchors. |
| Carpet Gripper / Z-Bar | Metal (Aluminum) | Provides a clean, tucked edge for the carpet against the LVP. | Adhesive or concrete nails. Often used with a reducer. |
| T-Molding | Vinyl, Metal, Wood | Joining two floors of the same height. Not ideal for this scenario. | Metal track secured with adhesive or screws. |
| End Cap / Square Nose | Vinyl, Metal, Wood | Finishing the edge of the LVP where it meets the carpet. | Adhesive or screw-down metal track. |
Step-by-Step Guide to a Perfect Transition
Now that you’ve chosen your transition strip, it’s time for the installation. This guide focuses on using a combination of a reducer strip and a carpet tack strip, which provides the most secure and professional-looking finish. Proper preparation is crucial for a long-lasting result.
Step 1: Prepare the Subfloor and Gap
First, ensure the concrete subfloor is clean, dry, and flat in the transition area. If you have any significant dips or high spots, you may need to use a self-leveling compound or grind down high spots. This is similar to the prep work needed for other flooring gaps, like when you fill gaps between tile and wood floors.
Your vinyl plank flooring should be installed with an expansion gap of about 1/4 inch from where the carpet begins. The transition strip will cover this gap. The carpet should be pulled back several inches to give you a clear working area.
Step 2: Cut the Transition Strip and Track
Measure the width of the doorway or opening where the transition will be. Use a miter saw or a hacksaw (for metal) to cut the transition strip and its corresponding metal mounting track to the precise length. A clean, straight cut is essential for a professional look.
Dry-fit the pieces to ensure they fit snugly between the door jambs. This is also a good time to check that the height and slope of the reducer are appropriate for your specific flooring.
Step 3: Secure the Mounting Track to the Concrete
This is the most critical step. You have two primary methods for securing the metal track to concrete: construction adhesive or concrete screws. For most residential applications, a high-quality construction adhesive like Loctite PL Premium is sufficient and avoids the hassle of drilling into concrete.
Apply a generous bead of adhesive to the underside of the metal track. Press it firmly onto the concrete in the gap between the LVP and the carpet area. Place heavy objects on the track and allow the adhesive to cure for the manufacturer-recommended time, typically 24 hours.
Step 4: Install the Carpet Tack Strip
With the transition track in place, you now need to secure the carpet. Cut a carpet tack strip to the same length as the transition. Place it on the concrete with the angled tacks pointing towards the transition, leaving a small gap of about 1/4 inch between the tack strip and the metal track.
Secure the tack strip to the concrete using concrete nails. Hammer them in firmly. If the nails won’t grab, you can also use construction adhesive for the tack strip.
Step 5: Stretch and Tuck the Carpet
Trim the carpet pad so it ends just before the tack strip. Do not let the pad go over the tack strip. Next, use a knee kicker to stretch the carpet over the tack strip, ensuring it hooks securely onto the tacks.
You should have a small amount of excess carpet. Use a sharp utility knife or a carpet tucker to trim the excess, leaving just enough to tuck down into the gap between the tack strip and the transition track. This creates a clean, professional edge.
Step 6: Snap in the Transition Strip
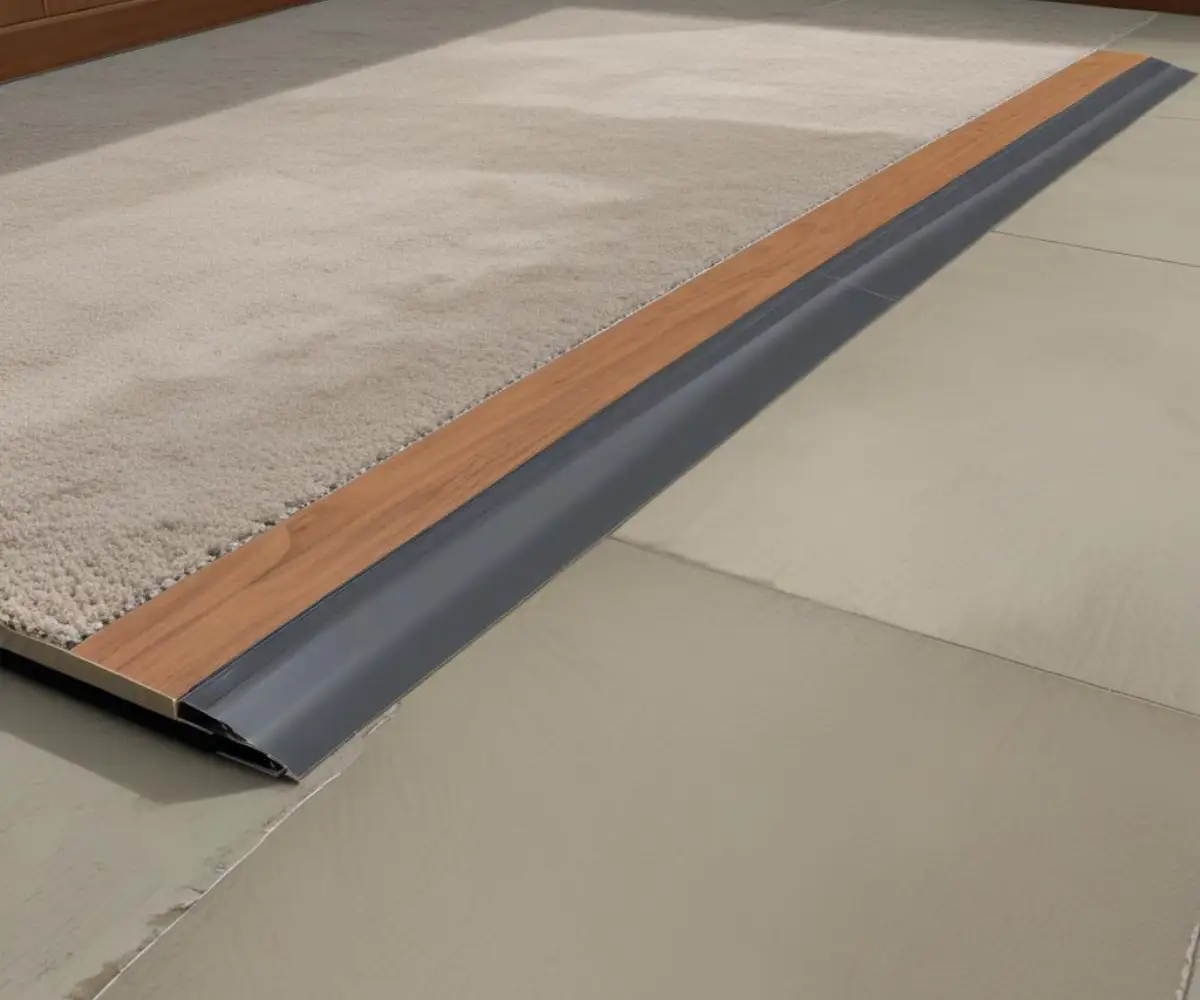
With the carpet neatly tucked, the final step is to install the top part of the transition strip. Align the groove on the bottom of the reducer with the metal track. Starting from one end, use a rubber mallet to gently but firmly tap the transition strip into the track until it snaps securely into place.
The reducer should overlap the edge of the vinyl plank (covering the expansion gap) and meet the tucked edge of the carpet, creating a smooth and secure transition. It should feel solid underfoot with no movement.
Common Mistakes to Avoid
Even with a clear plan, pitfalls exist. Avoiding these common errors will ensure your project is a success from the start and doesn’t require costly fixes later on.
Ignoring subfloor prep: An uneven concrete surface will cause the transition strip to sit improperly and fail prematurely. Using the wrong adhesive: Not all glues are created equal. Use a strong construction-grade adhesive designed for bonding to concrete. Securing the LVP: Never glue or nail the transition strip directly to the floating vinyl plank flooring. It must be attached only to the subfloor to allow for floor movement. This is a finishing detail, much like ensuring you have a clean look when adding quarter round around a door frame.
Maintaining Your New Transition
Your new transition is built to last, but a little care goes a long way. Regularly check for any signs of looseness or wear. Keep the area clean from dirt and debris that can accumulate in the seams.
By following these steps, you can confidently create a durable, safe, and visually appealing transition between your vinyl plank flooring and carpet, even on a challenging concrete subfloor. The result is a seamless flow between rooms that enhances the beauty and functionality of your home.