Tung Oil Floor Disaster? Your 5-Step Rescue Plan for Sticky, Blotchy Floors
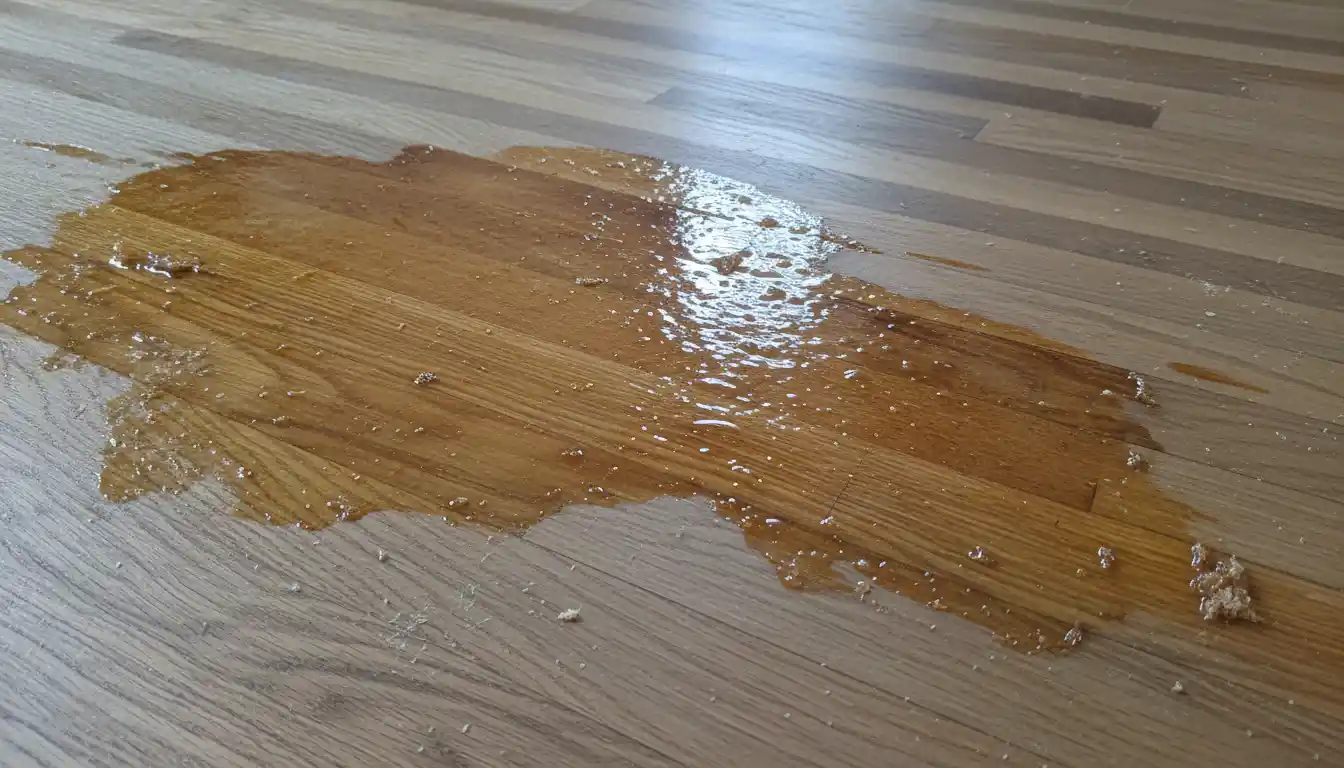
You envisioned a stunning, hand-rubbed wood floor with a warm, natural glow. Instead, you’re looking at a sticky, blotchy, dust-collecting disaster. That beautiful hardwood you spent so much time preparing now feels tacky to the touch, smells strongly of oil, and looks anything but finished. This is the all-too-common tung oil floor disaster, a frustrating outcome for a finish prized for its natural beauty and protective qualities.
The good news is you are not alone, and your floor is not ruined. This problem is almost always fixable. Understanding the unique way tung oil works is the key to both diagnosing the failure and implementing the correct rescue plan to achieve the beautiful, durable finish you wanted from the start.
You'll Learn About
Why Your Tung Oil Floor Turned Into a Sticky Mess
Unlike polyurethane, which forms a hard film on top of the wood, tung oil is a penetrating finish. It cures through a process called polymerization, which requires oxygen. When things go wrong, it’s almost always because this natural curing process was interrupted or prevented. Here are the primary culprits behind a tung oil disaster.
The #1 Culprit: Applying Tung Oil Too Thickly
This is the most frequent mistake. The instinct is often to apply a finish generously, like paint. With pure tung oil, this is a fatal flaw. A thick coat of tung oil prevents oxygen from reaching the lower layers. The surface may skin over and feel slightly dry, but underneath, it remains a liquid, gummy mess that can take months, if ever, to fully cure.
The core principle of a tung oil finish is “less is more.” The goal is to apply whisper-thin coats, allowing each one to fully absorb and cure before the next is applied. Any oil that sits on the surface after an hour must be wiped away aggressively.
The “Pure” vs. “Finish” Tung Oil Trap
The product you grab off the shelf significantly impacts application and curing time. Many products labeled “Tung Oil Finish” are not pure tung oil. They are often blends of tung oil, other oils, varnish resins, and chemical drying agents that speed up the curing process considerably. While easier for beginners, they offer less of the pure, in-the-wood protection of 100% tung oil.
100% Pure Tung Oil has no added driers and cures very slowly. A full cure can take 15 to 30 days, a fact that catches many DIYers by surprise. Not understanding this extended timeline leads to applying subsequent coats far too soon, trapping uncured oil and creating a sticky, layered catastrophe.
Inadequate Surface Preparation
Tung oil needs to penetrate bare wood to work correctly. It cannot be applied over an existing film finish like polyurethane or lacquer. If the floor was not sanded down to completely raw wood, the oil has nowhere to go. It will simply sit on top, resulting in a sticky, uneven surface that will never properly adhere or cure.
Furthermore, any contaminants left on the wood—dust, cleaning residues, or oils—can interfere with absorption, leading to blotchy and discolored patches where the oil couldn’t penetrate evenly. Proper sanding and a thorough cleaning with a tack cloth or mineral spirits before application are non-negotiable steps.
Environmental Sabotage: Humidity and Temperature
Polymerization is a chemical reaction that is highly sensitive to its environment. Applying tung oil in cold, damp conditions is a recipe for failure. High humidity and low temperatures dramatically slow down the curing process. The ideal conditions are warm, dry air with good ventilation to supply the oxygen needed for the oil to harden.
Attempting to finish a floor during a humid summer week or in a cold, unheated space can extend the already long curing time from weeks to months, increasing the likelihood of a sticky, frustrating outcome.
Your Step-by-Step Tung Oil Floor Rescue Mission
Facing a tacky floor is disheartening, but with the right approach, you can systematically remove the excess oil and get the project back on track. Patience is the most critical tool in this process.
Step 1: The Solvent Wipe-Down Method (For Tacky Surfaces)
If your floor is sticky or tacky but not wet or gummy, the problem is likely excess oil that has failed to cure. You can remove this layer using a solvent. Mineral spirits or an all-natural citrus solvent are excellent choices. Ensure the area is extremely well-ventilated by opening all windows and using fans to circulate air.
Dampen a clean, lint-free rag (old t-shirts work well) with your chosen solvent. Wipe the floor firmly, working in small, manageable sections. You should see the excess oil transferring to the rag. As the rag becomes saturated with oil, switch to a fresh one to avoid spreading the sticky residue around.
Step 2: The “Rewetting” Technique for Stubborn Spots
For areas that are particularly stubborn, a method known as “rewetting” can be highly effective. This involves using a small amount of new finish to dissolve the old, tacky layer. Create a thinning mixture of 50% tung oil and 50% mineral spirits or citrus solvent.
Apply a very thin layer of this thinned oil to a tacky section. The new oil and solvent will soften the semi-cured layer. After about 10-15 minutes, use a clean, dry rag to wipe away both the new oil and the dissolved tacky oil underneath. This technique essentially uses the finish to clean itself.
Step 3: The Scouring Method for a Frosty or Wrinkled Finish
If the surface has developed a “frosty” white appearance or has a wrinkled texture, this indicates a thick layer of oil has partially cured on the surface. For this, you will need a bit more abrasion. Use a non-woven abrasive pad (like a white or gray Scotch-Brite pad) dampened with mineral spirits.
Gently scrub the surface, following the direction of the wood grain. This will remove the improperly cured surface layer without aggressively scratching the wood itself. Follow up with a clean rag to wipe away all the residue. This method will leave the floor looking dull, which is normal; you will restore the sheen with proper recoating later.
Step 4: When to Call It Quits and Re-Sand
There is a point of no return. If the finish is not just tacky but is thick, gummy, and has trapped a significant amount of dirt and debris, attempting to salvage it with solvents will be a frustrating and often futile effort. In this scenario, the most effective and efficient solution is to start over.
This means sanding the entire floor back down to bare wood. While this is the most labor-intensive option, it is also the most foolproof. It guarantees the removal of all the failed finish and provides you with a clean slate to apply the tung oil correctly from the beginning.
Step 5: Curing, Patience, and Proper Aftercare
Once you have successfully removed the excess, uncured oil, you must allow the floor to dry completely. This could take anywhere from a few days to a week. The key is to provide ample airflow and maintain a warm temperature to aid the final stages of curing for any oil that remains in the wood grain.
Do not walk on the floor with shoes during this time. Once the floor is no longer tacky to the touch, you can proceed with applying a new, proper coat of tung oil. This time, remember the mantra: apply a whisper-thin coat and wipe off all excess after 30-60 minutes.
The Secret to a Flawless Tung Oil Finish (Prevention)
Avoiding a disaster in the first place is always the best strategy. A successful tung oil finish comes down to respecting the nature of the material and following a few key principles. These preventative measures will ensure your next project is a success from the start.
Choosing the Right Tung Oil Product
Understanding the different types of tung oil products is crucial for managing expectations about application and cure times. The choice you make will dictate the entire finishing schedule and process.
| Finish Type | Composition | Curing Time | Best For |
|---|---|---|---|
| 100% Pure Tung Oil | Just pure, unadulterated oil pressed from the tung nut. No additives. | Very Slow (15-30 days for a full cure). | Achieving the most natural, in-the-wood protection. Ideal for those prioritizing non-toxicity. |
| Polymerized Tung Oil | Pure tung oil that has been heat-treated to begin the polymerization process. | Faster than pure oil (typically cures in about half the time). | Floors and high-traffic areas where a slightly faster cure time and increased hardness are desired. |
| Tung Oil Finish (Varnish Blend) | A mixture of some tung oil, varnish resins, solvents, and chemical driers. | Fast (often dry in hours, cures in a few days). | Beginners or projects requiring a quick turnaround. Behaves more like a traditional varnish than a true oil finish. |
The “Less is More” Application Mantra
The single most important rule for applying tung oil is to apply thin and wipe off all excess. The goal is to saturate the wood fibers, not to build a film on top. Flood the surface with a liberal coat, let it sit for 30-60 minutes to absorb, and then wipe the surface completely dry with clean, lint-free rags. Any oil left on the surface is a potential point of failure.
For large areas like floors, it’s often easiest to work in sections. Apply the oil, let it soak, and then move to the next section while the first one is absorbing. Circle back to wipe the first section dry before continuing. This methodical approach ensures no area is left with excess oil sitting on it for too long.
The Critical Role of Thinning Your First Coat
For the very first coat on bare wood, thinning the tung oil is a professional technique that yields superior results. Mixing 100% pure tung oil in a 1:1 ratio with a solvent like mineral spirits or citrus solvent dramatically lowers its viscosity. This allows the oil to penetrate much deeper into the wood fibers, creating a stronger foundational layer and a better bond for subsequent coats.
Apply this thinned coat, let it soak in, wipe off the excess, and then allow it to cure for several days before applying subsequent, less-thinned coats. This initial deep penetration is a key step that many guides overlook but is essential for maximum durability.
Tung Oil and Beyond: Protecting Your Home’s Wood
Mastering a tung oil finish provides you with a versatile skill for protecting wood throughout your home. The principles of proper preparation and application apply to a wide range of wooden surfaces. Just as you’d take care to protect a beautiful wood countertop from the heat of an induction cooktop, your floor needs the right defense against daily wear and tear.
The challenges of protecting wood are universal, whether you’re preventing a sticky floor finish or finding ways to stop rot in a wood window in a shower. Understanding how wood interacts with its environment and with different finishes is key to long-lasting beauty and function. Embracing natural solutions, from plant-based floor oils to learning about underplanting citrus trees in pots, brings a healthier, more organic feel to your living space and connects your home to the natural world.
A tung oil floor disaster can be incredibly frustrating, but it is rarely permanent. By understanding that tung oil cures by oxidation and requires thin coats and ample oxygen, you can diagnose the problem accurately. With solvents, a bit of elbow grease, and a heavy dose of patience, you can correct the mistakes and achieve the beautiful, durable, and natural wood floor finish you originally desired.