That Trim Board at Bottom of Siding? Here’s Why It’s Critical
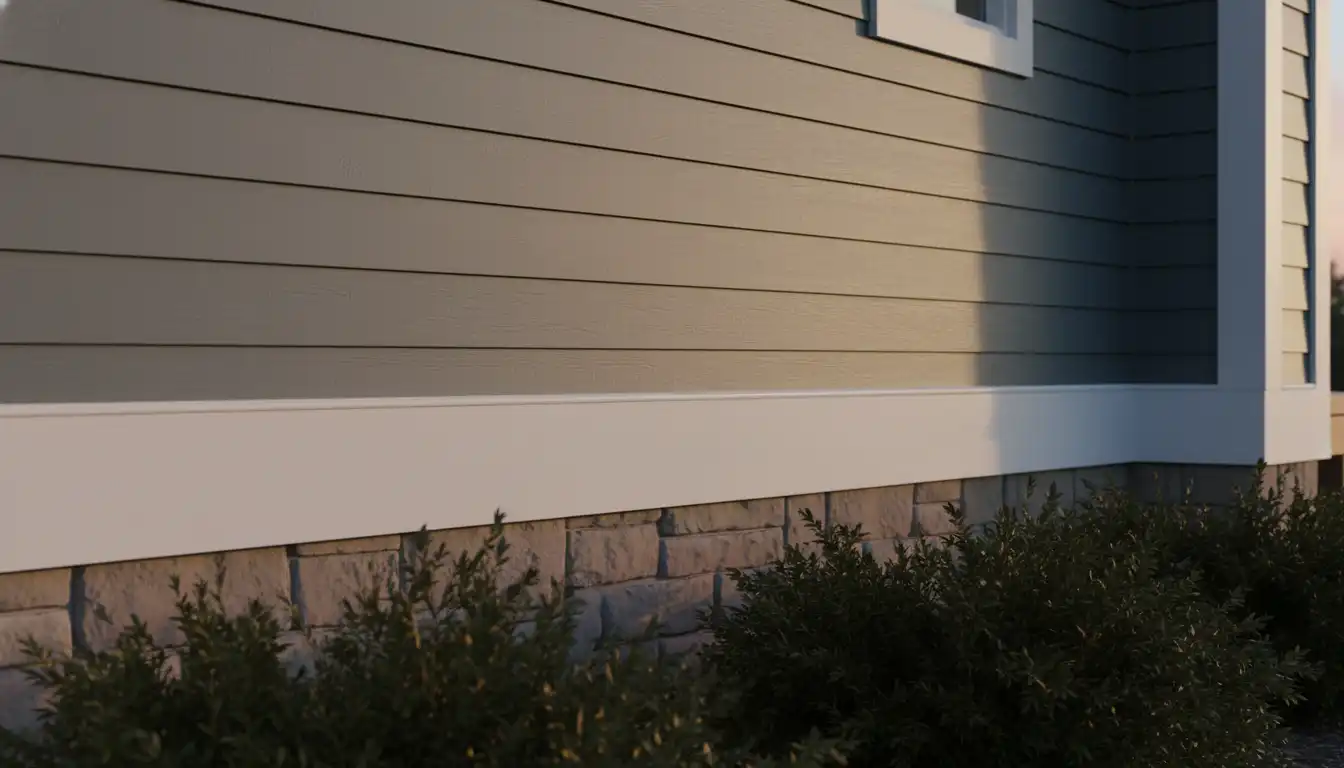
It’s one of the most overlooked details on a home’s exterior. That simple horizontal trim board at the bottom of the siding seems like just a finishing touch. But this component, often called a skirt board or water table, is one of the most critical protectors of your home’s entire structure.
Ignoring this piece or allowing it to fail can lead to catastrophic damage that goes far beyond curb appeal. Understanding its role is the first step in preventing costly repairs, pest infestations, and irreversible structural decay. This unassuming board is your first line of defense against the elements.
You'll Learn About
What Exactly Is This Trim Board and What Does It Do?
Before diving into the problems, it’s essential to clarify what this board is. It’s not just a decorative piece. Its primary role is to manage the vulnerable transition point where the siding ends and the foundation begins, a major hotspot for water intrusion.
This component has a few different names depending on the region and specific design, including a skirt board, band board, or water table trim. It’s different from a “starter strip,” which is a hidden metal or vinyl piece used to hook the very first course of siding. The trim board is the visible, architectural element that serves three crucial functions.
1. A Master of Water Diversion
The number one job of the trim board is to kick water away from the foundation. Rainwater flows down the face of your siding, and without this trim, it would run directly into the joint between the siding and the foundation. This area is highly susceptible to moisture absorption.
Properly installed skirt boards often have a slight angle or a drip edge on the bottom. This profile ensures that water is physically channeled outward, away from the wall, preventing it from soaking the sill plate—the wood base of your home’s frame that sits on the foundation.
2. An Essential Pest Barricade
Any gap between the siding and the foundation is an open invitation for insects like termites, ants, and rodents. A well-installed and sealed trim board closes this gap, creating a physical barrier that makes it much harder for pests to enter your walls and crawlspace.
If this board cracks, rots, or pulls away from the wall, it creates the very entry points you want to avoid. Pests can then access the wood structure of your home, leading to infestations that can compromise its integrity.
3. A Foundation for Curb Appeal
Aesthetically, the trim board provides a clean, intentional transition between the siding material and the foundation material (like concrete or brick). It creates a visually appealing base for the house, making the exterior look grounded and complete.
Without it, the siding can look unfinished, and the bottom edge is more exposed to damage from landscaping tools, ground contact, and splash-back from rain. This clean line is a hallmark of quality construction.
The Silent Killers: Common Problems That Lead to Failure
Because it’s so close to the ground, the skirt board is exposed to a brutal combination of moisture, pests, and physical damage. Homeowners often don’t notice a problem until significant damage has already occurred. Being aware of the potential failure points is key to prevention.
Wood Rot and Catastrophic Moisture Damage
The most common and destructive issue is rot. If a wood trim board is used, it’s constantly bombarded with moisture from rain splash-back, snow accumulation, and lawn sprinklers. If not properly painted and sealed, wood will absorb this moisture like a sponge.
This leads to rot, which turns the wood soft and mushy, rendering it useless for water diversion. Worse, the rot can spread to the structural sheathing and sill plate behind it. This is how a simple issue of water dripping down siding can escalate into thousands of dollars in structural repairs.
Pest Infestations Through Gaps and Cracks
As the trim board ages, caulking fails and joints can open up. These small gaps are all pests need to get inside. Termites are particularly drawn to softened, moist wood, turning your vulnerable trim board into their first meal before moving into the rest of your house.
Regular inspection of the seams and seals around the trim board is critical. A small tube of exterior-grade caulk can save you from a major extermination bill down the road.
Installation Errors That Sabotage Your Siding
Many problems with the bottom trim board stem from improper installation. A failure to integrate it correctly with the home’s weather-resistive barrier (house wrap) and flashing can create a direct path for water to get behind the siding.
One of the biggest errors is a lack of proper flashing. A metal or vinyl Z-flashing should be installed over the top edge of the trim board, tucked under the house wrap. This creates a layered defense, ensuring any water that gets behind the siding is directed out and over the trim, not behind it.
Choosing Your Armor: The Best Materials for Bottom Trim Boards
When it comes time to replace or install a new skirt board, choosing the right material is paramount. Given its high-exposure location, durability and moisture resistance are non-negotiable. While wood is traditional, modern materials offer superior performance with far less maintenance.
| Material | Pros | Cons | Best For |
|---|---|---|---|
| Pressure-Treated Wood | Classic look, readily available, affordable. | Requires frequent painting and sealing, susceptible to rot if maintenance is neglected. | Historic homes or homeowners committed to regular upkeep. |
| Cellular PVC | Completely waterproof, will not rot, impervious to insects, low maintenance. | More expensive upfront, can expand and contract with temperature changes. | Almost any application, especially in wet climates or for a “fix it and forget it” solution. |
| Fiber Cement | Extremely durable, rot-resistant, fire-resistant, holds paint well. | Heavy, requires special tools for cutting, can be brittle. | Homes with fiber cement siding for a perfect match in durability and appearance. |
| Composite Trim | Resists rot and insects, often made from recycled materials, stable. | Quality can vary by brand, can be more expensive than wood. | A durable and eco-conscious alternative to traditional wood. |
Why PVC is Often the Smartest Choice
For this specific application, cellular PVC is often the superior material. Because it is a solid, non-porous material, it cannot absorb water. This means it will never rot, swell, or delaminate. It is also completely unattractive to termites and other wood-boring insects.
While the upfront cost is higher than wood, the long-term savings in maintenance, painting, and potential replacement make it a wise investment. It provides ultimate peace of mind in the most vulnerable area of your exterior.
The Definitive Installation Guide: Getting It Right the First Time
Proper installation is everything. A high-quality material installed incorrectly will fail just as quickly as a cheap one. If you’re tackling this as a DIY project, precision and adherence to best practices are essential. Here’s a breakdown of the critical steps.
Step 1: Preparation and Removal of the Old Board
Start by carefully removing the old trim board. Use a pry bar and work slowly to avoid damaging the siding above it or the foundation below. Once the old board is off, inspect the area thoroughly.
Check the sheathing and the sill plate for any signs of water damage or rot. If you find soft, discolored wood, this must be repaired before you proceed. Covering up rot will only allow it to get worse.
Step 2: The Critical Flashing Detail
This is the step that cannot be skipped. Install a drip cap or Z-flashing along the top of the area where the new trim board will go. The flashing should be installed so the top leg slides up and under the house wrap, while the bottom leg extends out over the new trim board.
This ensures that any water running down the house wrap is directed safely over the front of the trim. This single piece of metal or vinyl is your failsafe against hidden water damage.
Step 3: Measuring, Cutting, and Fitting
Measure the length needed for your new trim board carefully. When cutting, especially with PVC, it’s often recommended to create scarf joints for long seams rather than simple butt joints. A scarf joint (a 45-degree angled cut on both ends) provides more surface area for adhesive and creates a stronger, less noticeable seam.
Fasten the board securely to the wall framing, using corrosion-resistant screws or nails. Be sure to follow the manufacturer’s recommendations for fastener type and spacing, as materials like PVC have specific requirements to allow for expansion and contraction.
Step 4: Sealing for a Watertight Finish
Once the board is installed, seal all joints and gaps. Apply a high-quality, exterior-grade sealant to the top edge where the trim meets the siding (just under the drip edge of the flashing), at all corner joints, and around any penetrations. This final step is crucial for blocking both water and pests.
When planning siding projects, it’s wise to consider other tasks. For instance, if you ever need to run cable under siding, planning it before new trim is installed can make the process much cleaner and prevent unnecessary cuts or seals later on.
Beyond Installation: Long-Term Maintenance and Care
Even with durable materials, your work isn’t done after installation. A yearly inspection can catch small issues before they become big problems. A holistic approach to exterior maintenance ensures everything lasts longer.
The Annual Walk-Around Inspection
At least once a year, walk the perimeter of your home and pay close attention to the bottom trim board. Look for cracked or shrinking caulk, separating joints, or any signs of damage from landscaping equipment. Proactively touching up sealant can add years to the life of your installation.
This is also a good time to look at your siding in general. Developing a routine that includes tasks like learning how to clean Masonite siding or other types of cladding will keep your entire home exterior in top shape and protect your investment.
Frequently Asked Questions (FAQs)
How high should the trim board be from the ground?
Most building codes and siding manufacturers require a minimum of 6 to 8 inches of clearance between the bottom of the siding or trim and the grade (the ground). This prevents direct contact with soil and minimizes moisture absorption from splash-back.
What is the gap at the bottom of the siding for?
The small gap often left between the bottom edge of the first course of siding and the top of the trim board is intentional. It’s a weep hole that allows any moisture that gets behind the siding to drain out. Never caulk this gap shut, as it would trap water inside the wall system.
Can I just paint over a rotten trim board?
Absolutely not. Paint is only a surface coating; it does nothing to address the underlying rot. Painting over rotten wood is a temporary cosmetic fix that traps moisture and allows the decay to accelerate, leading to much more severe structural problems.
Final Words
The trim board at the bottom of your siding, often called a water table or skirt board, is far more than a decorative transition. Its primary job is to serve as the first line of defense against moisture wicking. By providing a physical break between the siding and the ground or foundation, it prevents snow, rain splash-back, and soil moisture from traveling upward into your wall sheathing. Without this critical barrier, your siding panels are prone to premature rot, warping, and mold growth.
Beyond moisture protection, this board acts as a sacrificial layer for your home’s exterior. Because it sits closest to the “splash zone,” it takes the brunt of the weather and weed-whacker damage. It is much easier and more cost-effective to replace a single horizontal trim board than it is to tear off and replace several courses of siding. Choosing a rot-resistant material like PVC or fiber cement for this piece ensures that your home’s perimeter remains structurally sound and maintenance-free.
Ultimately, installing a proper water table board elevates the architectural appeal of your home while doubling its lifespan. It provides a clean, grounded look that defines the foundation line and creates a professional finish. By investing in this one “critical” detail, you are not just improving your curb appeal—you are sealing your home against the elements and avoiding thousands of dollars in future structural repairs.