Broken Thermal Release Valve Fix: Water Heater Repair Guide
It’s a moment of pure frustration. You’re in the middle of a project, and suddenly, a small but vital component gives way with a disheartening snap. A thermal release valve broke off, and now your equipment is out of commission, possibly with the threaded end stuck firmly inside the housing.
This tiny safety device is crucial for appliances like pressure washers and gas fireplaces. When it breaks, it’s not just an inconvenience; it’s a serious safety concern that demands immediate attention. This guide will walk you through every step, from understanding the crisis to implementing a lasting solution.
You'll Learn About
Why a Broken Thermal Valve Is a Critical Failure
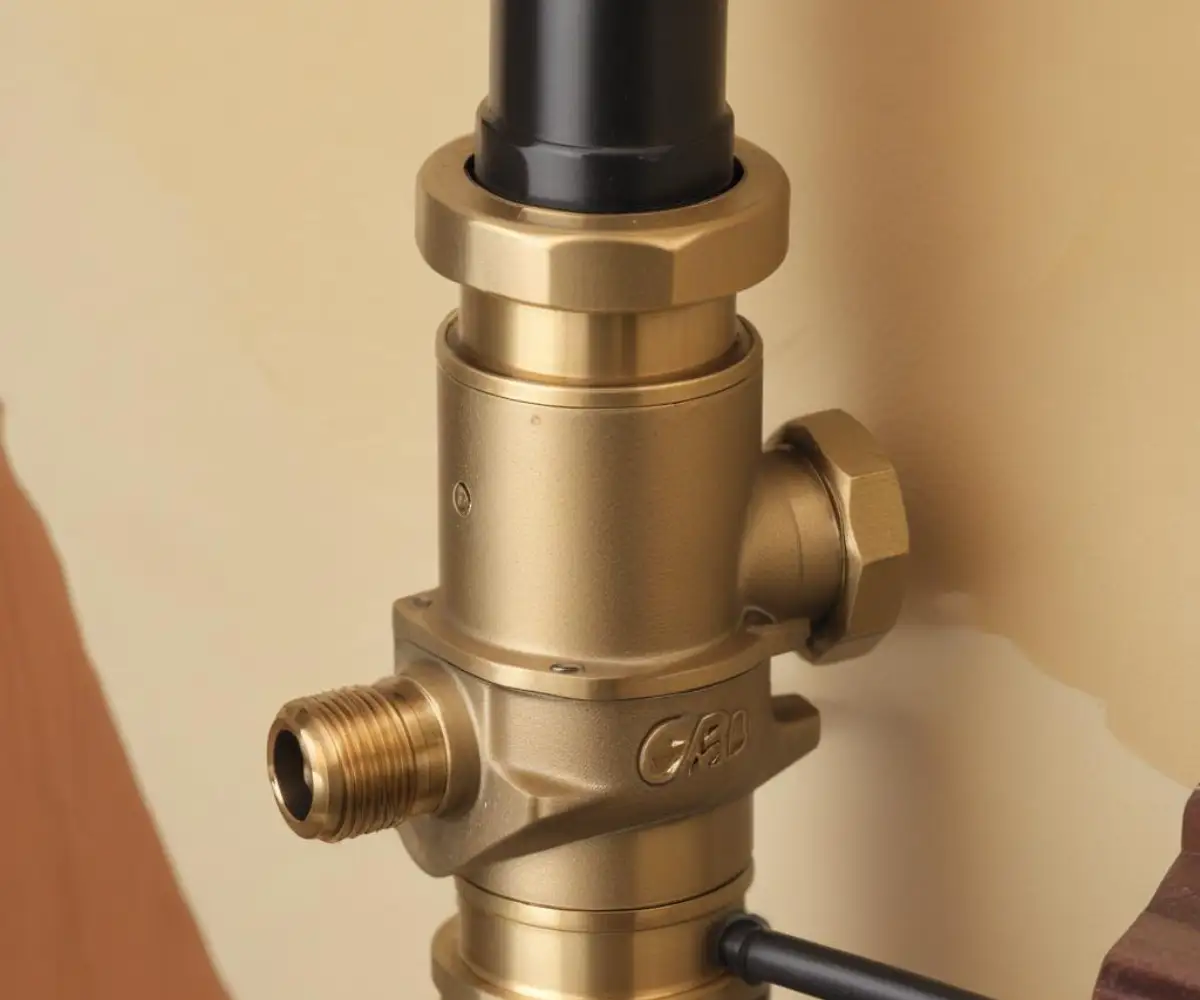
A thermal release valve, also known as a thermal relief valve, is a safety feature designed to protect equipment from overheating. In a pressure washer, it releases hot water from the pump when it reaches a dangerous temperature, usually around 145°F. In a gas fireplace, it can be part of the pilot assembly, shutting off gas flow if the pilot light goes out or temperatures become unsafe.
When this valve breaks off, you’re facing several immediate problems. The appliance is now unsafe to operate, and the broken piece creates a significant repair challenge. Ignoring this issue is not an option, as it could lead to catastrophic equipment failure or even a dangerous accident.
Understanding the Root Causes of Breakage
Before you can fix the problem, it helps to understand why it happened. These valves are typically made of brass or other soft metals and can fail for a few common reasons. Knowing the cause can help you prevent it from happening again in the future.
Overtightening is the most common culprit. These valves require a delicate touch during installation; too much torque can shear the head right off the threaded body. Corrosion and material fatigue over time, especially with constant exposure to heat and water, can also weaken the valve and lead to sudden failure.
The Complete Guide to Removing a Sheared-Off Valve
With the head of the valve gone and the threaded portion stuck, your task is now one of extraction. This requires patience and the right tools. Rushing the process can damage the threads in the appliance’s housing, turning a manageable repair into a costly replacement.
Safety First: Essential Preparations
Before you attempt any repair, you must secure the appliance. Always disconnect the power source. For a gas-powered pressure washer, disconnect the spark plug wire to prevent any accidental starts. For a gas fireplace, you must turn off the gas supply line completely.
Ensure the equipment is completely cool and that any pressure in the system has been released. Water heaters, for instance, can pose significant risks if not handled correctly. Learning more about how fragile are water heaters can provide valuable context for appliance safety. Finally, wear safety glasses to protect your eyes from debris or cleaning solvents.
Your Toolkit for a Successful Extraction
Having the right tools on hand is non-negotiable. Attempting this repair without the proper equipment will likely lead to frustration and further damage. Below is a table of essential and helpful tools for the job.
| Tool | Primary Use | Expert Tip |
|---|---|---|
| Screw Extractor Set | Essential for gripping and removing the broken piece. | Choose a high-quality set with left-handed threads for the best results. |
| Penetrating Oil | Loosening corroded or seized threads. | Apply liberally and allow it to soak for at least 30 minutes before attempting extraction. |
| Drill & Left-Handed Drill Bits | Creating a pilot hole for the extractor. | A left-handed bit can sometimes catch the broken piece and unscrew it on its own. |
| Center Punch | Marking the center of the broken valve for accurate drilling. | A precise center mark prevents the drill bit from wandering and damaging the housing threads. |
| Propane or MAPP Gas Torch | Applying heat to expand the housing and loosen the threads. | Use heat sparingly and evenly around the housing, not directly on the broken brass piece. |
| Safety Goggles & Gloves | Protecting your eyes and hands. | Do not skip this step. Metal shavings and chemicals can cause serious injury. |
Step-by-Step Extraction Process
With your tools gathered and safety precautions in place, it’s time to begin the extraction. Follow these steps carefully for the best chance of success.
First, clean the area around the broken valve. Use a small wire brush or compressed air to remove any dirt or grime. This ensures the penetrating oil can work its way into the threads effectively.
Next, apply a generous amount of penetrating oil directly onto the broken, threaded section. Let it sit for a while; patience is key here. Some DIYers have had success by applying heat with a torch to the housing around the valve, which can help expand the metal and break the bond of corrosion or thread sealant. If you choose to use heat, do so cautiously.
Drilling and Extracting the Broken Piece
Once the penetrating oil has had time to work, take your center punch and carefully create a divot in the exact center of the broken valve stem. This is a critical step. An off-center pilot hole can damage the threads of the pump or fireplace assembly, making it impossible to install the new valve.
Start with a small, left-handed drill bit and drill a pilot hole into the center-punched mark. The left-handed direction of the bit might be enough to catch the broken piece and turn it out. If it doesn’t, gradually increase the size of the drill bit until the hole is large enough for your screw extractor.
Gently tap the screw extractor into the pilot hole with a hammer. It should fit snugly. Using a T-handle or adjustable wrench, turn the extractor counter-clockwise. You should feel it bite into the brass. Apply steady, firm pressure to turn the broken piece out. If you are working on a pressure washer, a specific guide on this repair, like this one on a pressure washer thermal relief valve broke off, can provide additional details.
Choosing and Installing the New Valve
Once the broken piece is successfully removed, the hardest part is over. Now, you need to select the correct replacement valve and install it properly to prevent a repeat failure.
Finding the Right Replacement
Take the old, broken valve pieces to a hardware or specialty repair shop to find an exact match. Pay close attention to the temperature and pressure ratings, as well as the thread size (usually 1/4″ or 3/8″ NPT). Using a valve with the wrong specifications can be extremely dangerous.
Before installing the new valve, thoroughly clean the threads inside the housing with a wire brush or a thread chaser. Any remaining debris or old thread sealant can prevent a proper seal and may lead to leaks.
Installation Best Practices
Apply a small amount of pipe thread sealant or Teflon tape to the threads of the new valve. When applying Teflon tape, wrap it clockwise 2-3 times so it doesn’t unravel as you screw the valve in.
Thread the new valve in by hand to ensure it’s not cross-threaded. Then, use a wrench to tighten it. Do not overtighten. A good rule of thumb is to make it hand-tight, then give it another quarter- to half-turn with the wrench. This is enough to create a secure seal without stressing the brass fitting.
Testing and Preventing Future Failures
After installation, it’s crucial to test the repair. For a pressure washer, reconnect the water supply and check for leaks around the new valve before starting the engine. For a gas fireplace, carefully turn the gas supply back on and use a soapy water solution on the connection to check for bubbles, which indicate a gas leak.
To prevent future issues, perform regular maintenance. Periodically check the valve for signs of corrosion or wear. For pressure washers, avoid letting the machine run in bypass mode for extended periods, as this is what causes the water to heat up in the first place. For other appliances, like patio heaters, understanding proper maintenance and conversion, such as how to convert patio heater to natural gas, is part of responsible ownership.
By following this guide, you can confidently tackle the challenge of a broken thermal release valve. What started as a major headache can become a satisfying repair that restores both the function and safety of your valuable equipment.

