Skylight Inside Finishing: From Ugly Box to Stunning Feature
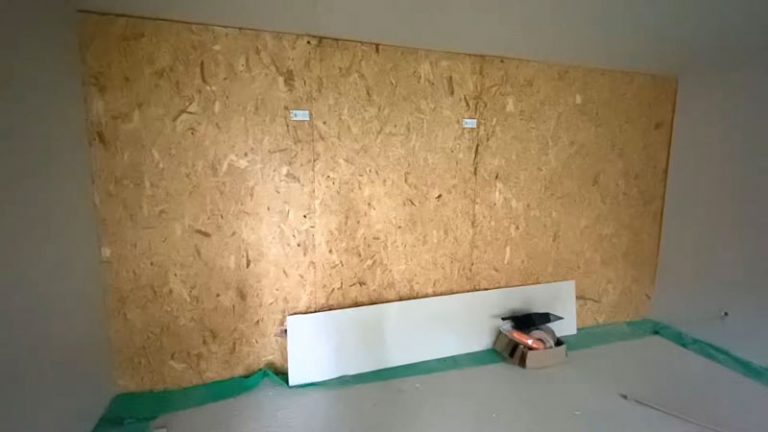
A poorly finished skylight is more than just an eyesore. It’s a glaring reminder of an incomplete project, a source of drafts, and a significant point of energy loss that quietly inflates your utility bills. Many homeowners install a beautiful skylight only to leave the interior light shaft—the tunnel connecting the ceiling to the roof—as a raw, unappealing box of exposed framing and rough drywall.
This unfinished state creates frustrating problems. It disrupts the clean lines of your ceiling, creates awkward shadows, and can become a magnet for dust and cobwebs in hard-to-reach corners. More critically, an improperly finished shaft is often poorly insulated and sealed, leading to heat loss in the winter and heat gain in the summer, directly undermining the comfort of your home.
This guide transforms that problem into a solution. We will walk through every essential step of skylight inside finishing, from the fundamental choices in shaft design to the final stroke of paint. You will learn how to turn that neglected tunnel into a seamless, efficient, and architecturally beautiful feature that floods your room with light and enhances your home’s value.
You'll Learn About
The Core Problem: Why an Unfinished Skylight Shaft Is a Major Flaw
The issue begins the moment the skylight is installed on the roof. The focus is typically on the exterior weatherproofing, but the interior light well is often treated as an afterthought. This neglect leads to several critical issues that go far beyond simple aesthetics, impacting your home’s performance and your comfort.
At its heart, a skylight shaft is a hole in your home’s thermal envelope—the continuous layer of insulation and air sealing that separates the conditioned indoor space from the unconditioned outdoors (like an attic). When this shaft is left unfinished, it becomes a weak spot. Many incorrectly believe that are skylights outdated, but often it’s the poor finishing, not the feature itself, that causes problems.
The most significant consequence is thermal bridging. The wood studs used to frame the shaft are poor insulators. Heat naturally moves through these studs, bypassing your attic insulation and creating cold spots on the interior drywall during winter. This is a primary cause of condensation, which can lead to peeling paint, water stains, and even mold growth over time.
Condensation: The Silent Destroyer
Condensation is the most common and destructive problem in poorly finished skylight wells. It happens when warm, moist air from inside your home rises and comes into contact with the cold surfaces of the shaft, which are chilled by the cold attic air. The moisture in the air then condenses into water droplets, mimicking the signs of a roof leak.
Many homeowners mistakenly believe their skylight is leaking when they see water stains. However, in a vast majority of cases, the culprit is condensation caused by inadequate insulation and air sealing within the shaft. A proper finishing process addresses this by treating the shaft walls like exterior walls, creating a robust thermal and moisture barrier.
Without this crucial step, you are essentially creating a small, inefficient chimney in your ceiling that constantly works against your heating and cooling systems. For those experiencing active drips, understanding the principles of sealing a skylight from the inside is the first step, but a complete finish is the permanent solution.
Step 1: Designing the Light Shaft for Light and Style
Before you touch a single tool, the most impactful decision is the shape of your light shaft. The geometry of the shaft walls dictates not only the aesthetic but, more importantly, how effectively light is dispersed throughout the room. You have two primary options: a straight shaft or a splayed (or flared) shaft.
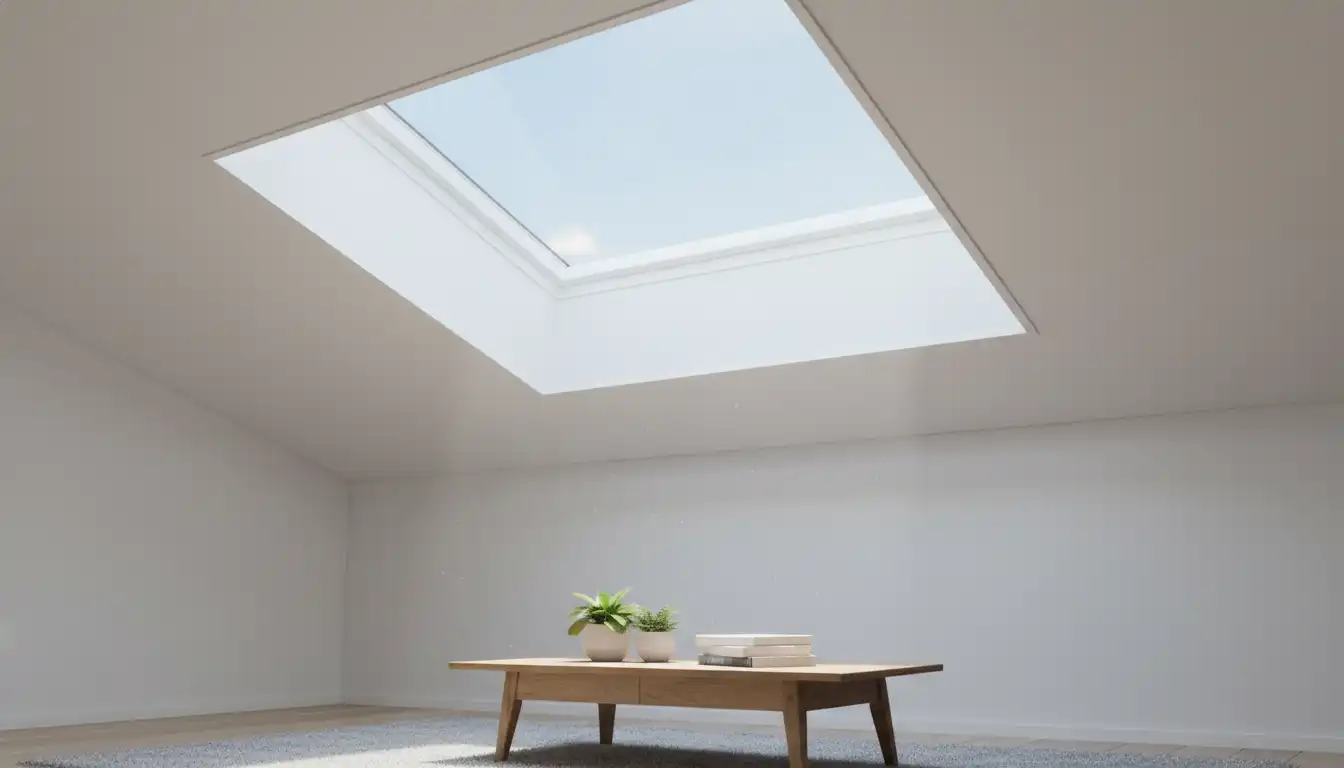
A straight shaft has vertical walls, creating a direct, box-like tunnel from the ceiling to the skylight. This design is simpler to frame and drywall. However, it can create a “tunnel effect,” where the light is concentrated in a bright spot directly below the skylight, leaving the surrounding areas darker.
A splayed shaft is the superior choice for maximizing light diffusion. In this design, one or more walls of the shaft are angled outwards from the skylight down to the ceiling opening. This flare allows light rays to bounce off the angled surfaces and spread across a much wider area of the room, creating a brighter, more ambient feel. Flaring the top and bottom walls (the ones running parallel to the roof slope) is most common and effective.
The Physics of Light Diffusion
Think of the light entering the skylight as a stream. In a straight shaft, that stream pours directly down. In a splayed shaft, the angled walls act like reflectors, scattering that stream across the entire room. The wider the flare, the more diffuse and even the light becomes.
Even a modest splay of 10-15 degrees can dramatically increase the amount of usable daylight. This simple geometric choice transforms the skylight from a spotlight into a broad, natural light source. While it requires slightly more complex angle cuts during framing, the payoff in light quality is immense.
Step 2: The Critical Trio – Framing, Insulating, and Air Sealing
With your design chosen, the next phase is the structural and thermal work. This is the most critical stage for preventing future problems like condensation and energy loss. The goal is to build a shaft that performs as well as, or better than, an exterior wall.
Framing the Shaft
The shaft is typically framed with 2×4 or 2×6 lumber, creating a structure that connects the roof rafters to the ceiling joists. If you’ve opted for a splayed shaft, the corner studs will be cut at an angle to create the flare. It is crucial that this framing is solid and provides adequate backing for the drywall to be attached later.
Insulation: Your Best Defense Against Condensation
The cavities between the framing studs must be completely filled with insulation. This is not optional. An uninsulated or poorly insulated shaft is a guaranteed source of problems. The shaft walls are exposed to the extreme temperatures of your attic, making them a prime location for heat transfer.
Closed-cell spray foam is the gold-standard solution because it provides a high R-value (insulating power) and acts as an air and vapor barrier in one step. Alternatively, you can use rigid foam boards cut to fit snugly between the studs, or mineral wool batts. The key is to eliminate any gaps or voids where air can circulate.
Air Sealing: The Forgotten Detail
Insulation only works effectively when air cannot move through or around it. Before installing the interior drywall, every seam, gap, and joint in the shaft’s framing must be sealed. This includes the connection between the shaft and the roof deck, the ceiling, and around the skylight unit itself.
Use high-quality caulk or canned spray foam to seal these gaps. This crucial step stops warm, humid interior air from leaking into the shaft cavity, where it could bypass the insulation and condense on cold surfaces. Proper air sealing is the secret to a high-performance, moisture-free skylight shaft.
Step 3: Choosing Materials for a Flawless Finish
With the shaft properly framed, insulated, and sealed, you can now focus on the visible surfaces. The material you choose will define the final look and durability of your skylight well. While standard drywall is the most common choice, there are other options to consider depending on your home’s style and the location of the skylight.
Moisture-resistant drywall (green board) is a wise upgrade, especially for skylights in kitchens or bathrooms where humidity levels are higher. It offers enhanced protection against moisture and mold. For the highest level of protection, a tileable foam board backer can be used and finished with waterproof plaster.
For a more rustic or traditional look, wood paneling like tongue-and-groove beadboard or shiplap can be used. These materials add texture and warmth, turning the skylight shaft into a deliberate design element. If using wood, it’s still critical to ensure the underlying structure is perfectly insulated and air-sealed.
Material Comparison Table
To help you decide, here is a comparison of the most common interior finishing materials for a skylight shaft:
| Material | Pros | Cons | Best For |
|---|---|---|---|
| Standard Drywall | Inexpensive, versatile, creates a seamless look with the ceiling. | Susceptible to moisture damage if not properly primed and painted. | Living rooms, bedrooms, and hallways. |
| Moisture-Resistant Drywall | Resists humidity and mold, more durable in damp environments. | Slightly more expensive than standard drywall. | Bathrooms, kitchens, and laundry rooms. |
| Wood Paneling (Beadboard/Shiplap) | Adds architectural character, texture, and warmth. | More expensive, requires more skill to install, seams can expand/contract. | Farmhouse, coastal, or rustic style homes. |
| Plaster | Creates a very smooth, high-end, durable finish. Can be curved. | Requires professional installation, more expensive and time-consuming. | High-end custom homes or historical renovations. |
Step 4: Drywall Installation and Finishing Like a Pro
Achieving a professional-looking finish with drywall requires precision and patience, especially given the awkward angles inside a skylight shaft. The goal is to create sharp, clean lines and a surface so smooth that it blends perfectly with the surrounding ceiling.
Cutting and Hanging the Drywall
Measure each panel for the shaft walls carefully. For splayed shafts, you will need to cut the edges of the drywall at an angle to ensure a tight fit in the corners. A sharp utility knife is essential for clean cuts. Secure the drywall to the framing with drywall screws, making sure to sink the heads just below the surface without tearing the paper.
Taping and Mudding the Joints
This is where skill makes all the difference. The corners of a skylight shaft are highly visible, and any imperfections will be highlighted by the intense natural light. Use paper tape for inside corners, embedding it in a thin layer of joint compound (mud). For outside corners where the shaft meets a flat ceiling, a rigid corner bead will create a crisp, durable edge.
Apply multiple thin coats of joint compound, allowing each coat to dry completely before sanding and applying the next. The first coat should fill the gaps and bed the tape, the second should widen and feather the joint, and the final coat should be a very light skim to smooth out any remaining imperfections. Sand lightly between coats with fine-grit sandpaper for a flawless surface.
Step 5: Priming and Painting for Maximum Light and Durability
The final step is to prime and paint the finished drywall. The right paint not only completes the look but also adds a layer of protection and enhances the light-reflecting properties of the shaft. A common question is whether a higher sheen paint will reflect more light.
While technically true, the perceptible difference between a flat and a semi-gloss finish in terms of light reflection is minimal. The most important factor is the color. A bright, clean white is the best choice for maximizing the light cast into the room. It creates a neutral, clean canvas that allows the natural daylight to be the star.
Choosing the Right Paint and Sheen
A high-quality acrylic latex paint is ideal. For the paint sheen, a flat or matte finish is highly recommended. The intense, direct light from a skylight is unforgiving and will highlight every tiny bump, roller mark, or imperfection on the surface. A flat finish absorbs light and is excellent at hiding these minor flaws, resulting in a cleaner, more uniform appearance.
In moisture-prone areas like bathrooms, a dedicated kitchen-and-bath paint with a satin or eggshell finish is a better choice. These paints are formulated with mildewcides and offer a more washable, durable surface. Before painting, always apply a high-quality PVA (polyvinyl acetate) drywall primer to seal the new joint compound and ensure the topcoat adheres properly and has an even sheen.
Beyond the Basics: Considering Other Daylighting Options
While a traditional skylight is a fantastic addition, it’s worth noting other technologies designed to bring light into different spaces. For areas where a full skylight isn’t feasible, such as a windowless bathroom or a dark hallway, a solar tube can be an excellent alternative.
For spaces below the main floor, a specialized solar tube for basement can even channel sunlight down through multiple stories. These options highlight how modern solutions can solve a wide range of natural lighting challenges throughout the home, complementing the role of a well-finished traditional skylight.
Conclusion: A Finished Skylight Is a Finished Room
Finishing the inside of your skylight shaft is not just a cosmetic upgrade; it is an essential part of the installation. By focusing on the critical details of shaft design, insulation, air sealing, and high-quality finishing, you transform a potential problem area into a high-performance architectural asset.
A properly finished skylight well prevents condensation, minimizes energy loss, and maximizes the beautiful, diffuse daylight that you wanted in the first place. It elevates the feature from a simple “hole in the roof” to a stunning, integrated element that enhances the comfort, efficiency, and value of your home for years to come.