Repair Cut Trusses in Attic: Your Guide to a Critical Fix
You’ve ventured into your attic, perhaps to investigate a leak or stash away holiday decorations, and you see it. A wooden beam—part of the triangular framework holding up your roof—has been crudely cut. This shocking discovery is more than just an eyesore; it’s a serious structural problem that could compromise the safety of your entire home.
Finding a cut truss can be alarming, but don’t panic. This guide will walk you through why this is a critical issue, what causes it, and the essential steps to properly and safely repair cut trusses in your attic.
You'll Learn About
What Are Trusses and Why Are They Untouchable?
Roof trusses are pre-engineered wooden structures designed with incredible precision to support the weight of your roof and distribute it evenly to the exterior walls of your home. Each component of the truss—the top chords (rafters), bottom chords (ceiling joists), and webbing—works together in a delicate balance of tension and compression. They are not just random planks of wood; they are a sophisticated engineering system.
Because they are engineered for a specific load and design, you should never cut, drill, or modify a truss in any way without professional guidance. Altering even a single component disrupts the load distribution, potentially leading to sagging roofs, cracked drywall, and in the worst-case scenario, a catastrophic roof collapse.
Common Culprits: Why Would Anyone Cut a Truss?
If trusses are so critical, why would one be cut? The reasons usually stem from convenience or ignorance during other home projects. It’s a shortcut that creates a massive long-term risk.
Often, HVAC installers are the culprits. They might cut through a truss web or chord to create space for ductwork, an air handler, or other equipment. Similarly, plumbers or electricians may notch or cut members to run pipes or wires. Another common reason is a homeowner attempting to create extra storage space or an attic room without understanding the structural implications.
In some cases, work on other systems can lead to this issue. For instance, replacing a furnace in the attic can be difficult, and a contractor might cut a truss for access. This highlights the importance of ensuring all your home’s systems are installed correctly; a mistake in one area can have cascading effects, similar to how an issue like a polarity reversed on furnace problem can indicate deeper electrical concerns that need professional attention.
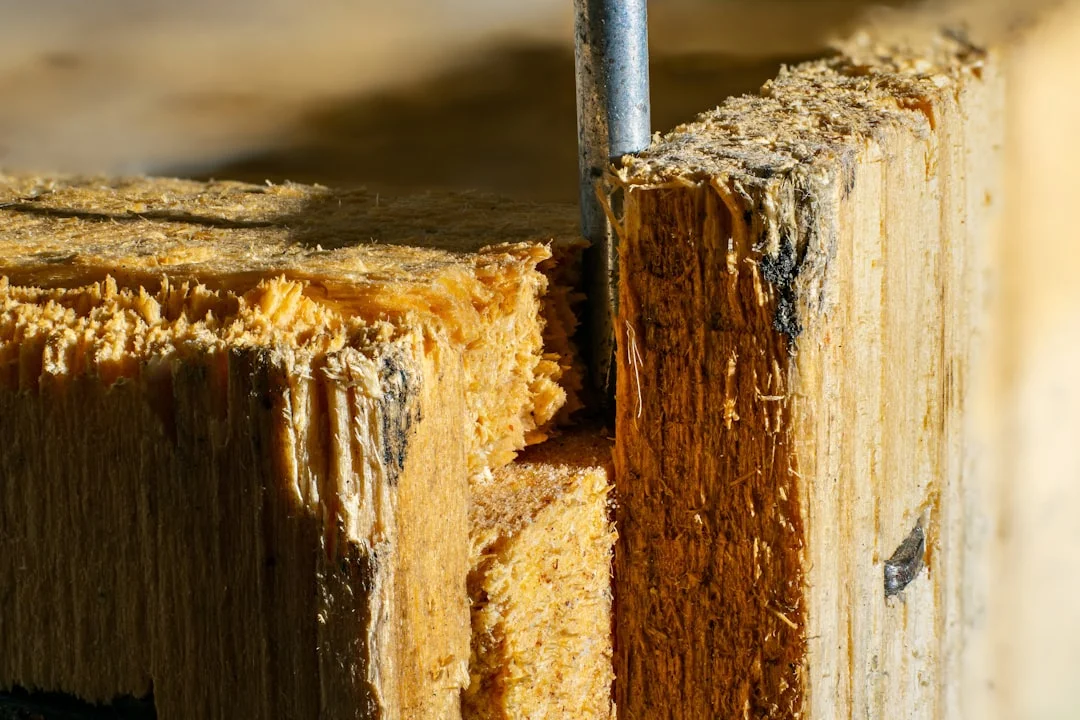
The Dangers Lurking Above: Consequences of a Cut Truss
A compromised truss is a ticking time bomb for your home’s structural integrity. The triangular shape is what gives a truss its strength, and when a piece is removed, the remaining parts are subjected to forces they were never designed to handle.
This can lead to a host of problems, from the subtle to the severe. You might notice ceiling cracks appearing below the affected area, or the roofline may begin to sag. These are clear distress signals from your home, indicating that the structural support system is failing.
The Only Safe Solution: How to Properly Repair a Cut Truss
When you discover a cut truss, the first and most important rule is: do not attempt a DIY fix. Simply sistering a new piece of wood alongside the cut member or slapping on a piece of plywood is almost always inadequate and can make the problem worse. This is not a job for a handyman or even a general contractor without specific guidance.
The only correct way to address a modified truss is to involve a licensed structural engineer. They are the only professionals qualified to assess the damage and design a proper, safe repair plan. The peace of mind that comes from a certified repair is invaluable.
Step 1: The Structural Engineer’s Assessment
An engineer will visit your home to inspect the cut truss and the surrounding structure. They will analyze the original truss design, the extent of the damage, and the loads the truss is meant to carry. Based on this evaluation, they will create a detailed set of repair drawings and specifications.
This professional assessment is non-negotiable. Building codes require an engineered solution for any truss modification, and attempting to sell a home with an improper repair will be flagged by a home inspector, causing major issues with the sale. The cost of an engineer, typically a few hundred to a couple of thousand dollars, is a small price to pay to avoid tens of thousands in future damages.
Step 2: Common Engineered Repair Methods
The engineer’s plan will detail the precise materials and methods for the repair. These solutions are designed to restore the truss to its original strength and function. Common methods include:
Plywood or OSB Gusset Plates: This is a very common repair technique. The engineer will specify the thickness of the plywood or Oriented Strand Board (OSB) and the size and pattern of nails or structural screws required. The gusset is glued and fastened over the damaged joint or cut, effectively creating a strong new connection.
Sistering or Scabbing: This involves attaching a new piece of lumber of the same or greater dimension alongside the damaged or cut member. The engineer’s plan will specify the length of the new piece, ensuring it extends far enough past the damaged area, and the exact fastening pattern needed to transfer the load correctly.
Metal Connector Plates or Brackets: In some situations, specially designed steel plates or brackets may be specified to reinforce a joint or splice a cut member. These are often used in conjunction with other methods to add strength and rigidity.
Step 3: Executing the Repair with a Qualified Contractor
With the engineer’s sealed plans in hand, you can hire a qualified contractor to perform the work. The contractor must follow the repair documents to the letter. Any deviation from the plan invalidates the repair and could compromise its effectiveness.
After the contractor completes the work, the structural engineer will often return to inspect the repair and confirm it was done according to their specifications. They will then provide a letter or report certifying that the truss has been properly repaired, a crucial document for your home’s records.
DIY vs. Professional Repair: A Cost and Safety Breakdown
While the allure of saving money with a DIY approach is strong, repairing a structural component like a truss is one area where it is never worth the risk. The table below outlines why a professional, engineered repair is the only safe and viable option.
| Aspect | DIY Approach | Professional (Engineer + Contractor) |
|---|---|---|
| Safety | Extremely high risk of personal injury and catastrophic structural failure. Incorrectly transfers loads, potentially causing more damage. | Ensures the repair is designed to safely handle all structural loads. Professionals use proper safety equipment and techniques. |
| Effectiveness | Almost always inadequate. Fails to properly restore the truss’s engineered load-bearing capacity. | Repair is designed and certified to be as strong or stronger than the original, un-altered truss. |
| Code Compliance | Violates building codes, which require an engineered solution for any truss modification. | Ensures the repair is fully compliant with all local building codes and regulations. Provides necessary documentation. |
| Home Resale Value | A DIY repair will be flagged during a home inspection, potentially killing a sale or forcing a costly, last-minute professional repair. | An engineered repair with documentation satisfies buyers and inspectors, protecting your home’s value. |
| Cost | Low initial material cost but can lead to tens of thousands of dollars in damages, making it far more expensive in the long run. | Upfront cost for engineer and contractor, but prevents catastrophic failure and far greater future expenses. |
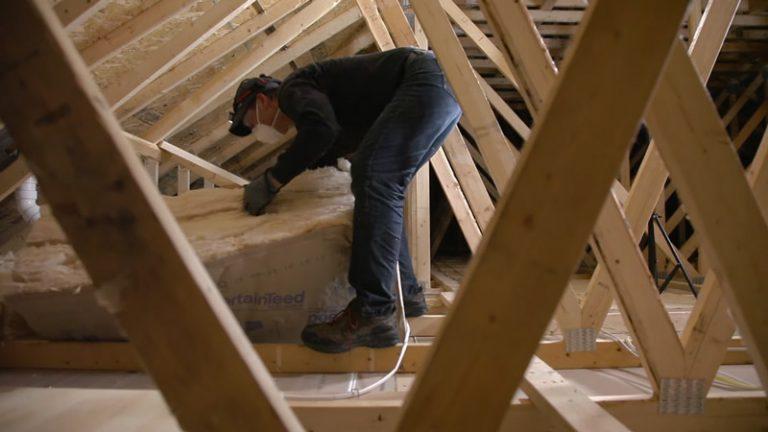
Prevention and Best Practices for Your Attic
Once your truss is repaired, it’s wise to consider how to prevent future issues. Proper attic maintenance and planning are key. If you plan to use your attic for storage, it’s important to understand its limitations.
Many homeowners ask, is it ok to put plywood over attic insulation for flooring? While you can, you must ensure the flooring only rests on the bottom chords of the trusses and that you are not overloading them. Trusses are often designed to carry only the weight of the drywall ceiling below and a light storage load, not heavy boxes or furniture.
When having any work done in your attic, be explicit with contractors that they are not, under any circumstances, to cut, notch, or drill any part of the roof trusses. It’s also a good time to check on other systems. For instance, ensuring your attic lighting is functional and safe is important; you might even consider the differences in a Leviton plus switch vs standard switch for better control and reliability in an area you don’t frequent often.
Your Home’s Structural Integrity is Worth the Investment
Discovering a cut truss is a serious problem, but it is entirely fixable when handled correctly. The key is to resist the temptation to cut corners and to instead invest in a professional, engineered solution. By hiring a structural engineer and a qualified contractor, you are not just repairing a piece of wood; you are protecting your home, your family, and one of the most significant investments of your life.
Take immediate action, follow the right steps, and restore the strength and safety of your home’s structure for years to come.