Moss Fireplace Guide: Avoid Disasters, Create a Green Oasis
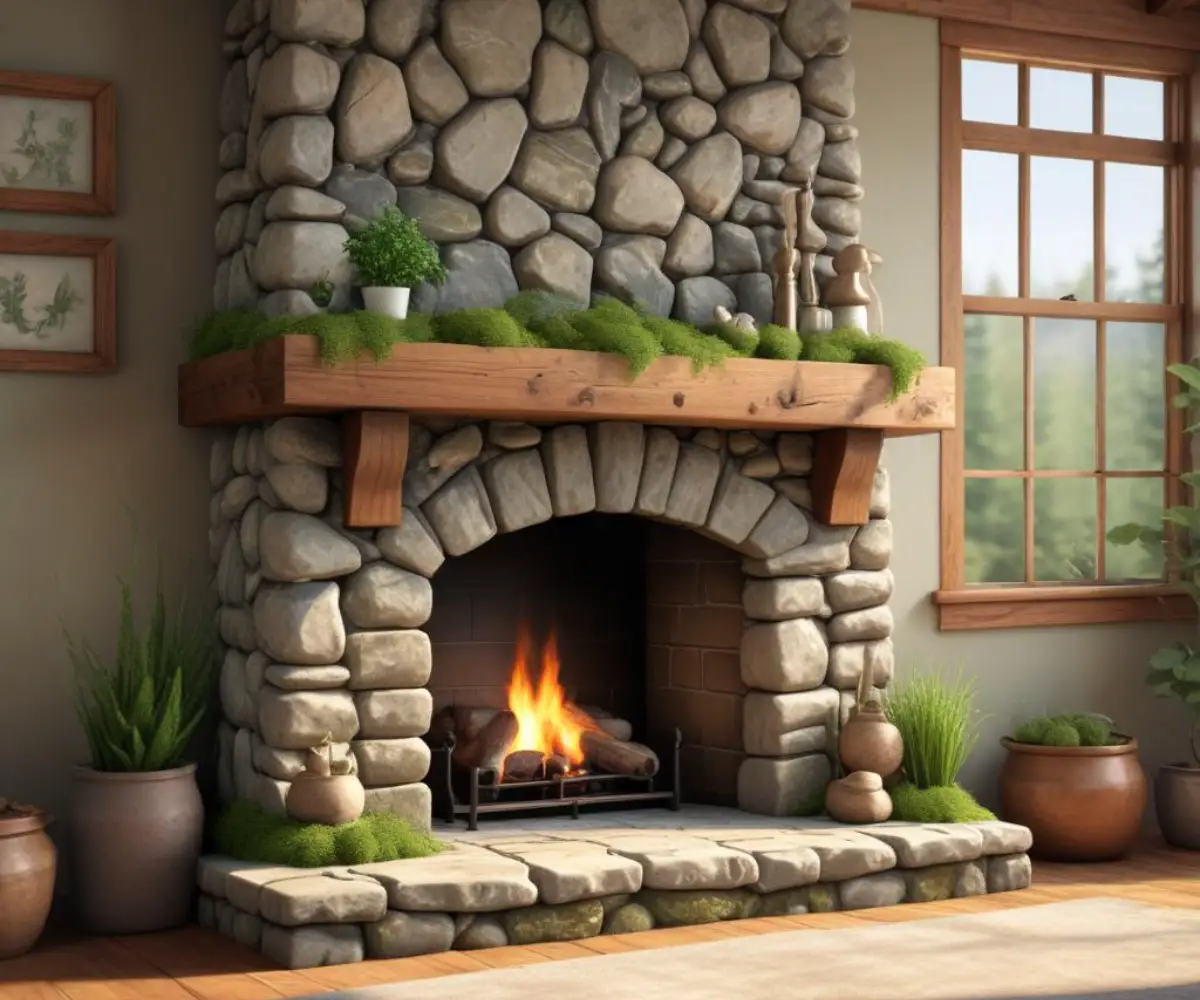
A moss fireplace is a captivating design feature, promising to bring a touch of serene, natural beauty indoors. The vision is a lush, green hearth that serves as a living piece of art. The reality, however, can quickly turn into a frustrating and damaging ordeal if approached incorrectly.
Many homeowners, inspired by biophilic design, attempt this project only to face dying moss, unsightly brown patches, and persistent moisture issues. These problems not only ruin the aesthetic but can also lead to mold, mildew, and costly damage to your home’s structure. Understanding the core reasons for these failures is the first step toward success.
You'll Learn About
Why Your Moss Fireplace Dreams Are Turning into Nightmares
The fundamental issue often lies in a misunderstanding of moss itself. Bringing living moss indoors, especially around a feature like a fireplace, introduces a host of challenges that are frequently underestimated. The dream of a low-maintenance, evergreen accent piece can quickly sour.
A primary cause of failure is using living moss in an unsuitable indoor environment. Living moss requires a delicate balance of moisture, indirect light, and coolness to thrive. The area around a fireplace, particularly one that is used, is often too hot and dry, leading to the moss quickly dying and losing its vibrant color.
The Perils of Living Moss Indoors
Introducing constant moisture to keep live moss alive on a vertical surface is a recipe for disaster. This moisture can seep into the fireplace surround, whether it’s made of brick, stone, or wood. This creates a perfect breeding ground for mold and mildew, which can compromise air quality and cause structural materials to rot or degrade over time.
Furthermore, living moss can attract insects and other pests looking for a damp, sheltered environment. This introduces another layer of complication and potential infestation inside your home. Without the right knowledge and materials, a DIY moss fireplace can become an expensive and unhealthy problem rather than a beautiful feature.
The Secret to a Stunning, Long-Lasting Moss Fireplace
The solution to creating a beautiful and durable moss fireplace lies in a simple, yet critical choice: using preserved moss instead of living moss. This single decision eliminates nearly all the common problems associated with this project. Preserved moss is real moss that has been sustainably harvested and treated with a non-toxic solution, like glycerin, to maintain its color and texture indefinitely.
This preservation process means the moss is no longer alive and requires no water, light, or maintenance. It provides the lush, natural aesthetic of living moss without any of the risks. With preserved moss, you can achieve a flawless, vibrant green fireplace surround that remains beautiful for years without attracting pests or causing moisture damage.
Choosing Your Weapon: Preserved Moss vs. Living Moss
Understanding the distinct differences between these two options is crucial for anyone considering a moss feature wall or fireplace. While both originate from nature, their application and behavior indoors are worlds apart. The right choice ensures a beautiful, lasting installation, while the wrong one leads to decay and disappointment.
The key takeaway is that preserved moss is engineered for interior design, offering stability and longevity. Living moss, on the other hand, is a delicate ecosystem that is incredibly difficult to sustain vertically indoors, especially in a challenging location like a fireplace surround.
| Feature | Preserved Moss | Living Moss |
|---|---|---|
| Maintenance | None (occasional light dusting) | High (requires regular misting, specific light) |
| Water Required | No | Yes, constantly |
| Moisture Damage Risk | None | Very High |
| Pest Risk | None | High |
| Longevity Indoors | Years | Short-lived without expert care |
| Color Stability | Excellent (fades only in direct sunlight) | Prone to browning and dying |
Step-by-Step Guide to Creating a Flawless Moss Fireplace
With the right materials and a methodical approach, creating a stunning moss fireplace is an achievable and rewarding project. The process begins not with the moss itself, but with careful planning and preparation. This foundational work ensures the final result is not only beautiful but also durable and seamlessly integrated into your space.
Step 1: Design and Preparation – The Blueprint for Success
Before you even think about glue, conceptualize your design. Decide whether you want full coverage, a patterned design, or subtle accents of moss on the mantel or surround. Crucially, never apply moss inside the firebox or too close to the heat source. Safety must always be the priority.
The surface of your fireplace must be impeccably clean, dry, and free of dust or debris. For porous surfaces like brick or stone, a wire brush can help remove any loose particles. Depending on the material, applying a primer or sealant can create a better bonding surface for the adhesive, preventing it from soaking in and weakening the hold. Proper preparation is not just a suggestion; it’s the most critical factor for a long-lasting application. A little extra effort here prevents the frustration of peeling moss later, a task as tedious as trying to fix separated crown molding.
Step 2: Gathering Your Materials – The Right Tools for the Job
Success depends on using high-quality materials. Invest in premium preserved moss; popular varieties include sheet moss for broad coverage, and mood or reindeer moss for texture and dimension. Avoid cheap craft store moss, which can be brittle and poorly preserved.
Your choice of adhesive is equally important. A strong, high-quality construction adhesive or a specialized floral glue is recommended. While hot glue can work for small accents, it’s not reliable for larger areas and can fail over time. Use a caulking gun for clean, even application of construction adhesive.
Step 3: The Art of Moss Application
This is the creative part of the process. Work in small, manageable sections to prevent the adhesive from drying out. Apply a thin, even layer of glue to the fireplace surface, then firmly press your moss pieces into place. Hold for a few moments to ensure a solid bond.
For a dynamic, natural look, combine different types of moss. Use sheet moss as a base and then layer on clumps of mood moss or colorful reindeer moss to create depth and visual interest. Overlap pieces slightly to hide seams and create a lush, seamless carpet of green. This is where your artistic vision truly comes to life.
Step 4: Curing and Finishing Touches
Patience is key after the moss is applied. Allow the adhesive to cure completely, which can take 24 hours or more depending on the product and ambient humidity. Refer to the manufacturer’s instructions and resist the urge to touch or adjust the moss during this critical period.
Once cured, go over the entire surface and trim any stray moss fibers with scissors for a clean, professional edge. Use a soft brush or compressed air to gently remove any loose bits or dust. This final step elevates the project from a DIY experiment to a polished, intentional design feature.
Beyond Installation: Long-Term Care and Styling
One of the greatest benefits of a preserved moss fireplace is its incredibly low maintenance. However, understanding how to care for it and style the surrounding space will ensure it remains a stunning focal point for years to come. Proper care is less about active maintenance and more about protecting it from environmental factors.
Debunking Moss Maintenance Myths
The most important rule of preserved moss care is simple: do nothing. It does not need water, misting, or sunlight. In fact, watering it will damage the preservation and can lead to decay. Direct sunlight is its primary enemy, as UV rays will cause the vibrant green color to fade over time. Place it in a location with indirect light to preserve its beauty.
The only “maintenance” required is an occasional, gentle dusting. You can use a can of compressed air held at a distance or a soft feather duster to remove any accumulated dust. It truly is a set-it-and-forget-it piece of natural art.
Styling Your Biophilic Masterpiece
A moss fireplace is a powerful statement piece that anchors a room in nature. Enhance this biophilic connection by styling the surrounding area with complementary elements. Natural wood tones, stone textures, and earthy color palettes all work beautifully with the lush green of the moss.
Incorporate other natural elements to complete the look. Adding a few well-chosen houseplants can create a layered, jungle-like effect, though be sure to follow best practices to keep them thriving—a challenge many enthusiasts discuss on platforms like a houseplant forum. Ambient lighting, such as spotlights directed at the fireplace, can highlight its texture and make it a dramatic focal point in the evening.
Troubleshooting Common Moss Fireplace Issues
Even with preserved moss, minor issues can occasionally arise. Knowing how to quickly address them will keep your installation looking its best. Most problems are easily preventable with proper installation but are also simple to fix after the fact.
Problem: My Moss is Fading or Turning Brown
This is almost always caused by exposure to direct sunlight. The UV rays break down the natural pigments and dyes used in the preservation process. If the fading is minor, you may be able to live with it. For significant fading, the only solution is to replace the affected sections of moss and ensure the feature is protected from future sun exposure.
Problem: The Moss is Falling Off
If small pieces or sections of moss begin to detach, it typically points to one of two causes: insufficient adhesive during application or a poorly prepared surface. To fix it, carefully remove the loose piece, clean any old, failed glue from both the moss and the fireplace surface, and re-adhere it with a generous application of construction adhesive. Press firmly and allow it to cure fully.
Problem: It Has a Chemical Smell
A slight odor immediately after installation is normal. This smell comes from the off-gassing of the adhesive as it cures or from the glycerin solution used in the preservation process. Ensure the room is well-ventilated for a day or two, and the smell should dissipate completely. Choosing a low-VOC (Volatile Organic Compound) adhesive can minimize this initial odor.
Frequently Asked Questions (FAQ)
Addressing common questions and concerns upfront can provide peace of mind and ensure a safe, successful project. Here are the answers to the most frequently asked questions about moss fireplaces.
Is a moss fireplace a fire hazard?
This is the most critical question. Preserved moss should never be installed inside the firebox, on the hearth where embers could land, or anywhere it would be exposed to open flames or extreme heat. While many preserved moss products are treated with a fire retardant, they are not fireproof. Adhering to safety clearances specified by your fireplace manufacturer and local building codes is non-negotiable.
Does a preserved moss fireplace attract bugs?
No. Because preserved moss is no longer living and contains no organic matter for pests to eat, it does not attract insects or other bugs. This is one of its most significant advantages over using living moss indoors.
How much does a moss fireplace cost?
The cost can vary widely based on the size of the fireplace and the quality of the moss. A DIY project can range from a few hundred to several thousand dollars. Professional installation will be significantly more expensive but ensures a flawless and safe result. Consider the fireplace surround an investment, much like the exterior appeal provided by driveway pillars.
How long does a preserved moss fireplace last?
When installed correctly in a location shielded from direct sunlight and moisture, a preserved moss fireplace can last for many years. Its lifespan is typically cited as 5-10 years or even longer before any significant degradation in color or texture occurs, making it a long-term, high-impact design feature.