Light Switch Popped Out? Here’s the Real Reason (and a Safe Fix!)
There are few things more startling in a quiet home than the sudden pop of a light switch coming loose from the wall. It’s an unsettling event that immediately raises questions: Is this dangerous? What caused it? Can I fix this myself? The short answer is yes, it can be a hazard, but in many cases, it’s a problem you can safely and confidently resolve with the right knowledge.
A light switch that has popped out of place is not just a cosmetic issue; it’s a clear signal that something is wrong within the electrical box. This guide will walk you through the common causes, the essential safety precautions, and the step-by-step solutions to restore your switch to its secure, functional state, ensuring your home remains safe.
You'll Learn About
Why Your Light Switch Popped Out of the Wall
Understanding the root cause of a loose or popped-out switch is the first step toward a permanent fix. While it may seem like a random failure, the problem can almost always be traced back to a handful of specific mechanical issues within the electrical box.
Loose Mounting Screws: The Most Common Culprit
The simplest and most frequent cause is that the two long screws holding the switch to the electrical box have loosened over time. Every time you flip the switch, a small amount of force is applied. Over thousands of cycles, this can cause the screws to gradually back out, leading to a wobbly switch that eventually pops free.
This is particularly common in high-traffic areas. Fortunately, this is also the easiest issue to fix, often requiring nothing more than a screwdriver.
A Damaged or Broken Electrical Box
The electrical box, typically made of blue plastic (PVC) or metal, is the housing mounted inside your wall that contains the switch and wiring. These boxes have small tabs or “ears” with threaded holes where the switch’s mounting screws attach. If these tabs crack or break off, the screws have nothing to hold onto, and the switch will push out from the wall.
This damage can happen from overtightening screws during installation, physical impact to the switch, or the box becoming brittle with age. You might hear a piece of plastic fall inside the wall when this happens.
Stripped Screw Holes in the Box
Similar to a broken tab, the threads inside the screw holes can become stripped. This is especially common in plastic boxes where repeated tightening and loosening of screws can wear down the material. When the threads are gone, the screw can no longer get a firm grip, and the switch will not stay securely in place.
You’ll know this is the problem if you turn the mounting screw and it just keeps spinning without ever getting tight.
Issues with the Switch Itself
While less common, the switch’s metal mounting strap—the part with the screw holes at the top and bottom—can bend or break. This is usually due to a manufacturing defect or extreme force. If the strap is compromised, it won’t be able to hold the switch flush against the box, causing it to feel loose or pop out.
Safety is Non-Negotiable: Before You Touch Anything
Working with electricity requires the utmost caution. Even a simple light switch repair can be dangerous if you skip the proper safety steps. Never attempt any electrical work without first cutting the power to the circuit.
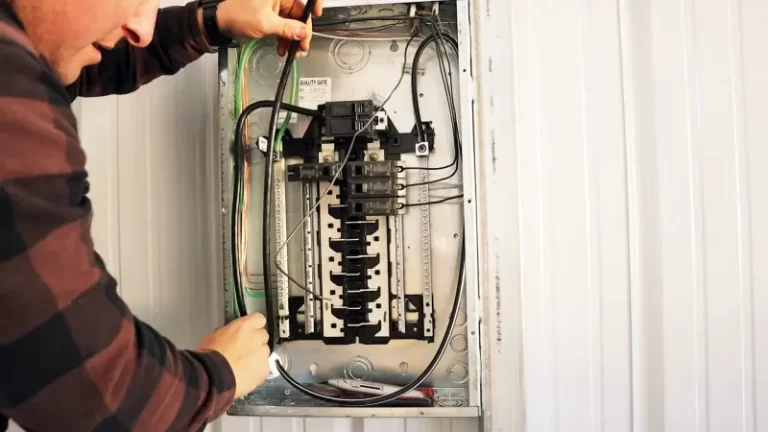
First, go to your home’s main electrical panel (also called a breaker box or fuse box). Identify the circuit breaker that controls the power to the light switch you’ll be working on and turn it to the “OFF” position. This will stop the flow of electricity to that specific area.
Next, you must verify that the power is truly off. Use a non-contact voltage tester by holding its tip near the wires and screws of the switch. If the tester lights up or beeps, there is still power, and you must go back to the panel to find the correct breaker. Do not proceed until the tester confirms there is no live current.
How to Safely Fix a Light Switch That Popped Out: A Step-by-Step Guide
With the power safely disconnected and verified, you can now proceed with the repair. The key is to first diagnose the exact problem and then apply the correct solution.
Step 1: Gather Your Tools and Materials
Having the right tools on hand will make the job smooth and efficient. You will likely need:
- Non-contact voltage tester
- Phillips and flathead screwdrivers
- Needle-nose pliers
- Utility knife
- Flashlight or headlamp
Depending on the diagnosis, you may also need replacement parts like an electrical box repair clip, oversized screws, or a new “old work” electrical box.
Step 2: Remove the Switch Plate and Inspect
Unscrew the two small screws holding the decorative cover plate and set it aside. This will expose the switch and its mounting screws. Gently pull the switch out from the box just enough to get a clear view of the wiring and the inside of the box itself. Look for any obvious signs of damage.
Is the box cracked? Are the screw holes visibly stripped or broken? Are the screws just loose? This initial inspection is crucial for determining your next move.

Step 3: Diagnose and Implement the Correct Solution
Based on your inspection, choose the appropriate repair method from the options below. Each solution targets a specific cause of the problem.
Solution for Loose Screws
If the box is intact and the screw holes are fine, the fix is simple. Push the switch back into the box so it is flush with the wall and use your screwdriver to tighten the top and bottom mounting screws firmly. Don’t overtighten, as this can damage a plastic box. Once snug, the switch should be solid and secure.
Solution for Stripped Screw Holes
When the screw just spins in its hole, you have a few excellent options. One of the easiest fixes is to use a slightly larger screw, like an #8-32 screw, which can cut new threads into the plastic. Alternatively, you can insert a small plastic zip tie into the hole alongside the original screw to provide the necessary friction for it to tighten securely.
Another professional solution is using an electrical box repair clip (sometimes called a “G-Clip”). This small metal clip slides over the damaged hole, providing a new, threaded surface for the screw to bite into.
Solution for a Broken Electrical Box
If a mounting tab on the box has broken off completely, the most reliable and long-term solution is to replace the box. You will need what’s called an “old work” or “remodel” box. These boxes are designed to be installed in existing walls without causing damage.
To do this, you’ll need to disconnect the wires from the old switch (take a picture first!), carefully break apart and remove the damaged box, and then install the new “old work” box. These boxes have wings that clamp onto the back of the drywall as you tighten their screws, creating a very secure mount.
Step 4: Reassemble and Test
Once you have implemented the fix and the switch is securely mounted in the box, carefully push the wires back into the box. Re-attach the switch to the box, ensuring it is straight and flush. Screw the cover plate back on.
Finally, go back to your electrical panel and turn the circuit breaker back to the “ON” position. Test the light switch to ensure it operates the light correctly and feels solid in the wall. A stable switch is a safe switch, but sometimes a malfunctioning switch can manifest as other issues, like an always on light switch, which indicates a different internal problem.
Troubleshooting Common Light Switch Problems
Even after a successful repair, it’s helpful to understand the landscape of potential switch issues. The table below outlines common problems, their likely causes, and the recommended actions to take.
| Symptom | Potential Cause | Recommended Action |
|---|---|---|
| Switch feels wobbly or loose | Mounting screws have loosened over time. | Turn off power and tighten the top and bottom mounting screws. |
| Switch pushes into the wall | The electrical box is recessed too far behind the drywall. | Use outlet spacers or “caterpillars” to fill the gap behind the switch’s mounting strap. |
| Switch pops out of the wall | Stripped screw holes or a broken electrical box tab. | Use an oversized screw, a repair clip, or replace the box with an “old work” unit. |
| Crackling or sizzling sound from switch | Serious Hazard: Loose wiring or a failing switch mechanism causing arcing. | Turn off the circuit immediately and call a licensed electrician. Do not use the switch. |
| Switch is warm to the touch | Overloaded circuit or faulty switch (especially common in old dimmer switches). | Turn off the circuit and consult an electrician to assess the load and switch condition. |
Beyond the Basics: When to Call a Professional Electrician
While fixing a popped-out switch is a manageable DIY task for many, there are situations where calling a professional is the safest and wisest choice. Electrical work can be complex, and recognizing your limits is crucial for your safety and your home’s integrity.
You should immediately stop and call a licensed electrician if you encounter any of the following:
- Signs of Burning or Melting: If you see any black marks, scorch marks, or melted plastic on the switch, wires, or box, it’s a sign of a dangerous overheating condition called arcing.
- Crumbling or Frayed Wire Insulation: Older homes may have wiring with insulation that has become brittle and flakes off when touched. This exposes the live wire and creates a severe shock and fire risk.
- Aluminum Wiring: If you see silver-colored wires instead of copper, your home likely has aluminum wiring, which requires special handling and connectors. Improper connections are a major fire hazard.
- You Are Unsure or Uncomfortable: If at any point you feel uncertain about what you are doing, it is always better to be safe. A professional can handle the job quickly and correctly.
Proper electrical installation is key to preventing future issues. Ensuring boxes are secure is a fundamental step, whether for a simple switch or for more complex installations. Good planning can prevent problems like an off-center vanity light where the fixture’s placement depends entirely on a well-anchored electrical box.
Proactive Measures: How to Prevent Future Switch Issues
Once your switch is repaired, a few simple habits can help prevent the problem from recurring. These proactive steps contribute to the overall longevity and safety of your home’s electrical system.
Practice Gentle Usage
Encourage family members to operate light switches with gentle pressure rather than slapping or forcefully flipping them. Abrupt force is the primary reason that mounting screws work themselves loose over time. This is especially true for Decora-style rocker switches, which can be tempting to hit with an elbow or the back of a hand.
Perform Periodic Checks
Every year or so, take a moment to gently check the light switches in your home. Do any of them feel slightly loose or wobbly? If you catch a loose switch early, a quick tightening of the mounting screws (with the power off) can prevent it from ever popping out.
Maintaining the integrity of your walls and the systems within them is a core part of homeownership. Just as you might undertake a project to replace sidelights with wood to improve an entryway, periodic maintenance of your electrical fixtures improves your home’s safety and functionality from the inside out.
Avoid Overtightening Screws
During installation or repair, tighten screws until they are snug and secure, but no further. Overtightening is a leading cause of stripped screw holes and cracked plastic electrical boxes. The goal is to eliminate wobble, not to apply maximum torque.
.


