Kerdi Shower Pan With Cement Board Walls
The topic of using a Kerdi shower pan with cement board walls is a common question among DIYers and homeowners who are renovating their bathrooms. The Kerdi shower pan is a popular choice for creating a waterproof shower base, and when paired with cement board walls, it can provide a durable and reliable watertight enclosure.
Proper waterproofing is essential in a shower because it prevents water from penetrating the walls and floor and causing damage. If a shower is not properly waterproofed, water can seep into the walls and floor, causing damage to the structure of the building and potentially leading to mold growth.
Waterproofing the shower also helps to prevent leaks and moisture damage in adjacent rooms, which can be costly to repair. Using a high-quality waterproofing system like the Kerdi shower pan can help ensure that the shower is properly sealed and protected from water damage.
You'll Learn About
Benefits of the Kerdi system
The Kerdi shower pan is a popular choice for waterproofing showers because it is easy to install and creates a reliable waterproof barrier. The pan is made of a polystyrene core covered with a layer of reinforced, waterproof membrane material. This design allows it to be easily cut and molded to fit the shape of the shower and create a watertight seal.
In addition to the shower pan, the Kerdi system also includes a waterproofing membrane and bands that are used to seal the seams between the pan and the walls. The membrane is a thin, flexible material that is applied over the cement board walls and adhered to the shower pan using the accompanying bands. This creates a continuous waterproof barrier that prevents water from penetrating the walls or the shower pan.
One of the key benefits of the Kerdi system is that it is designed to work together as a complete waterproofing solution. Using the pan, membrane, and bands together ensures that the shower is properly sealed and protected from water damage. This is important because even small leaks can cause significant damage over time, and can lead to mold and other health hazards.
Another advantage of the Kerdi system is its durability. The pan and membrane are made of high-quality materials that are resistant to cracking, peeling, and other types of wear and tear. This means that they will continue to provide effective waterproofing for many years, even with regular use.
Overall, the Kerdi shower pan and accompanying membrane and bands offer a reliable and long-lasting solution for waterproofing a shower. Using the entire system together ensures a properly sealed and protected shower that will remain watertight for years to come.
Benefits of the Kerdi Shower Pan System
| Benefit | Description |
|---|---|
| Waterproofing | The Kerdi shower pan and membrane are specifically designed to create a watertight seal, preventing water from penetrating the walls and floor and causing damage. |
| Durability | The Kerdi system is made from high-quality materials that are resistant to mold and mildew, ensuring that the shower will last for many years. |
| Compatibility | The Kerdi system is compatible with a variety of surfaces and installation methods, making it a versatile option for many different shower projects. |
| Ease of installation | The Kerdi system is designed to be easy to install, even for DIYers with limited experience. Detailed instructions and videos are available to guide homeowners through the installation process. |
| Customer support | The manufacturer of the Kerdi system provides comprehensive customer support, including technical assistance and warranty information. |
Installing a Kerdi shower pan with cement board walls
Installing a Kerdi shower pan with cement board walls requires careful preparation and attention to detail. The following steps outline the process for installing a Kerdi shower pan and accompanying membrane and bands on cement board walls:
Preparing the subfloor
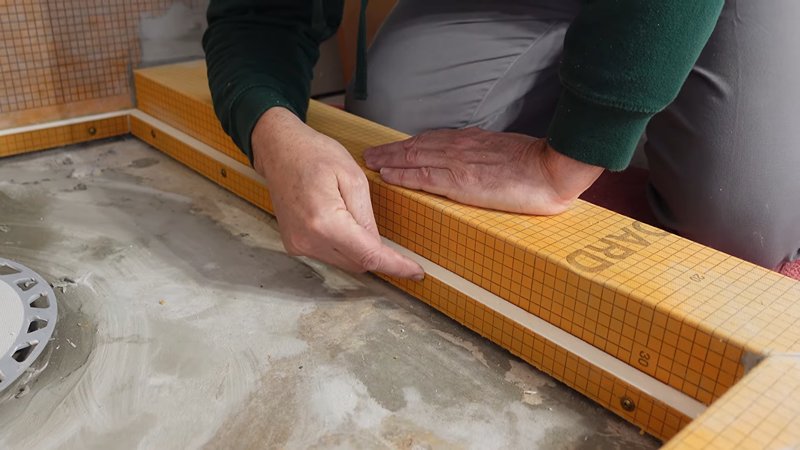
- Before beginning the installation, the subfloor must be properly prepared to ensure that the shower pan sits level and is supported properly. This may involve reinforcing the subfloor or adding additional layers of material, depending on the condition of the existing subfloor.
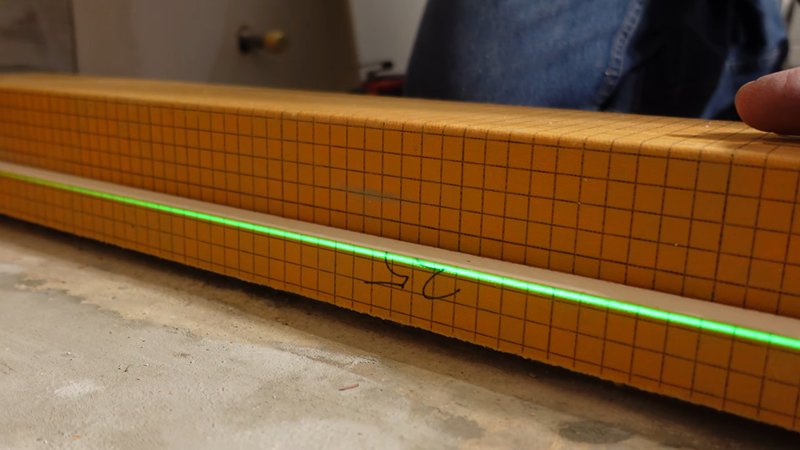
- It is important to check the subfloor for level and to make any necessary adjustments to ensure that the shower pan will sit evenly.
Attaching the cement board
- Once the subfloor is prepared, the next step is to attach the cement board to the walls. This is typically done using cement board screws or nails, and the seams between the sheets of cement board should be sealed with thin-set mortar and fiberglass mesh tape.
- It is important to make sure that the cement board is attached securely to the walls and that the seams are sealed properly to prevent water from penetrating behind the cement board.
Installing the Kerdi shower pan
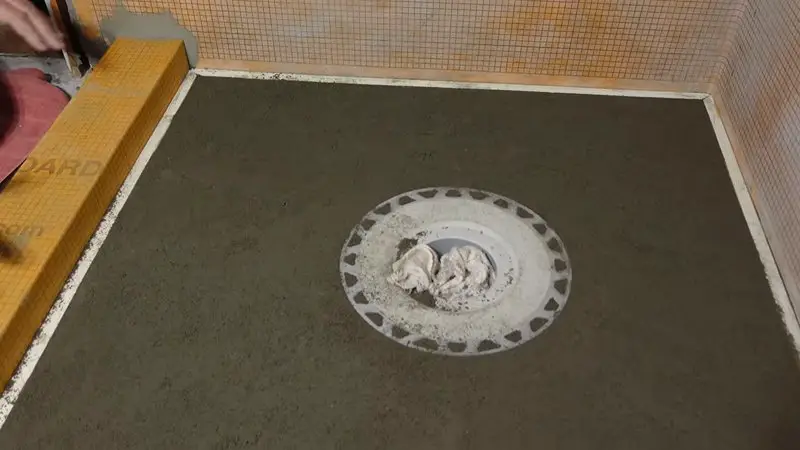
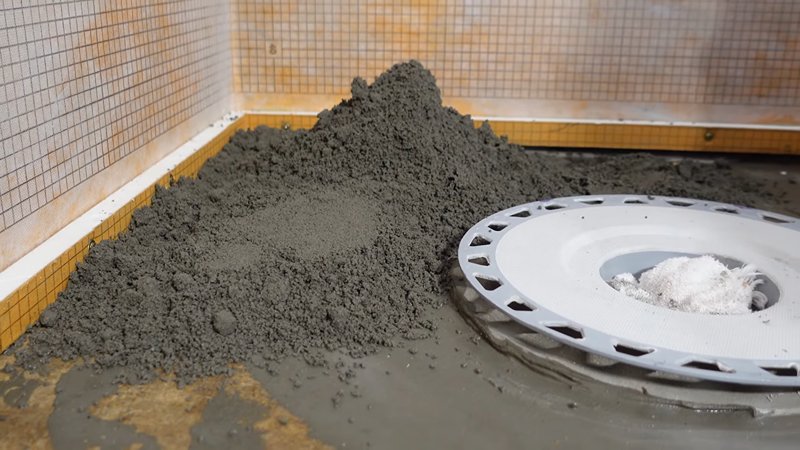
- The Kerdi shower pan is installed by cutting it to fit the dimensions of the shower and attaching it to the subfloor using thin-set mortar. The pan should be positioned so that it slopes slightly towards the drain, and the edges should be sealed with this set to create a watertight seal.
- It is important to follow the manufacturer’s instructions for installing the shower pan, as different models may have different requirements.
Installing the Kerdi membrane and bands
- Once the shower pan is in place, the next step is to install the Kerdi membrane and bands on the walls. The membrane is a thin, flexible material that is applied over the cement board walls and adhered to the shower pan using the accompanying bands. This creates a continuous waterproof barrier that prevents water from penetrating the walls or the shower pan.
Importance of using the entire Schluter system
It is important to use the entire Schluter system for proper waterproofing because each component of the system is designed to work together to create a watertight seal. The Schluter shower pan and membrane, along with the band and other accessories, are all specifically engineered to work together to create a durable and reliable waterproofing system.
Using the entire system ensures that all the components are compatible and that the installation will be effective at preventing leaks and moisture damage. It is not recommended to mix and match components from different manufacturers or systems, as this can compromise the effectiveness of the waterproofing and increase the risk of leaks.
Tips for a Successful Installation
- Plan and prepare before starting the installation. This includes carefully reading the manufacturer’s instructions and gathering all the necessary tools and materials.
- Make sure the subfloor and walls are in good condition and properly prepared to receive the shower pan and tile. This may include reinforcing the subfloor, repairing any damage, and ensuring that the walls are flat and level.
- Use the correct adhesive and grout to install the shower pan and tile. Follow the manufacturer’s recommendations for the best results and to ensure a waterproof seal.
- Take your time and pay attention to detail. It’s important to carefully follow the manufacturer’s instructions and make sure all joints are properly sealed and all surfaces are properly waterproofed.
- Test the shower for leaks before using it. This can be done by filling the shower with water and checking for any leaks or moisture accumulation. If any leaks are found, they should be repaired before using the shower.
Frequently Asked Questions
- Can the Kerdi shower pan be installed on a wood subfloor?
Yes, the Kerdi shower pan can be installed on a wood subfloor as long as the subfloor is in good condition and properly reinforced to support the weight of the shower. It is important to follow the manufacturer’s instructions for installation on a wood subfloor to ensure that the pan is properly supported and sealed. - Can the Kerdi shower pan be used with a prefabricated shower enclosure?
Yes, the Kerdi shower pan can be used with a prefabricated shower enclosure as long as the enclosure is compatible with the Kerdi system. It is important to carefully read the manufacturer’s instructions and follow their recommendations for installation to ensure that the pan is properly sealed and waterproofed. - Can the Kerdi shower pan be installed on an existing shower base?
In some cases, the Kerdi shower pan can be installed on top of an existing shower base. However, it is important to carefully assess the condition of the existing base and ensure that it is in good condition and properly prepared to receive the Kerdi pan. It may be necessary to remove the old base and install a new subfloor before installing the Kerdi pan. - Can the Kerdi shower pan be installed on a concrete slab?
Yes, the Kerdi shower pan can be installed on a concrete slab. However, it is important to properly prepare the concrete and ensure that it is level and free of defects before installing the pan. It may be necessary to use a self-leveling compound to create a smooth, even surface for the pan. - Can the Kerdi shower pan be used with a steam shower?
Yes, the Kerdi shower pan can be used with a steam shower. However, it is important to carefully follow the manufacturer’s instructions for installation and use in a steam shower to ensure that the pan is properly sealed and waterproofed. It may also be necessary to use additional waterproofing measures and ventilation to prevent moisture damage in a steam shower.
Final Words
Using a Kerdi shower pan with cement board walls is a reliable and effective method for creating a waterproof shower. The Kerdi system is specifically designed to provide a watertight seal and prevent leaks and moisture damage. By following the manufacturer’s instructions and using the entire system, homeowners can ensure that their shower is properly waterproofed and protected.
If you are planning a bathroom renovation, consider the benefits of the Kerdi system for your own shower project. It can provide peace of mind and help prevent costly water damage.