James Hardie Paint Match Sherwin Williams: The Ultimate Guide
You have beautiful, durable James Hardie siding, but now you need to paint. Maybe you’re touching up a few spots, painting new trim, or planning a complete exterior refresh. The problem is clear: how do you find the perfect Sherwin-Williams paint color to match your existing James Hardie siding? It’s a question that brings many projects to a halt.
Matching the specific, factory-applied color of James Hardie siding with a field-applied paint is not as simple as picking a similar shade from a swatch. Get it wrong, and you’re left with noticeable, mismatched patches that detract from your home’s curb appeal. This guide provides the ultimate solution to ensure a flawless color match and a professional-grade finish every time.
You'll Learn About
Why Is Matching Hardie Colors So Tricky?
The primary challenge lies in the difference between a factory finish and a traditional paint job. James Hardie’s renowned ColorPlus® Technology is not just paint; it’s a multi-coat, baked-on finish applied in a controlled factory environment. This process ensures a consistent, durable, and UV-resistant color designed to last for years without chipping, peeling, or cracking.
When you try to match this with liquid paint from Sherwin-Williams, several variables come into play. Factors like sheen, weathering of the original siding, and the paint application method can all affect the final appearance. James Hardie does not officially publish exact Sherwin-Williams paint formulas for their colors, making a perfect off-the-shelf match nearly impossible.
The Science of Color: Why Swatches Lie
Beyond the manufacturing process, the way we perceive color is influenced by light and texture. A phenomenon known as metamerism can cause two colors that look identical under a store’s fluorescent lights to appear vastly different in natural daylight. The embossed wood grain texture of Hardie siding also creates subtle shadows that can alter how a color looks compared to a smooth paint chip.
Furthermore, a color’s Light Reflectance Value (LRV) dictates how light or dark it appears. A factory finish and a liquid paint might share a color code, but if their formulation gives them different LRVs, they will not look the same on your home. This is why simply relying on a name or a digital swatch is a recipe for disappointment.
The Foolproof 3-Step Color Matching Process
Achieving a near-perfect match is possible, but it requires a methodical approach. Do not rely on guesswork or online forums alone. Follow these three essential steps to get it right.
Step 1: The Chip is Your Champion
The single most reliable way to get an accurate match is to use a physical sample of your siding. If possible, use a leftover piece or a small chip from an inconspicuous area. Take this sample directly to a Sherwin-Williams store with a high-quality color-matching spectrophotometer.
This device analyzes the exact color of your siding chip and generates a custom formula to replicate it. This method accounts for the specific hue, shade, and even slight fading that may have occurred, providing a much more accurate result than any pre-selected color chart.
Step 2: Use Known “Close” Matches as a Starting Point
While a custom match is best, many homeowners and professional painters have identified Sherwin-Williams colors that are widely considered very close matches for popular James Hardie colors. These can be an excellent starting point, especially for painting entire sections where a microscopic difference won’t be noticeable.
Remember, these are unofficial matches. They should always be tested before you commit to painting your entire house. Below is a table of some of the most sought-after matches to guide your selection.

Step 3: Always, Always Test a Sample
This step is non-negotiable. Once you have your custom-matched formula or a known close match, purchase a small sample pot of the paint. Apply a small test patch on a less visible part of your siding, such as behind a bush or on a back wall.
Let the sample dry completely for at least 24 hours. Observe it at different times of the day—in the bright morning sun, in the afternoon shade, and in the evening. This is the only way to be certain that the color, sheen, and undertones are a satisfactory match before you invest in gallons of paint and hours of labor.
The Definitive James Hardie to Sherwin-Williams Match Table
Here is a comprehensive table of popular James Hardie ColorPlus® colors and their closest known Sherwin-Williams equivalents. Use this as a reference, but always verify with a physical sample as recommended in the steps above.
| James Hardie ColorPlus® Name | Closest Sherwin-Williams Match | SW Code |
|---|---|---|
| Arctic White | Nebulous White | SW 7063 |
| Cobble Stone | Skyline Steel | SW 1015 |
| Light Mist | Passive | SW 7064 |
| Gray Slate | Cityscape | SW 7067 |
| Iron Gray | Rock Bottom | SW 7062 |
| Night Gray | Grays Harbor | SW 6236 |
| Boothbay Blue | Foggy Day | SW 6235 |
| Evening Blue | Grays Harbor | SW 6236 |
| Deep Ocean | Naval | SW 6244 |
| Khaki Brown | Virtual Taupe | SW 7039 |
| Timber Bark | Garret Gray | SW 6075 |
| Pearl Gray | Silverplate | SW 7649 |
| Aged Pewter | Dovetail | SW 7018 |
| Monterey Taupe | Gray Area | SW 7052 |
| Navajo Beige | Kilim Beige | SW 6106 |
| Countrylane Red | Red Barn | SW 7591 |
Choosing the Right Sherwin-Williams Paint for the Job
The type of paint you choose is just as important as the color. Fiber cement siding requires a high-quality, 100% acrylic exterior paint. These paints are flexible, allowing them to expand and contract with the siding as temperatures change, which prevents cracking and peeling.
Avoid using oil-based paints or stains, as they are not compatible with fiber cement and can damage the siding. Before you begin, a thorough inspection is key. Ensure all panels are secure, using the right Hardie board anchors where needed, so your new paint job has a solid foundation.
Recommended Sherwin-Williams Product Lines
For painting James Hardie siding, several Sherwin-Williams product lines offer excellent durability and performance. Consider these top-tier options:
- Emerald® Exterior Acrylic Latex Paint: This is a premium choice offering exceptional durability, resistance to blistering and peeling, and a mildew-resistant coating.
- Duration® Exterior Acrylic Coating: Known for its PermaLast® technology, Duration offers fantastic coverage and long-lasting performance, often requiring just one coat for repaints.
- Resilience® Exterior Acrylic Latex: This paint is formulated for application in a wider range of temperatures and has excellent moisture resistance, making it a great choice for unpredictable climates.
Understanding Sheen and Its Impact
The sheen of your paint has a significant impact on the final look. James Hardie’s ColorPlus® finish typically has a low-lustre or satin appearance. To achieve the most seamless match, especially for touch-ups, it is crucial to select a similar sheen.
A satin or low-lustre finish is generally the best choice. It offers a slight gloss that is easy to clean but is not so shiny that it highlights imperfections. A flat or matte finish can look chalky and is harder to keep clean, while a semi-gloss or gloss finish will likely be too shiny and will not blend well with the original siding.
A Step-by-Step Guide to Painting Your Hardie Siding
Whether you are repainting the entire house or just a section, proper preparation and application are vital for a long-lasting finish. Rushing the process will only lead to problems down the road.
1. Thorough Surface Preparation
Start by cleaning the siding to remove any dirt, dust, chalking, or mildew. Use a garden hose, a soft brush, and a mild detergent. Avoid using a high-pressure washer, as it can damage the siding surface. If you have stubborn stains, such as from sprinklers or construction, you may need a specialized cleaner. For instance, knowing how to remove concrete splatter from Hardie board can save a section of siding from needing replacement.
After cleaning, allow the siding to dry completely, which may take up to 48 hours depending on the weather. Inspect the caulking around windows, doors, and trim and replace any that is cracked or failing.
2. Priming (If Necessary)
If you are painting new, unprimed Hardie siding, you must apply a high-quality acrylic latex primer designed for fiber cement. For siding that is already finished with ColorPlus®, a primer is not usually necessary unless the surface is chalky or the old color is significantly darker than the new one.
If you do need to prime, ensure you get full coverage and let it dry according to the manufacturer’s instructions before applying your topcoat.
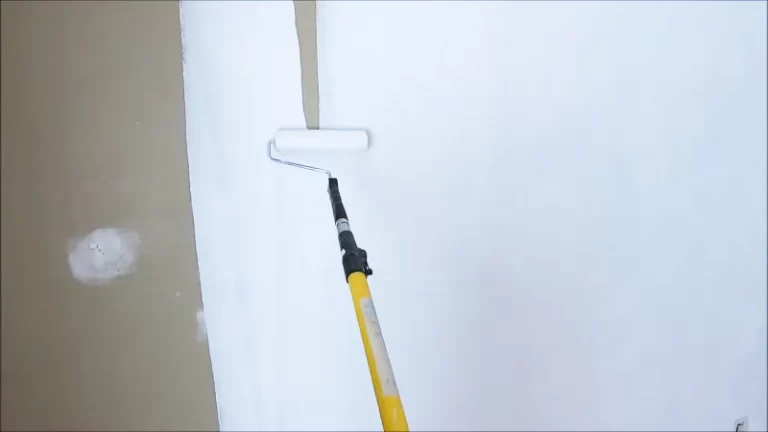
3. Application and Best Practices
For the best results, apply two coats of your chosen Sherwin-Williams paint. This ensures even coverage and maximum durability. You can apply the paint using a sprayer, roller, or brush.
A paint sprayer provides the most uniform finish, mimicking the factory application. If using a sprayer, it’s often recommended to “back-brush” the first coat, which means using a brush to work the paint into the siding’s texture immediately after spraying. Check the weather forecast and avoid painting in direct, intense sunlight or when rain is expected.
Protecting Your Investment and Warranty
It is important to know that repainting your James Hardie siding with a non-Hardie product will void the 15-year limited finish warranty that comes with ColorPlus® Technology. However, it does not void the 30-year limited product warranty that covers the siding material itself, provided you use the correct type of paint and follow proper application procedures.
Also consider the entire siding system. A great paint job won’t last if there are underlying issues. Ensuring that components like the Hardie panel flashing are correctly installed is crucial for the long-term health of your exterior, preventing water intrusion that could undermine both the siding and the paint.