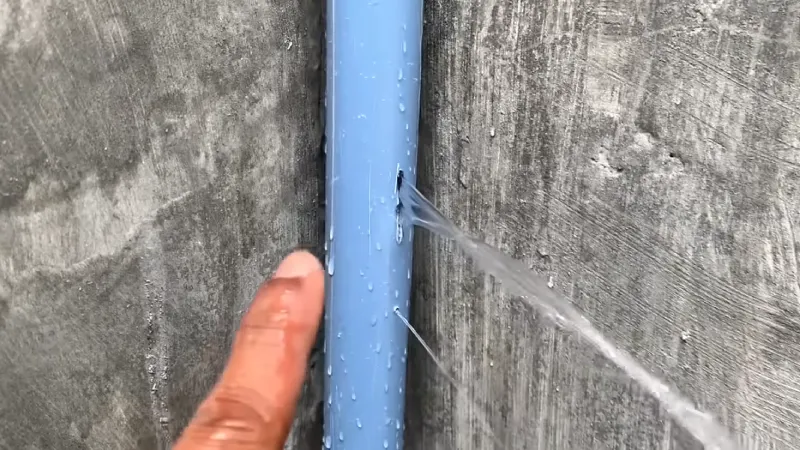
How to Stop a Leaking Pipe With Water in It?
Welcome to a world full of endless possibilities, where the limits are only in your mind. Every day is a new adventure waiting to be discovered, every challenge is an opportunity to learn and grow, and every person you meet has a unique story to share.
Whether you are exploring a new city, learning a new skill, or simply enjoying the little moments in life, there is always something new to discover and experience. So come along with us on this journey and let’s discover the endless possibilities that await us.
You'll Learn About
How to Stop a Leaking Pipe With Water in It
Here are five different methods for stopping a leaking pipe with water in it:
- Pipe clamp: A pipe clamp is a U-shaped device that fits over the pipe and is tightened with bolts. It can be used to temporarily stop a leak until a more permanent repair can be made.
- Epoxy putty: Epoxy putty is a two-part adhesive that can be used to fill and seal leaks in pipes. It is a quick and easy fix that can be done without shutting off the water supply.
- Pipe repair tape: Pipe repair tape is a self-fusing silicone tape that can be used to seal leaks in pipes. It is easy to use and can be applied even when the pipe is wet.
- Rubber or silicone patch: A rubber or silicone patch can be used to cover a small hole or crack in a pipe. The patch can be held in place with hose clamps until a more permanent repair can be made.
- Shut off the water supply: If the leak is too large or cannot be repaired with a temporary fix, the best course of action may be to shut off the water supply to the affected pipe. This can be done at the main shut-off valve or at a valve located near the affected area. Once the water is shut off, the pipe can be repaired or replaced as necessary.
Method 1: Pipe Clamp
Here is a step-by-step guide on how to stop a leaking pipe with a pipe clamp:
Tools and Materials Needed:
- Pipe clamp
- Wrench
- Screwdriver
- Rag or cloth
- Water-resistant epoxy putty (optional)
Step 1: Identify the Leak
The first step is to identify where the leak is coming from. Once you have located the leak, turn off the water supply to the affected pipe.
Step 2: Clean the Pipe
Clean the affected area of the pipe with a rag or cloth to remove any dirt or debris that may prevent the clamp from sealing properly.
Step 3: Position the Pipe Clamp
Position the pipe clamp over the leak and align it with the affected area of the pipe. The rubber gasket should be facing the pipe.
Step 4: Tighten the Bolts
Using a wrench or screwdriver, tighten the bolts on the pipe clamp. Tighten the bolts evenly, alternating between them to ensure that the clamp is secured in place.
Step 5: Test the Repair
Once the clamp is secured, turn the water supply back on and check for any leaks. If there are still leaks, tighten the bolts further or use water-resistant epoxy putty around the leak before reapplying the clamp.
Step 6: Final Check
Inspect the repair one final time to make sure there are no leaks.
The pipe clamp method is a simple and effective way to temporarily stop a leaking pipe. It is best used as a temporary fix until a more permanent repair can be made. It is important to use a pipe clamp that is the correct size for the pipe and to tighten the bolts evenly to ensure a secure seal.
Method 2: Epoxy Putty
Here is a step-by-step guide on how to stop a leaking pipe with epoxy putty:
Tools and Materials Needed:
- Water-resistant epoxy putty
- Latex gloves
- Putty knife
- Rag or cloth
Step 1: Identify the Leak
The first step is to identify where the leak is coming from. Once you have located the leak, turn off the water supply to the affected pipe.
Step 2: Prepare the Epoxy Putty
Put on a pair of latex gloves and knead the epoxy putty in your hands until it is fully mixed. This will activate the adhesive.
Step 3: Apply the Epoxy Putty
Apply the epoxy putty to the affected area of the pipe. Use a putty knife to spread the putty over the leak and ensure that it is fully covered. Smooth out any bumps or uneven spots in the putty.
Step 4: Allow the Epoxy Putty to Cure
Wait for the epoxy putty to cure according to the manufacturer’s instructions. This usually takes a few hours.
Step 5: Test the Repair
Once the epoxy putty has fully cured, turn the water supply back on and check for any leaks. If there are still leaks, reapply the epoxy putty as necessary.
Step 6: Final Check
Inspect the repair one final time to make sure there are no leaks.
The epoxy putty method is a quick and easy way to stop a leaking pipe with water in it. It is important to wear gloves when handling the putty and to follow the manufacturer’s instructions for curing time. While epoxy putty is a good temporary solution, it is not a permanent fix, so it is best used until a more permanent repair can be made.
Method 3: Pipe Repair Tape
Here is a step-by-step guide on how to stop a leaking pipe with pipe repair tape:
Tools and Materials Needed:
- Pipe repair tape
- Scissors
Step 1: Identify the Leak
The first step is to identify where the leak is coming from. Once you have located the leak, turn off the water supply to the affected pipe.
Step 2: Prepare the Pipe Repair Tape
Cut a length of pipe repair tape that is long enough to cover the affected area of the pipe. Make sure the tape is wide enough to fully cover the leak and extend a few inches on either side.
Step 3: Apply the Pipe Repair Tape
Wrap the pipe repair tape tightly around the affected area of the pipe. Start wrapping a few inches before the leak and wrap a few inches past the leak to ensure that the tape is fully covering the leak. Make sure the tape is wrapped tightly and smoothly to create a strong seal.
Step 4: Allow the Pipe Repair Tape to Cure
Wait for the pipe repair tape to cure according to the manufacturer’s instructions. This usually takes a few hours.
Step 5: Test the Repair
Once the pipe repair tape has fully cured, turn the water supply back on and check for any leaks. If there are still leaks, reapply the pipe repair tape as necessary.
Step 6: Final Check
Inspect the repair one final time to make sure there are no leaks.
The pipe repair tape method is a quick and easy way to stop a leaking pipe with water in it. It is important to make sure the tape is wrapped tightly and smoothly to create a strong seal. While pipe repair tape is a good temporary solution, it is not a permanent fix, so it is best used until a more permanent repair can be made.
Method 4: Rubber or Silicone Patch
here is a step-by-step guide on how to stop a leaking pipe with a rubber or silicone patch:
Tools and Materials Needed:
- Rubber or silicone patch
- Scissors
- Sandpaper
- Cleaning cloth
Step 1: Identify the Leak
The first step is to identify where the leak is coming from. Once you have located the leak, turn off the water supply to the affected pipe.
Step 2: Clean the Affected Area
Use a cleaning cloth to clean the affected area of the pipe. Make sure the area is completely dry before proceeding.
Step 3: Sand the Area
Use sandpaper to roughen up the surface of the affected area. This will help the patch adhere better to the pipe.
Step 4: Cut the Rubber or Silicone Patch
Cut a patch that is slightly larger than the affected area of the pipe. The patch should be big enough to fully cover the leak and extend a few inches on either side.
Step 5: Apply the Patch
Apply the rubber or silicone patch over the affected area of the pipe, making sure it is centered over the leak. Press the patch firmly onto the pipe to create a tight seal.
Step 6: Wait for the Patch to Cure
Wait for the patch to cure according to the manufacturer’s instructions. This usually takes a few hours.
Step 7: Test the Repair
Once the patch has fully cured, turn the water supply back on and check for any leaks. If there are still leaks, reapply the patch as necessary.
Step 8: Final Check
Inspect the repair one final time to make sure there are no leaks.
The rubber or silicone patch method is a good temporary solution to stop a leaking pipe with water in it. It is important to make sure the area is completely dry before applying the patch, and that the patch is centered over the leak and pressed firmly onto the pipe. While a rubber or silicone patch can last for a few months, it is not a permanent fix, so it is best used until a more permanent repair can be made.
Method 5: Shut Off the Water Supply
Here is a step-by-step guide on how to stop a leaking pipe with the shut off the water supply method:
Tools and Materials Needed:
- Water main shut off valve
- Wrench or pliers
Step 1: Locate the Water Main Shut Off Valve
The first step is to locate the water main shut off valve for your home. This is typically located near the water meter or where the main water supply line enters your home.
Step 2: Turn Off the Water Supply
Once you have located the water main shut off valve, turn it off to stop the flow of water to your home. If you are unable to turn the valve by hand, you may need to use a wrench or pliers to help.
Step 3: Drain the Pipes
Once you have turned off the water supply, turn on all of the faucets in your home to drain any water remaining in the pipes. This will help prevent any remaining water from leaking out and causing damage.
Step 4: Fix the Leak
After the pipes are drained, you can now fix the leaking pipe using one of the repair methods discussed earlier.
Step 5: Turn on the Water Supply
Once the leak has been repaired, turn the water main shut off valve back on and wait for the water to start flowing again. Then, turn off all of the faucets you turned on earlier.
Step 6: Check for Leaks
Check for any new leaks or drips around the affected pipe. If there are still leaks, turn off the water supply again and repeat the repair process.
The shut off the water supply method is a good solution to stop a leaking pipe when there is no immediate need for water. It is important to locate and turn off the water main shut off valve to prevent any further water damage to your home. Once the leak has been repaired, turn the water supply back on and check for any new leaks.
Frequently Asked Questions
Q: Can I use duct tape to stop a leaking pipe?
A: While duct tape may temporarily stop a leak, it is not a recommended long-term solution. It is better to use a product specifically designed for plumbing repairs, such as pipe repair tape or epoxy putty.
Q: How do I know if the pipe is still leaking after applying a repair method?
A: Wait a few minutes after applying the repair method and check the area for any signs of water dripping or leaking. If the leak has stopped, dry the area completely and monitor it for a few days to ensure that the repair is holding.
Q: Is it safe to use a propane torch to repair a leaking pipe?
A: No, it is not safe to use a propane torch to repair a leaking pipe, especially if it is located near any flammable materials. This method is best left to trained professionals.
Q: Can I use a sealant to stop a leaking pipe?
A: Yes, sealants can be used to stop leaks in certain types of pipes, such as PVC pipes. However, it is important to choose a sealant that is appropriate for the type of pipe and the location of the leak.
Q: What should I do if the leak is too large to be repaired using any of these methods?
A: If the leak is too large, it may be necessary to replace the damaged section of the pipe. In this case, it is best to contact a licensed plumber to assess the situation and make the necessary repairs.
Final Words
In conclusion, life is full of endless possibilities and opportunities for growth and exploration. By embracing new experiences and challenges, we can discover our full potential and find fulfillment in the journey.
Whether it’s traveling to new places, learning new skills, or simply being open to new perspectives, there is always something to be gained from trying something new. So let’s continue to embrace the unknown, keep an open mind, and enjoy the journey of life to the fullest.