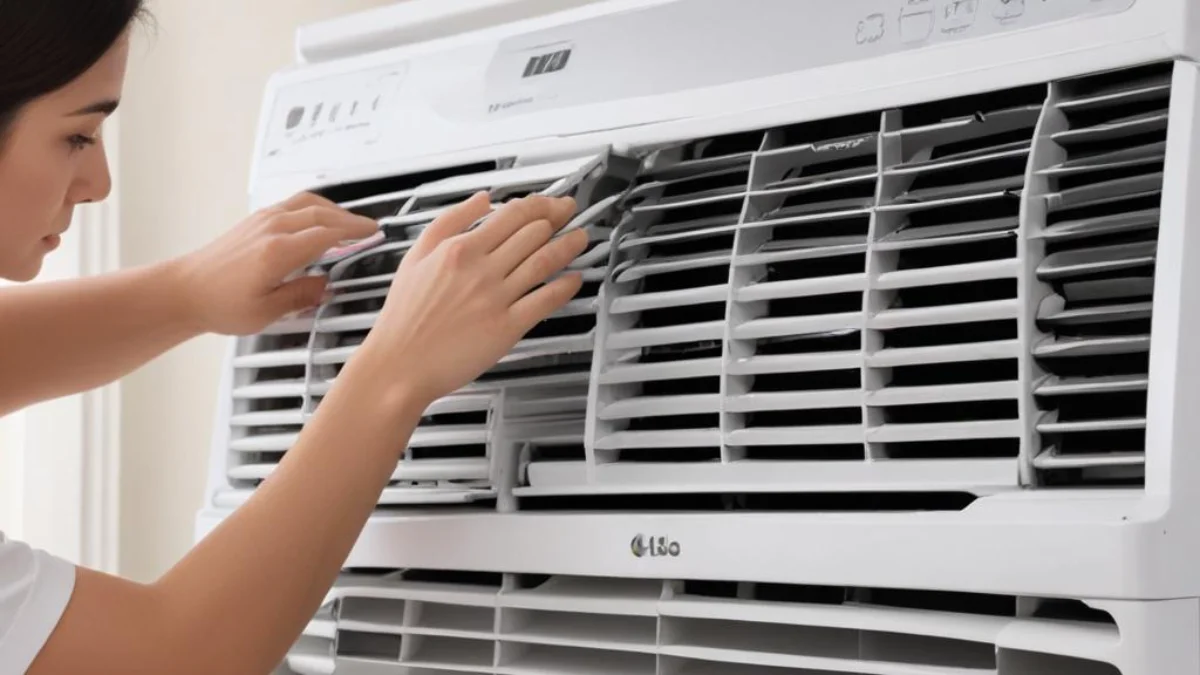
LG Window AC Grill Removal: Your Ultimate 5-Minute Guide
Is a dirty, inefficient window air conditioner ruining your summer comfort? You know a deep clean is long overdue, but that stubborn front grill on your LG unit seems impossible to remove without breaking something. This common frustration prevents many people from performing essential maintenance, leading to poor cooling, bad odors, and higher energy bills.
Many users find that official manuals can be vague, simply stating to “unsnap the grill” without showing exactly where the clips are or how much force to use. The fear of snapping a crucial piece of plastic is real. This guide cuts through the confusion, providing a clear, step-by-step process to safely remove your LG window AC’s front grill for cleaning and maintenance.
You'll Learn About
Why You Can’t Afford to Ignore a Dirty AC Grill
The front grill is more than just a cosmetic cover; it’s the first line of defense for your air conditioner’s internal components. It allows air to be pulled into the unit, across the filter, and over the cooling coils. When this grill becomes clogged with dust, pet hair, and other airborne debris, it’s like forcing your AC to breathe through a straw.
This blockage restricts airflow, which is a critical issue. Restricted airflow can lead to a host of problems, including reduced cooling efficiency and even cause the evaporator coils to freeze over. Understanding the importance of clear pathways for air is fundamental, much like recognizing how a cold air return with no ductwork can impact a central HVAC system’s performance.
The Problem: Hidden Screws and Stubborn Clips
The primary challenge in removing an LG window air conditioner’s front grill lies in its design. Most models are secured by a combination of visible screws and hidden plastic clips or tabs. Without knowing their exact locations, you can pull and pry with no success, risking damage to the unit. The solution is a methodical approach that addresses both screws and clips in the correct order.
This guide will walk you through the exact process, ensuring a damage-free removal so you can clean your unit and restore its cooling power. Don’t let a simple plastic cover stand between you and a cool, comfortable room.
Preparing for Removal: Tools and Safety
Before you begin, safety is paramount. You will be working with an electrical appliance, so taking the proper precautions is non-negotiable. Gather the necessary tools to make the job quick and easy. This preparation will prevent multiple trips to the toolbox and ensure you can work efficiently.
First and foremost, unplug the air conditioner from the wall outlet. Do not simply turn it off with the power button. This step eliminates the risk of electric shock and is the most critical part of the entire process.
Required Tools and Materials
Having the right tools on hand simplifies the entire process. Luckily, you won’t need anything highly specialized. Most of the required items are common household tools.
A soft cloth and a mild cleaning solution will also be needed for when you clean the grill and the filter. A vacuum cleaner with a brush attachment can also be very helpful for removing loose dust and debris before you start wiping things down.
| Tool/Material | Purpose | Pro-Tip |
|---|---|---|
| Phillips Head Screwdriver | To remove the mounting screws securing the grill. | Use a #2 size, which fits most LG AC screws. A magnetic tip can help prevent losing screws. |
| Flat Head Screwdriver or Putty Knife | To gently pry open plastic clips if they are stubborn. | Wrap the tip in a thin cloth or electrical tape to avoid scratching the plastic. |
| Small Container | To keep screws and small parts safe during cleaning. | A magnetic parts tray is an excellent, low-cost investment for any DIY project. |
| Soft Brush / Old Toothbrush | For cleaning the grill vents and filter. | Use a dry brush first to remove loose debris before washing. |
Step-by-Step Guide to Removing the Front Grill
With your tools gathered and the unit safely unplugged, you are ready to begin. Most LG window AC models follow a similar removal process. We will break it down into simple, actionable steps.
Step 1: Open the Inlet Cover and Remove the Air Filter
The first step is to access the area behind the front-most part of the grill. Look for a small door or panel on the face of the unit, often called the inlet cover. This is where the air is drawn in.
Typically, you can open this by pulling it forward from tabs at the top or sides. Once open, you will see the air filter. Slide the air filter up and out of the unit. This not only gets it out of the way but also reminds you to clean it, which should be done at least twice a month during cooling season.
Step 2: Locate and Remove the Securing Screws
With the filter removed, you can now see the screws that hold the main front grill assembly in place. Most LG models have one or two Phillips head screws located here.
They are often found below where the filter was sitting. Use your Phillips head screwdriver to unthread these screws completely. Place them immediately into your small container so they don’t get lost.

Step 3: Carefully Unclip the Grill Assembly
This is the step where most people get stuck. With the screws removed, the grill is held in place only by plastic tabs or clips. The key is to apply gentle, steady pressure in the right direction.
Start from the bottom of the grill. Gently pull the bottom edge of the grill assembly toward you. You should hear or feel the bottom clips disengage. Once the bottom is free, you can then lift the entire grill assembly upward and off the top retaining tabs on the main unit’s frame.
Step 4: Disconnect Any Wires (If Applicable)
On some LG models, especially those with more advanced digital displays or features, there may be a wire connector linking the front grill’s control panel to the main body of the AC. Do not pull hard on the grill after it unsnaps.
Look for a small white or black plastic wire connector. There will be a small tab you need to press to release the lock while you gently pull the two halves apart. Once this is disconnected, the front grill assembly is completely free and can be set aside for cleaning.
Cleaning and Reassembly: The Final Steps
Now that the grill is removed, you have full access for a thorough cleaning. Use a soft brush to remove caked-on dust from the vents. You can wash the grill with warm water and a mild detergent, but ensure it is completely dry before you reinstall it to prevent mold and mildew growth.
Reassembly is simply the reverse of the removal process:
- Reconnect the wire connector if your model has one. Make sure it clicks securely into place.
- Hook the top of the grill onto the upper tabs of the AC frame.
- Swing the bottom of the grill down and press firmly but gently along the sides and bottom until you hear the clips snap back into place.
- Re-insert and tighten the Phillips head screws you removed earlier. Do not overtighten them, as this can crack the plastic.
- Slide the clean, dry air filter back into its slot.
- Close the front inlet cover.
Finally, you can plug your air conditioner back in and test it. You should notice improved airflow and cooling performance immediately. Regular cleaning is essential, and now that you know how to easily remove the grill, you can keep your unit in top condition, just as you would handle air conditioner storm window replacement to ensure seasonal efficiency.
Troubleshooting Common Issues
What if the grill won’t budge? If you’ve removed the screws and are pulling from the bottom but the grill feels stuck, you may have side clips. Gently slide a putty knife wrapped in a cloth into the seam between the grill and the main unit chassis on the sides to locate and release these clips.
If the grill doesn’t snap back on easily, check for obstructions. A wire harness might have shifted and could be blocking the connection. Ensure all wires are tucked away and that the top of the grill is properly seated on its tabs before trying to snap the bottom back in.

