How to Move Doorbell Wiring: Your Ultimate Guide
Is your doorbell in an awkward spot? Perhaps a recent renovation, a new security door, or the installation of a video doorbell has made its current location less than ideal. You’re not alone. Many homeowners face the challenge of a poorly placed doorbell, disrupting both aesthetics and functionality. The good news is that moving your doorbell wiring is a manageable project that can significantly improve your home’s entryway.
This comprehensive guide will walk you through everything you need to know about how to move doorbell wiring. We’ll cover the essential safety precautions, the tools you’ll need, and a step-by-step process for a successful relocation. Whether you’re a seasoned DIYer or a beginner, you can tackle this project with confidence.
You'll Learn About
Why You Might Need to Move Your Doorbell Wiring
There are several common reasons why you might find yourself needing to relocate your doorbell. Understanding the “why” can help you better plan the “how.” A frequent scenario is accommodating a new video doorbell that requires a different angle for an optimal field of view. Sometimes, a new door or siding installation necessitates moving the button.
Another common issue is that the original builders simply placed it in an inconvenient location. Whatever your reason, moving the wiring is the key to placing your doorbell exactly where you want it. This project not only enhances convenience but can also boost your home’s curb appeal and security profile.
Understanding the Basics of Doorbell Wiring
Before you begin, it’s crucial to understand the components of a standard wired doorbell system. A typical setup includes three main parts: the doorbell button outside, the chime box inside, and a transformer. The transformer is a vital component that steps down your home’s standard 120-volt electricity to a much lower, safer voltage (usually 10-24 volts) for the doorbell to use.
The wiring itself is low-voltage, which makes it safer to work with than standard household wiring. However, this does not mean you can skip safety precautions. Always disconnect power at the circuit breaker before handling any electrical wires to prevent any risk of shock or damage to the components.
Safety First: Essential Precautions
Your safety is the top priority. While doorbell wiring is low-voltage, the transformer is connected to your home’s main electrical system. Therefore, you must take proper precautions to avoid any electrical hazards. This is not a step to be taken lightly.
Before you touch a single wire, locate the circuit breaker that controls your doorbell’s transformer and switch it to the “OFF” position. Use a voltage tester to confirm that there is no power flowing to the wires at the doorbell button, chime, and transformer. Never assume the power is off; always test it to be certain.
Preparing for the Project: Tools and Materials
Gathering the right tools and materials before you start will make the process much smoother and more efficient. Having everything on hand prevents interruptions and ensures you can complete the job safely and correctly. Most of the required items are readily available at any hardware store.
A well-prepared workspace is a safe and effective workspace. Clear the area around your door, both inside and out, to give yourself plenty of room to work. Lay down a drop cloth to protect your flooring from dust and debris.
Tools and Materials Checklist
To successfully move your doorbell wiring, you’ll need a specific set of tools and materials. This checklist will help ensure you have everything you need before you begin the project. Proper preparation is key to a smooth and successful outcome.
Having the right equipment not only makes the job easier but also safer. For instance, using insulated screwdrivers and proper wire strippers can prevent accidental shorts and ensure clean connections. Don’t be tempted to make do with improper tools, as this can lead to frustration and potential damage.
| Category | Item | Purpose |
|---|---|---|
| Safety Gear | Safety Glasses | Protect eyes from debris when drilling. |
| Safety Gear | Voltage Tester | To confirm power is off before handling wires. |
| Hand Tools | Drill with Various Bits | For creating new holes for wiring and mounting. |
| Hand Tools | Screwdriver Set | For removing and installing doorbell components. |
| Hand Tools | Wire Strippers/Cutters | For preparing wires for connection. |
| Hand Tools | Fish Tape or Coat Hanger | To guide wires through walls. |
| Materials | 18- or 20-Gauge Bell Wire | To extend the existing wiring to the new location. |
| Materials | Wire Connectors (e.g., Wire Nuts, Crimp Connectors) | To securely splice new wire to the old wire. |
| Materials | Electrical Tape | To secure connections and provide insulation. |
| Materials | Caulk or Wood Filler | To patch the old doorbell button hole. |
Step-by-Step Guide to Moving Your Doorbell Wiring
With your tools gathered and safety precautions in place, it’s time to begin the process of moving your doorbell wiring. Follow these steps carefully for a clean and professional-looking result. Take your time and double-check your work at each stage.
Step 1: Locate Your Doorbell Transformer
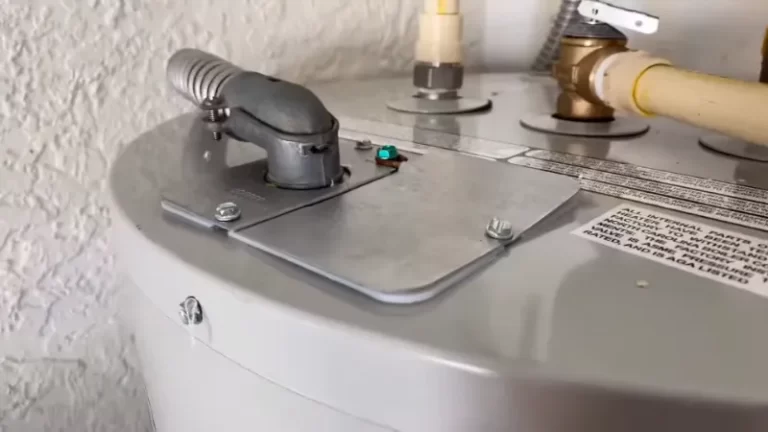
The first step is to find your doorbell transformer. Common locations include the attic, a crawl space, a basement, or mounted on an electrical box near your main service panel or furnace. It’s a small, boxy device with two screw terminals where the low-voltage wires are connected.
Once you’ve located the transformer, you can proceed to the next step. If you’re having trouble finding it, check in closets near the front door. Knowing its location is critical for troubleshooting any potential issues, such as those related to gas valve problems on nearby appliances that might share a circuit.
Step 2: Disconnect Power and Remove the Old Doorbell
As mentioned, turn off the power at the circuit breaker. After confirming the power is off with a voltage tester, carefully unscrew the existing doorbell button from the wall. Gently pull it away to expose the two wires connected to the back.
Loosen the terminal screws and disconnect the two wires. To prevent the wires from falling back into the wall cavity, you can temporarily tape them to the exterior wall. This small step can save you a significant headache later.
Step 3: Plan the New Wiring Route
Determine the best path for the new wire from the old location to the new one. The goal is to conceal the wire as much as possible for a clean look. This may involve running the wire along the inside of the door trim, through the wall, or along the exterior siding.
If you have to drill through your wall, plan your entry and exit points carefully. Take into account the location of wall studs and any other potential obstructions. Careful planning here will prevent unnecessary holes and patchwork later.
Step 4: Drill the New Hole and Run the Wires
Once you’ve planned your route, mark the new location for your doorbell. Drill a small hole at this mark, just large enough for the doorbell wire to pass through. If you are extending the wire inside the wall, you will need to use fish tape or a stiff wire (like a coat hanger) to pull the new wire through.
This can be the most challenging part of the project. Be patient and work carefully to avoid damaging the walls or the wire’s insulation. Sometimes, it may be easier to route the wire externally, concealing it under trim or siding.

Step 5: Extend the Existing Wires
Now, you need to connect the new length of bell wire to the old wires. If the old wires have enough slack to reach the new location, you can skip this step. If not, you will need to splice them. This is a common requirement and is straightforward with the right connectors.
Using wire strippers, remove about half an inch of insulation from the ends of both the old and new wires. Twist the corresponding bare ends together—it typically doesn’t matter which wire connects to which, as doorbell circuits are simple. Secure the connections tightly with wire nuts or crimp connectors, and then wrap each connection with electrical tape for added security.
Step 6: Connect and Mount the New Doorbell
With the wires extended, feed them through the hole at the new location. Connect the two wires to the terminal screws on the back of your new doorbell button. It’s similar to how you would remove an emergency light cover; simply secure the connections and ensure a snug fit.
Once the wires are securely attached, gently push any excess wiring back into the wall and mount the doorbell button to the wall using the provided screws. Ensure it is level and secure. Proper mounting is crucial for the longevity of the installation.
Step 7: Patch the Old Hole
With the new doorbell in place, you need to address the old hole. Use a suitable caulk or wood filler to patch the hole where the old button was located. Once the filler is dry, you can sand it smooth and paint it to match the surrounding wall for a seamless finish.
This final touch is what separates a professional-looking job from an amateur one. Take the time to do this correctly. A well-patched hole will be virtually invisible.
Step 8: Restore Power and Test
Finally, go back to your circuit breaker and turn the power back on. Press your newly relocated doorbell button to test it. You should hear the chime ring inside your home.
If the doorbell doesn’t work, turn the power off again and double-check all your connections. Ensure the wires are making good contact at the button and that your splices are secure. Most issues at this stage are due to a loose connection.
Troubleshooting Common Issues
Even with careful work, you might run into a few snags. If your doorbell isn’t working after the move, don’t panic. There are a few common culprits that are usually easy to fix.
First, re-check your wire connections. A loose wire nut or a wire that has slipped out from under a terminal screw is often the problem. Also, ensure that the wires are not shorting against each other or any metal components.
When to Call a Professional
While moving doorbell wiring is a manageable DIY project for many, there are times when it’s best to call a professional electrician. If you are uncomfortable working with electrical wiring, cannot locate your transformer, or if the wiring needs to be run through a particularly difficult path (like through brick or concrete), an expert can save you time and ensure the job is done safely and correctly.
Professionals have the tools and experience to handle complex situations, such as navigating through a wall that also contains a drive-over drain pipe or other obstacles. The cost of hiring an electrician for a small job like this is often well worth the peace of mind.
Conclusion: A Simple Upgrade for a More Functional Home
Moving your doorbell wiring might seem daunting at first, but with careful planning and attention to safety, it’s a project that can be completed in an afternoon. By relocating your doorbell, you can improve the functionality of your entryway, accommodate modern smart doorbells, and enhance your home’s overall aesthetic.
Remember to always prioritize safety by disconnecting the power before you begin. By following the steps outlined in this guide, you can confidently move your doorbell wiring and enjoy the benefits of a perfectly placed doorbell for years to come.