Mixing Durabond 90: Your Guide to a Flawless, Rock-Hard Finish
There’s a common frustration that plagues even the most seasoned DIY enthusiasts and professional drywall finishers: the dreaded lumpy mix. You follow the directions, you put in the effort, but you end up with a bucket of joint compound that’s more cottage cheese than creamy perfection. This isn’t just a cosmetic issue; an improperly mixed batch of Durabond 90 can lead to a weak bond, a shortened working time, and a finish that’s impossible to smooth out.
The core of the problem lies in the chemical nature of setting-type compounds. Unlike their premixed cousins that dry through evaporation, Durabond 90 hardens through a chemical reaction. This process is powerful, creating an incredibly strong and durable patch, but it’s also unforgiving. Once that reaction starts, there’s no going back, and any mistake in the mixing process is literally set in stone.
You'll Learn About
Why a Perfect Mix is Non-Negotiable
Achieving the right consistency with Durabond 90 is the foundation of any successful drywall repair or installation. A smooth, homogenous mixture ensures that you get the full 90-minute working time advertised on the bag. It allows the compound to be applied evenly, creating a superior bond with the drywall and tape.
Conversely, a bad mix can sabotage your project from the start. Lumps create weak spots and prevent a smooth application, while a mix that’s too thin will lack the strength needed for deep fills. Understanding the science and technique behind the mix is what separates a frustrating amateur effort from a flawless, professional result.
The Essential Toolkit for Durabond Success
Before you even open the bag, assembling the right tools is a critical first step. Working with a setting-type compound is a race against the clock, and you don’t want to be scrambling for equipment mid-mix. Here is what you’ll need for a clean, efficient mixing process.
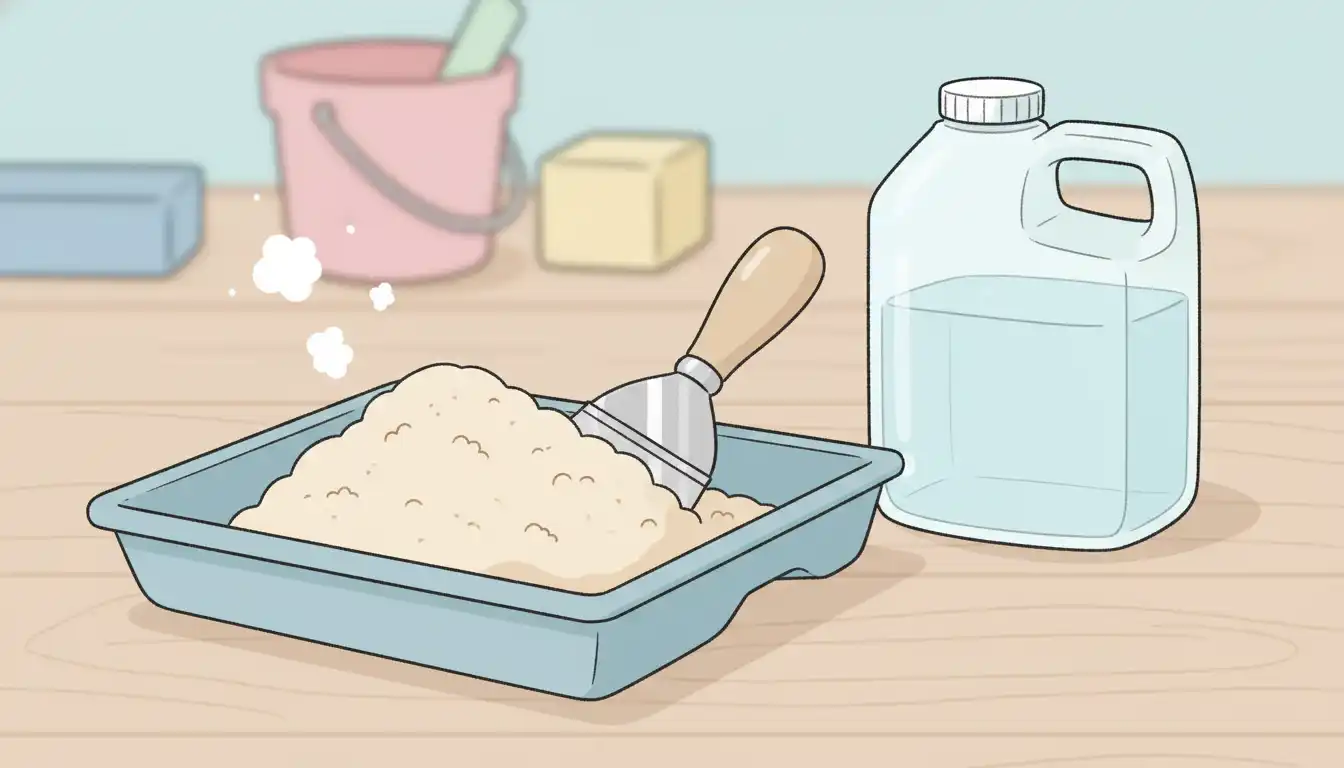
Your primary tools will be a high-torque, low-speed drill and a paddle mixer. A standard cordless drill will work for small to medium batches. Also, ensure you have a clean 5-gallon bucket, a smaller container for accurately measuring water, a mud pan for application, and a set of flexible taping knives.
One of the most overlooked yet crucial elements is the cleanliness of your equipment. Any lingering residue of old, set compound in your bucket or on your mixer will act as a catalyst, causing your new batch to set up much faster than intended. Always start with meticulously clean tools and fresh, cold water.
The Professional’s Step-by-Step Guide to Mixing Durabond 90
Mixing Durabond 90 is a straightforward process, but it demands precision. By following these steps, you can eliminate lumps and achieve the perfect, workable consistency every single time. This method ensures a strong, reliable mud that performs exactly as it should.
Step 1: Water First, Always
This is the golden rule of mixing any powdered compound. Pour your desired amount of clean, cold water into your mixing bucket *before* adding the powder. Adding powder to a dry bucket creates clumps at the bottom that are nearly impossible to break up, leading to a lumpy, unusable mix. Starting with water ensures that every particle of the powder gets properly hydrated from the moment it’s introduced.
Using cold water is another pro tip; warm or hot water will significantly accelerate the chemical reaction, drastically reducing your workable time. For a true 90-minute set, start with cold tap water.
Step 2: Nailing the Water-to-Powder Ratio
While the manufacturer provides general guidelines, the perfect ratio can vary slightly based on ambient temperature and humidity. A good starting point is to aim for a consistency resembling thick pancake batter or creamy peanut butter. It should hold its shape on your knife without being stiff or runny.
Begin by adding the Durabond 90 powder to the water gradually. Don’t dump the whole bag in at once. This allows you to control the thickness more effectively and avoid creating a mix that’s too soupy or too stiff. For those just starting, it’s always better to begin with a slightly thicker mix; you can sparingly add small amounts of water, but you can’t easily thicken a runny mix.
Step 3: The “Slaking” Secret
Once you’ve added the powder to the water, give it a brief initial mix with your drill and paddle for about 30 seconds. The goal here isn’t to make it perfect, but simply to get all the powder wet. Then, stop and walk away for one to two minutes.
This waiting period is called slaking. It allows the powder to fully absorb the water, softening any small, dry clumps before the final mix. This small pause is a game-changer for achieving an ultra-smooth consistency and is a technique used by virtually all professional drywall finishers.
Step 4: The Final, Lump-Free Mix
After the slaking period, it’s time for the final mix. Turn your drill on a low speed and move the paddle mixer around the bucket, up and down, ensuring you scrape the sides and bottom. Mixing on high speed can introduce air bubbles, which can cause issues during application.
Continue mixing for another one to two minutes until the compound is completely smooth and uniform. Scrape the sides of the bucket with a taping knife and incorporate that material back into the mix. Once it’s smooth and lump-free, your Durabond 90 is ready for application.
Troubleshooting Common Mixing Disasters
Even with careful preparation, issues can arise. Understanding how to diagnose and prevent common problems will save you time, money, and frustration on your projects. Most issues trace back to a few key variables.
Problem: “My Mix is Full of Lumps!”
Lumps are the number one complaint, and the cause is almost always procedural. This happens when dry powder gets trapped and doesn’t hydrate properly. The solution is to strictly adhere to the water-first rule, add powder gradually, and never skip the slaking step. A thorough final mix at low speed will break down any remaining particles.
Problem: “It’s Setting Way Too Fast!”
If your 90-minute mud is hardening in your pan after 30 minutes, you’re likely dealing with contamination or temperature issues. As mentioned, even a small chip of old, cured compound can act as an accelerator. Likewise, using warm water or working in a very hot environment will speed up the chemical reaction. Always use cold water and clean tools.
Problem: “My Mix is Weak and Crumbly After Setting.”
A weak or soft final product is a clear sign of an incorrect water ratio. This most often occurs when someone tries to “re-temper” the mud. If your mix starts to stiffen in the bucket, do not add more water to prolong its life. The chemical reaction has already begun, and adding more water at this stage will only dilute the mix and ruin its structural integrity, resulting in a weak, poor-quality bond.
Understanding Durabond’s Strengths and Limitations
Durabond 90 is an exceptional product for specific applications. Its incredible hardness and bonding strength make it the go-to choice for pre-filling large gaps, embedding tape, and performing deep, durable patches. It is especially useful for repairs around areas that need extra stability, such as when you discover an outlet box not flush with the wall and need to build out the area.
The number “90” refers to its approximate working time in minutes. This generous window makes it a more forgiving option for larger projects or for those new to setting-type compounds. For a detailed comparison of different set times, understanding the choice between Durabond 45 vs 90 can help you tailor the product to the specific demands of your project. However, the same hardness that makes it so strong also makes it extremely difficult to sand. For this reason, Durabond 90 should be used for initial coats only and never as a final topping compound.
A Note on Project Pacing
Working with setting-type compounds requires a certain workflow. Once a batch is mixed, the clock is ticking. This focused work period can be intense, so planning your project is key. And remember, home improvement should also be enjoyable. While you’re waiting for that incredibly hard first coat of Durabond to set, it might be the perfect time to step outside and enjoy your garden, maybe even check on that beautiful passion flower in zone 5 you’ve been cultivating.
Mastering the Mix for Professional Results
Mixing Durabond 90 doesn’t have to be a source of anxiety. By embracing a methodical approach—starting with clean tools, honoring the water-first rule, and allowing the compound to slake—you can consistently produce a perfectly smooth, workable mud. This mastery of the basics is what empowers you to tackle any drywall project with the confidence that your work will be strong, durable, and flawlessly finished.
Forget the frustration of lumpy, unpredictable mixes. With these professional techniques, you are now equipped to unlock the full potential of Durabond 90, ensuring your repairs and installations stand the test of time.
| Batch Size | Approximate Water | Approximate Durabond 90 Powder | Ideal Use Case |
|---|---|---|---|
| Small Patch (Mud Pan) | 1-1.5 cups (8-12 oz) | 2-3 cups | Minor repairs, filling nail holes, small cracks. |
| Medium Batch (1/4 Bucket) | 1.5 quarts | ~6-7 lbs | Taping a single room or multiple butt joints. |
| Large Batch (1/2 Bucket) | 3 quarts | ~12-14 lbs | Large-scale taping or pre-filling extensive areas. |
| Full Bag | 5-6 quarts | 25 lbs | Professional use on large construction projects. Not recommended for DIY. |
Final Words
The flawless, rock-hard finish that Durabond 90 provides is directly proportional to the care taken during its initial preparation. By adhering strictly to the water-to-powder ratio and utilizing a clean, deliberate mixing process, professionals can unlock the full potential of this powerful compound. This attention to detail guarantees a patch that is not only ready for sanding much sooner but also structurally sound and built to last.