How to Insulate Skylights for Winter: Stop Heat Loss Now!
That beautiful skylight you love during the spring and summer can quickly become your home’s biggest energy drain when winter arrives. As heat naturally rises, a poorly insulated skylight acts like an open window, allowing your expensive warm air to escape while welcoming in the bitter cold.
This leads to chilly drafts, mysterious cold spots, frustrating condensation, and shockingly high heating bills. Many homeowners feel they have to choose between the natural light they love and a comfortable, energy-efficient home during the colder months. But you don’t have to sacrifice one for the other.
The problem lies in the fundamental principles of heat transfer. Older or poorly installed skylights, especially single-pane models, offer very little thermal resistance. This means heat can easily move through the glass and frame. Furthermore, the skylight shaft—the tunnel connecting the skylight to your ceiling—is often a neglected area in the attic, lacking proper insulation and air sealing.
This allows cold attic air to surround the shaft, making the entire structure a significant source of heat loss. Condensation is another common complaint, occurring when warm, moist indoor air hits the cold skylight glass, which can lead to drips, water stains, and even mold growth over time.
Fortunately, there are numerous effective solutions, ranging from simple DIY tricks to more permanent, professional upgrades, that can transform your skylight from an energy liability into a year-round asset.
You'll Learn About
Understanding the “Why”: How Skylights Lose Heat
To effectively combat heat loss, it’s crucial to understand how it happens. Heat moves in three primary ways: conduction, convection, and radiation. A skylight is susceptible to all three, making it a perfect storm for energy inefficiency in the winter.
Conduction is heat transfer through direct contact. Your warm indoor air heats the interior pane of the skylight glass. This heat then travels directly through the glass to the colder exterior pane, where it’s lost to the outside. Double or triple-glazed skylights combat this by creating insulating air or gas-filled gaps between the panes, which significantly slows down conductive heat transfer.
Convection is heat transfer through the movement of fluids (in this case, air). Gaps and cracks around the skylight frame or shaft create drafts. Warm air from your living space flows out, and cold air from the attic or outside seeps in, creating convective loops that continuously drain warmth from your home.
Even the air gap in a double-pane window can experience convection, which is why some high-performance windows fill the gap with a dense, inert gas like argon to inhibit this movement.
Radiation is the transfer of heat through electromagnetic waves. All warm objects radiate heat. Your body, your furniture, and your walls radiate heat towards colder surfaces. In winter, a cold skylight acts like a magnet for this radiant heat, pulling warmth from the room without the air itself having to move.
Low-emissivity (Low-E) coatings on modern skylights are designed to reflect this radiant heat back into the room, preventing its escape.
The skylight shaft itself is another critical, yet often overlooked, component. If this shaft passes through an unconditioned attic space, its walls must be treated like any other exterior wall of your home.
They need to be fully insulated and air-sealed. Without this, the cold attic air will chill the shaft walls, which then radiate cold into the room below, creating a persistent cold spot even if the skylight pane itself is efficient.
Temporary & DIY Skylight Insulation Solutions for Winter
If you’re looking for cost-effective, non-permanent ways to boost your skylight’s performance during the coldest months, several excellent DIY options are available. These methods are particularly well-suited for renters or those who want to enjoy maximum sunlight during other seasons.
1. Insulating Window Film Kits
One of the most popular and affordable DIY methods is a window insulation kit. These kits typically include a thin plastic film and double-sided tape. You apply the tape around the interior frame of the skylight and then affix the plastic film to it. A hairdryer is used to heat and shrink the film, creating a taut, clear barrier.
This process traps a layer of air between the film and the skylight glass, acting as an extra layer of insulation that reduces heat loss through convection. While this is a temporary solution, it’s highly effective for a single season. Be aware that for a skylight, this installation can be tricky due to its height and angle, so proceed with caution.
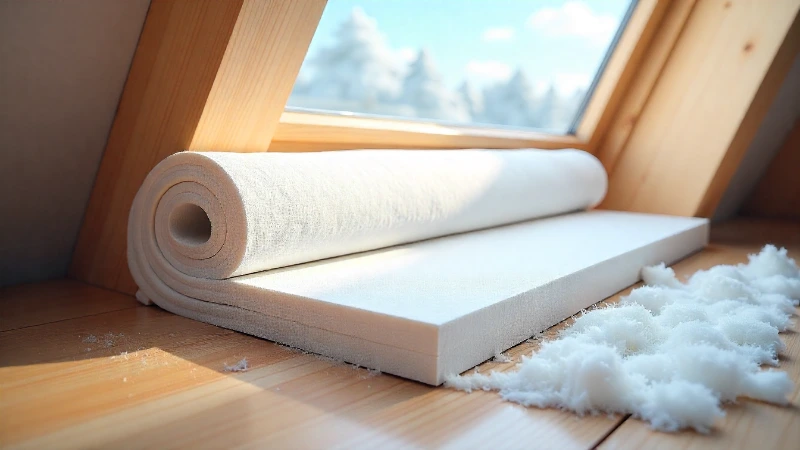
2. DIY Removable Foam Board Plugs
For a solution with a much higher insulation value (R-value), you can create a custom-fit, removable plug from rigid foam board. Rigid foam insulation offers excellent thermal resistance and is easy to work with. Simply measure the inside of your skylight well and cut a piece of foam board (polystyrene or polyisocyanurate) to fit snugly inside the opening.
For a more finished look, you can wrap the foam board in a decorative fabric. This plug can be easily pushed into place during cold snaps or at night and removed during sunny winter days to let in light and passive solar heat. This method is highly effective but does block all natural light when in use.
3. Acrylic Secondary Glazing (Magnetic Kits)
A more advanced yet still DIY-friendly option is to add a secondary glazing panel made of clear acrylic. You can purchase kits that use a magnetic sealing system. A steel tape is applied to your skylight frame, and a magnetic tape is applied to the edges of a custom-cut acrylic sheet.
The acrylic panel then snaps into place, creating a robust, airtight seal. This creates a significant insulating air gap, much like a permanent double-glazed window, but with the benefit of being completely removable. These kits dramatically reduce drafts and condensation while remaining optically clear, so you don’t lose any natural light.
Permanent & Professional Insulation Solutions
For homeowners seeking long-term performance and efficiency, investing in permanent upgrades is the most effective strategy. These solutions address the core issues of skylight performance and often provide benefits year-round.
1. High-Performance Window Treatments
Window treatments are a fantastic way to add a significant layer of insulation while also providing light control and aesthetic appeal. The most effective option for skylights is cellular shades, also known as honeycomb shades.
Cellular shades are engineered with a unique honeycomb structure that traps air in distinct pockets, creating a highly effective insulating barrier. They are available in single-cell, double-cell, and even triple-cell configurations, with R-values that can range from 2.0 to over 5.0.
Look for options with side tracks or seals that fit snugly into the skylight shaft, as this minimizes air gaps around the edges and prevents convective heat loss. Many are available with motorized or remote-control operation, which is a must-have for hard-to-reach skylights.
2. Insulating the Skylight Shaft
Properly insulating the skylight shaft is one of the most crucial steps for winter performance, yet it’s often done incorrectly or overlooked entirely. If the shaft runs through a cold attic, its walls must be insulated to the same level as your home’s exterior walls.
While fiberglass batts can be used, they are prone to sagging and leaving gaps over time. Rigid foam board or spray foam insulation are the superior choices for this application. The insulation should be installed in the stud cavities of the shaft walls and then covered with an air barrier like drywall or another layer of rigid foam with the seams taped.
Sealing all joints and edges with caulk or spray foam is critical to stop air leakage from the attic. This process ensures that the entire column of air from your ceiling to the skylight is protected from the cold attic temperatures, eliminating cold spots and drafts.
While this can be a DIY project for those comfortable working in an attic, hiring a professional insulation contractor will guarantee it’s done correctly. This kind of major renovation work can sometimes be part of a larger project, like converting a 1.5-story home to a 2-story home, where attic and roof structures are already being modified.

3. Upgrading to an Energy-Efficient Skylight
If your skylight is old, single-paned, or showing signs of wear like leaks or cracks, the most effective long-term solution is to replace it with a modern, energy-efficient model. Today’s skylights are engineered for superior thermal performance. Key features to look for include:
- Double or Triple Glazing: Multiple panes of glass create insulating air or gas-filled gaps.
- Low-E Coatings: A microscopically thin, transparent metallic coating reflects radiant heat back into your home.
- Inert Gas Fills: Argon or krypton gas between the panes is denser than air and provides better insulation.
- Thermally Broken Frames: The frame incorporates an insulating material to prevent heat transfer through the frame itself. This is an improvement over older metal frames, similar to how modern electrical systems have evolved; for instance, you might wonder why is copper no longer used for busbars in some applications due to changing technology and material science.
Upgrading your skylight is a significant investment, but it provides substantial returns in energy savings, comfort, and home value. It eliminates issues like drafts and condensation at the source. This is a job for a professional roofing or window contractor, as proper installation and flashing are essential to prevent leaks.
Comparing Skylight Insulation Methods
Choosing the right method depends on your budget, DIY comfort level, and long-term goals. Here’s a breakdown to help you decide:
| Insulation Method | Effectiveness | Cost | DIY Friendliness | Light Blockage |
|---|---|---|---|---|
| Insulating Film Kit | Low to Moderate | Very Low | High | None |
| Foam Board Plug | High | Very Low | High | Total |
| Magnetic Acrylic Panel | Moderate to High | Low to Moderate | High | None |
| Cellular Shades | High | Moderate | Moderate | Partial to Total (adjustable) |
| Shaft Insulation | Very High | Moderate to High | Low (Professional recommended) | None |
| Skylight Replacement | Very High | High | Low (Professional required) | None |
Final Checks and Maintenance
Once you’ve chosen an insulation method, don’t forget the basics. Regularly inspect the seals and weatherstripping around your skylight frame. Over time, these can degrade and create gaps for air leakage. A simple application of caulk or new weatherstripping can make a significant difference. Keeping the glass clean will also maximize passive solar gain during sunny winter days, providing free heat for your home.
While some homeowners might be tempted to tackle complex electrical work themselves, it’s important to know when to call a professional. Just as you’d hire a roofer for a skylight replacement, you should always rely on a certified professional for electrical jobs. For instance, many people ask, “can electricians install air conditioners?” The answer is yes, they are qualified for the complex wiring these systems require, ensuring safety and proper function—a principle that also applies to ensuring the structural integrity of your roof with a skylight.
By taking proactive steps to insulate your skylights, you can transform them from a winter weakness into a source of comfort and light all year long. You’ll stop throwing money out the roof, reduce your carbon footprint, and create a cozier, more enjoyable living space during even the coldest weather.