Insulate a Garage Ceiling With Living Space Above: The Ultimate DIY Guide
Is the room over your garage the most uncomfortable space in your house? Whether it’s a master bedroom that’s always freezing or a bonus room that’s scorching in the summer, you’re facing a common and frustrating problem. This temperature volatility isn’t just about comfort; it’s a major source of energy waste, driving up your utility bills month after month.
The core issue lies directly beneath the floor: the unconditioned garage. Without a proper thermal barrier, the garage’s temperature extremes directly impact the occupied room above. This guide provides a comprehensive, step-by-step solution to permanently fix this problem by properly insulating your garage ceiling.
You'll Learn About
Why Is the Room Above the Garage So Uncomfortable?
Understanding the “why” is the first step to a successful fix. A room over the garage is uniquely vulnerable to temperature swings for several reasons. It’s often exposed to the outdoors on more sides than other rooms, and the uninsulated garage acts as a massive thermal sink, pulling heat out in the winter and radiating it upward in the summer.
Most builders install basic insulation, but it’s often insufficient or improperly installed, leaving gaps and allowing air to move freely. This air leakage is a primary culprit, rendering even thick insulation batts ineffective. Sealing these leaks is just as crucial as adding insulation.
The Critical Role of Air Sealing
Before you even think about placing insulation, you must create a continuous air barrier. This is the single most important step for success. Air leaks through gaps around plumbing pipes, electrical wires, and where the framing meets the subfloor of the room above.
These gaps allow cold air, moisture, and even garage fumes to travel into the ceiling cavity and the room above. A proper air seal stops these drafts, making your insulation vastly more effective and improving indoor air quality. Ignoring this step is like wearing a winter coat full of holes—you won’t get the protection you need.
Planning Your Garage Ceiling Insulation Project
Proper preparation ensures a smooth, safe, and effective installation. Because you are working underneath an occupied living space, careful planning is essential to minimize disruption and risk for those inside the home.
Safety and Logistics for Occupied Spaces
Your top priority is the safety and comfort of anyone in the room above. Always use low-VOC (Volatile Organic Compound) sealants and materials whenever possible to minimize fumes. Ensure robust ventilation in the garage by opening doors and using fans pointed outwards.
Schedule the disruptive parts of the job, like removing drywall or spraying foam, for times when the occupants can be out of the room or even out of the house. Seal the doorway between the garage and the home’s interior with plastic sheeting to prevent dust and odors from spreading.
Choosing the Right Insulation
Several types of insulation can work for a garage ceiling, each with distinct advantages. The best choice depends on your budget, climate, and DIY comfort level. The goal is to achieve a high R-value, which measures thermal resistance—the higher, the better.
For floors above unconditioned garages, aiming for an R-value of at least R-30 is recommended, with R-38 or higher providing even better performance in colder climates.
| Insulation Type | Average R-Value/Inch | Pros | Cons |
|---|---|---|---|
| Fiberglass Batts | R-3.1 – R-4.3 | Affordable, widely available, easy for DIY installation. | Can lose R-value if compressed; susceptible to air movement and moisture. |
| Mineral Wool Batts | R-4.0 – R-4.3 | Excellent fire resistance, great sound dampening, moisture-resistant. | More expensive than fiberglass, can be harder to find. |
| Closed-Cell Spray Foam | R-6.0 – R-7.0 | Highest R-value per inch, creates a powerful air and moisture barrier. | Expensive, requires professional installation, long curing time for fumes. |
| Rigid Foam Boards | R-4.0 – R-6.5 | High R-value, easy to cut and fit, adds structural rigidity. | Joints must be meticulously sealed; requires a thermal barrier (drywall). |
Step-by-Step Installation Guide
With your materials chosen and safety plan in place, it’s time to transform your garage ceiling and the room above. Follow these steps carefully for a professional-quality result.
Step 1: Prepare the Workspace
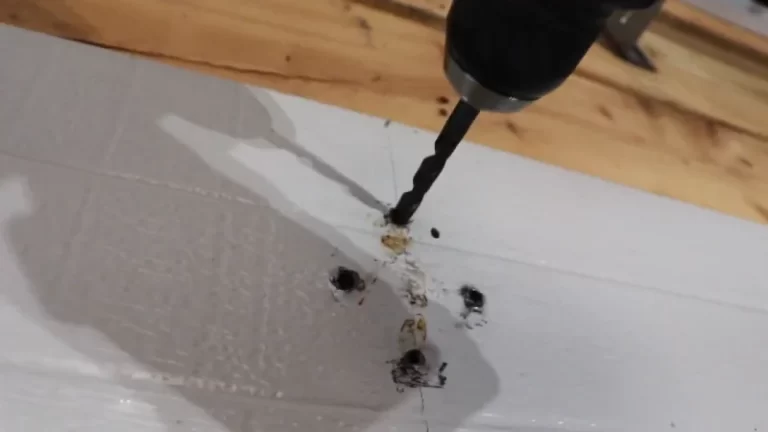
Clear everything out from under the ceiling area in your garage. Lay down drop cloths to protect the floor. If your garage ceiling is already finished with drywall, you will need to carefully remove it to expose the joists. Use a pry bar and drill to take down the sheets.
Be mindful of any exposed garage ceiling insulation from the past, as it may be dusty or contain irritants. Wear a high-quality respirator mask, safety glasses, and gloves during removal.
Step 2: Inspect and Air Seal Every Gap
This is your “add new value” moment. With the joist bays open, inspect the entire area. Identify every penetration—wires, pipes, vents, and light fixture boxes—passing through the subfloor above. Use fire-rated caulk or canned spray foam to seal all of these small gaps and cracks meticulously.
Pay special attention to the perimeter where the garage ceiling meets the walls. Sealing these joints is critical for stopping drafts. A good air seal can also prevent issues like strange odors from entering your home; if you’ve ever wondered if a garage smells like rotten eggs, poor sealing could be a contributing factor.
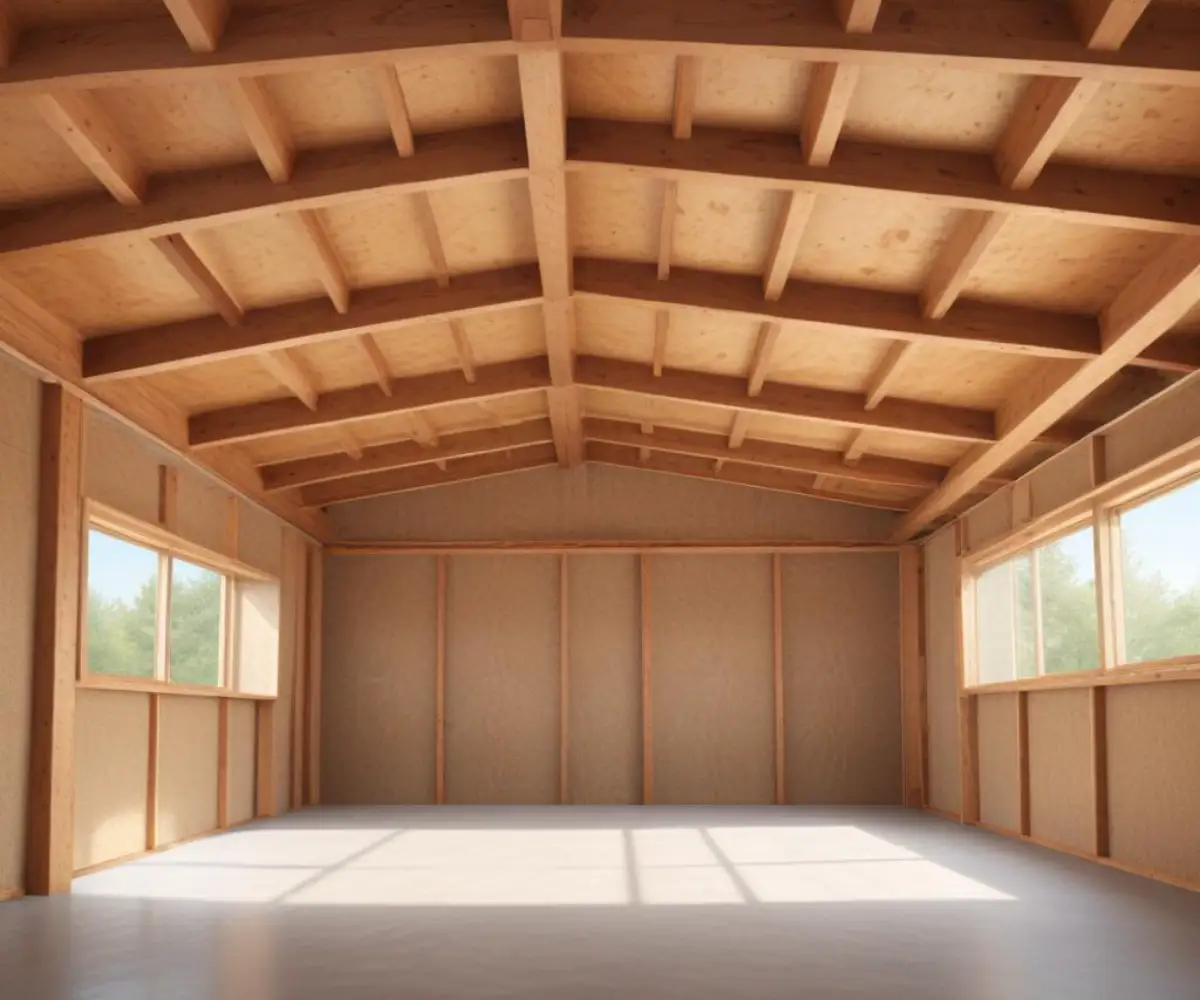
Step 3: Install the Insulation
For batt insulation (fiberglass or mineral wool), measure the joist bays and cut the batts to fit snugly without being compressed. The insulation should fill the entire cavity from the subfloor down, making full contact with all sides. If using faced batts, the paper or foil facing (the vapor retarder) should be installed facing the heated side—up against the subfloor of the room above.
If you’re using rigid foam boards, cut them to fit tightly between the joists. Use canned spray foam to seal the edges of each board, ensuring a complete air seal. For a superior result, you can use a “flash and batt” approach: a professional applies a thin layer of closed-cell spray foam for air sealing, and then you fill the rest of the cavity with cost-effective fiberglass batts.
Step 4: Add a Fire-Resistant Barrier (Drywall)
Building codes require a thermal barrier over most insulation types to protect them from fire. For a garage under a living space, 5/8-inch Type X fire-rated drywall is typically required. This is a critical safety step that must not be skipped.
Carefully measure, cut, and hang the drywall, securing it to the ceiling joists with drywall screws. This barrier not only enhances safety but also completes the air seal and provides a finished look.
Step 5: Finish the Ceiling
Tape the joints between the drywall sheets using joint compound and paper or mesh tape. Apply several thin coats of compound, sanding smoothly between each coat, to create a seamless surface. Once the compound is dry and smooth, prime and paint the ceiling to complete your project.
Common Mistakes to Avoid
A successful project means avoiding common pitfalls. Steer clear of these frequent errors to ensure your hard work pays off in comfort and energy savings.
- Compressing Batt Insulation: Squeezing fiberglass or mineral wool drastically reduces its R-value. Always cut batts to the right size, never stuff them into place.
- Ignoring Air Sealing: Simply adding insulation without sealing air leaks is the number one mistake. An unsealed ceiling will still allow for significant heat loss and drafts.
- Blocking Ventilation: If your garage has any attic or soffit vents in the ceiling structure, ensure your insulation doesn’t block them. Proper airflow is essential to prevent moisture buildup.
- Skipping the Fire Barrier: Leaving insulation exposed without a proper drywall barrier is a serious fire hazard and likely violates local building codes.
Frequently Asked Questions
What is the best type of insulation for a garage ceiling below a living space?
Spray foam insulation is a highly effective option as it creates an air seal, preventing drafts and fumes from entering the living area. Fiberglass batts are a more traditional and budget-friendly choice, while mineral wool offers excellent fire resistance. Ultimately, the best insulation depends on your budget and specific needs.
Do I need a vapor barrier when insulating my garage ceiling?
Yes, a vapor barrier is crucial to prevent moisture from the garage from seeping into the floor structure of the room above. The vapor barrier should be installed on the warm side of the insulation, which is against the floor of the living space. This helps to avoid condensation and potential mold growth.
What about fire safety regulations?
When there is a living space above a garage, building codes often require specific fire-resistant materials. This typically involves installing 5/8-inch Type X drywall on the garage ceiling to create a fire barrier. Always check your local building codes to ensure compliance.
Can I install insulation myself, or should I hire a professional?
While installing batt insulation can be a DIY project for those with some experience, spray foam insulation is generally best left to professionals. Professional installers have the right equipment and expertise to ensure even application and safety. For larger projects, hiring a professional can save time and ensure the job is done correctly.
How much does it cost to insulate a garage ceiling?
The cost can vary significantly based on the size of your garage, the type of insulation you choose, and whether you hire a professional. On average, you can expect to pay between $1,900 and $7,700 for professional garage insulation. Material costs for a DIY project using batt insulation can be around $530.
The Payoff: Comfort, Savings, and Peace of Mind
Properly insulating the garage ceiling below an occupied room is one of the most effective home improvement projects you can undertake. You’ll immediately notice a more stable and comfortable temperature in the room above, eliminating cold floors and drafty corners.
Beyond comfort, you will see a reduction in your heating and cooling bills as you stop wasting energy conditioning a room that is constantly battling the unconditioned space below. This project not only improves your daily life but also adds tangible value to your home.