How to Fix Dents in Engineered Wood Floors So They Look New Again
Engineered wood flooring is a durable and beautiful choice for any home, offering the classic look of hardwood with enhanced stability. However, it’s not indestructible. A dropped object, heavy furniture, or even high heels can leave behind an unsightly dent, marring the otherwise perfect surface. The good news is that many dents in engineered wood floors can be repaired without needing to call in a professional. With the right techniques and a little patience, you can often make those imperfections disappear.
This comprehensive guide will walk you through everything you need to know about how to fix dents in engineered wood floors. We’ll cover the different types of dents you might encounter, provide step-by-step instructions for various repair methods, and offer tips for preventing future damage. Whether you’re a seasoned DIYer or a complete novice, you’ll find actionable advice to restore the beauty of your floors.
You'll Learn About
Understanding Dents in Engineered Wood Flooring
Before jumping into repairs, it’s helpful to understand the structure of engineered wood and the nature of the damage. Engineered wood consists of a top layer of real hardwood veneer bonded to a core of plywood or high-density fiberboard (HDF). The thickness of this top veneer is crucial, as it dictates the repair options available.
Dents are typically compressions of the wood fibers. Unlike a scratch or a gouge where wood is removed, a dent is simply pushed down. This distinction is important because it means that for many shallow dents, the wood fibers can be encouraged to swell back to their original position.
Types of Dents and Severity
The approach you take will depend on the depth and size of the dent. It’s essential to assess the damage carefully before you begin any repair work.
Minor or Shallow Dents: These are slight depressions in the wood surface where the finish is often still intact. They are typically caused by smaller dropped items or pressure from furniture. These are the easiest to repair, often using simple, non-invasive methods.
Deep Dents and Gouges: These are more significant depressions that may have broken through the finish and potentially damaged the wood veneer itself. A deep gouge might even expose the core material beneath the veneer. These types of damage require more intensive repair methods, such as filling.
Assessing the Damage: What to Look For
Before you start any repair, take a moment to closely examine the dent. Is the finish cracked or broken? A broken finish may require an extra step of sealing the repair. Is the wood itself splintered or removed? If so, you’re dealing with a gouge rather than a simple dent, and filling will be necessary.
The thickness of your engineered wood’s wear layer is also a critical factor. Floors with a thicker veneer (3mm or more) can withstand more aggressive repairs, including light sanding. However, if your floor has a very thin veneer, you must be extremely gentle to avoid sanding through to the core layer.
Method 1: The Steam and Iron Trick for Minor Dents
For shallow dents where the wood fibers are compressed but the finish isn’t broken, the steam method is remarkably effective. The combination of heat and moisture causes the compressed wood fibers to swell and return to their original height, effectively erasing the dent.
What You’ll Need:
- A household iron
- A clean, thick cloth or paper towels
- Water
Step-by-Step Instructions:
- Clean the Area: Start by cleaning the dented area thoroughly to remove any dirt or debris.
- Apply Water: Place a few drops of water directly into the dent. Be careful not to use too much; you just want to moisten the compressed fibers.
- Cover with a Damp Cloth: Wet your cloth and wring it out so it’s damp but not dripping wet. Place the cloth over the dent.
- Apply Heat: Set your iron to a medium-high heat setting. Press the hot iron onto the damp cloth over the dent, moving it in a circular motion for a few seconds. You should hear a hissing sound as the water turns to steam.
- Check Your Progress: Lift the iron and cloth to check the dent. You may need to repeat the process a few times for the dent to rise completely. Be patient and work in short bursts to avoid damaging the wood’s finish.
Important Note: Always test this method on an inconspicuous area of your flooring first, such as inside a closet or under a large piece of furniture. Some finishes can be sensitive to heat and moisture and may become cloudy or discolored.
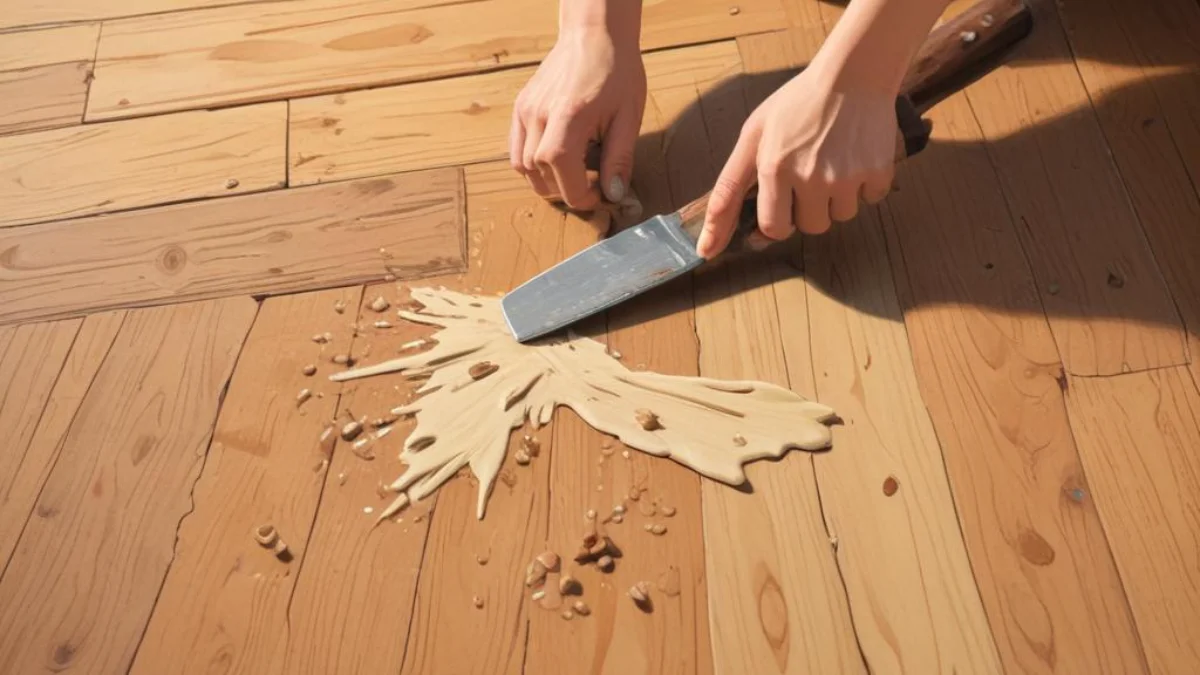
Method 2: Using Wood Filler for Deeper Dents and Gouges
When a dent is too deep to be steamed out, or if the wood is gouged and fibers are missing, wood filler is the best solution. The key to a successful repair with filler is choosing the right product and matching the color as closely as possible to your floor.
Choosing the Right Wood Filler:
There are several types of wood fillers available, each with its own properties. For engineered wood floors, it’s often best to use a filler that is specifically designed for flooring and can be stained or finished to match.
- Latex-Based Wood Fillers: These are easy to work with and clean up with water. They are suitable for small to medium-sized dents.
- Epoxy Wood Fillers: These come in two parts that you mix together. They create a very hard and durable repair, making them ideal for high-traffic areas.
- Wax Filler Sticks: These are great for very small nicks and scratches and come in a wide range of colors. They are simple to apply by just rubbing them into the imperfection.
Step-by-Step Instructions:
- Clean the Dent: Thoroughly clean the dent and the surrounding area, ensuring it is free of any dirt, dust, or loose wood fibers.
- Select and Prepare Your Filler: Choose a wood filler that closely matches the color of your floor. Some kits come with multiple colors that you can blend to achieve a perfect match. If you’re using a two-part epoxy, mix it according to the manufacturer’s instructions.
- Apply the Filler: Using a flexible plastic putty knife, press the filler firmly into the dent. It’s better to slightly overfill the dent to account for any shrinkage as it dries.
- Level the Repair: Use the straight edge of the putty knife to scrape away the excess filler, making it level with the floor’s surface.
- Allow to Cure: Let the filler dry completely according to the product’s instructions. This can take anywhere from 30 minutes to several hours.
- Sand Smooth (If Necessary): Once cured, you may need to lightly sand the filled area with fine-grit sandpaper (320-grit or higher) to ensure it is perfectly smooth and flush with the surrounding floor. Always sand in the direction of the wood grain.
- Touch Up the Finish: After sanding, wipe away any dust. You may need to apply a small amount of matching stain or a clear sealant to the repaired area to blend it seamlessly with the rest of the floor. Use a small artist’s brush for precision.
Understanding the layers of your subfloor can also be important, especially if the damage is severe. The choice between different materials like plywood vs sheathing for the subfloor can impact the overall stability and how the floor responds to impacts. Similarly, knowing the specifics of your subfloor material, such as the difference between 19/32 vs 5/8 plywood, can be useful for larger repair projects.
Method 3: Replacing a Damaged Plank
In cases of severe damage, such as a very deep dent, extensive water damage, or a large gouge that exposes the core, replacing the entire plank may be the only viable option. This is a more advanced repair and may be best left to a professional if you’re not comfortable with woodworking tools.
When to Consider Replacement:
- The dent is too large or deep to be effectively filled.
- The top veneer is severely cracked or delaminating.
- The core of the engineered wood is exposed and damaged.
To replace a plank, you will need a matching replacement plank, a circular saw or oscillating multi-tool, a hammer, a chisel, wood glue, and a pry bar. The basic process involves carefully cutting out the damaged plank without damaging the surrounding boards, cleaning the subfloor, preparing the new plank, and then gluing it into place. This is a meticulous process that requires precision.
Comparing Repair Methods
To help you decide which approach is right for your situation, here is a table summarizing the different methods:
| Repair Method | Best For | Difficulty Level | Tools Required | Potential Risks |
|---|---|---|---|---|
| Steam and Iron | Minor, shallow dents with intact finish | Easy | Iron, cloth, water | Can damage some finishes if not tested first |
| Wood Filler | Deep dents, gouges, and scratches | Moderate | Wood filler, putty knife, sandpaper, finish | Difficult to get a perfect color match; can look obvious if not done well |
| Plank Replacement | Severe damage, large dents, exposed core | Difficult | Replacement plank, saw, chisel, glue | Risk of damaging surrounding planks; requires precision |
Preventing Future Dents in Your Engineered Wood Floors
While repairs are possible, prevention is always the best strategy. Taking a few simple precautions can go a long way in keeping your engineered wood floors looking their best for years to come.
Use Protective Pads
This is the most effective way to prevent dents from furniture. Place felt pads on the bottom of all furniture legs, including chairs, tables, sofas, and cabinets. Regularly check these pads for wear and replace them as needed.
Lift, Don’t Drag
When moving heavy furniture, always lift it instead of dragging it across the floor. For very heavy items, use furniture sliders designed for hardwood floors to distribute the weight and prevent damage.
Utilize Rugs and Mats
Place area rugs in high-traffic areas and under heavy furniture groupings like dining tables and sofas. Use mats at all exterior doors to trap dirt, grit, and moisture that can scratch and dent your floors.
Be Mindful of Footwear
High heels can exert a tremendous amount of pressure on a small point, easily causing dents. Encourage a “no shoes” policy or provide soft-soled slippers for guests to wear inside.
Regular Cleaning
Sweep or vacuum your floors regularly to remove small rocks and other debris that can be ground into the floor underfoot, causing small dents and scratches.
By following these preventative measures and knowing how to tackle the occasional dent, you can maintain the beauty and value of your engineered wood floors. For issues related to transitions between different flooring types, such as figuring out how to fill the gap between tile and a wood floor, proper planning can prevent future damage and create a seamless look.
When to Call a Professional
While many minor dents can be fixed with a DIY approach, there are times when it’s best to call in a professional flooring contractor. If you’re dealing with extensive damage, multiple deep dents, or if you’re simply not confident in your ability to perform the repair, a professional can ensure the job is done right.
A professional will have the experience and specialized tools to perform seamless repairs, including perfectly matching colors and finishes. They can also provide a more accurate assessment of the damage and recommend the best course of action, which might save you time, money, and frustration in the long run.
In conclusion, a dent in your engineered wood floor doesn’t have to be a permanent eyesore. With the right knowledge and tools, you can effectively repair many types of damage and restore your floor to its former glory. From the simple steam and iron trick to the more involved process of using wood filler, there is a solution for nearly every situation. And by taking proactive steps to protect your floors, you can minimize the chances of future damage, ensuring they remain a beautiful feature of your home for many years to come.