How to Extend Stove Wire: A Comprehensive Guide
Extending stove wire is a common task during kitchen renovations, appliance replacements, or electrical repairs. Ensuring that the wire extension is done correctly and safely is crucial for both the functionality of the stove and the safety of your home.
This article provides a comprehensive guide on extending stove wire, covering the necessary tools, step-by-step procedures, safety precautions, and important considerations. With detailed explanations and visual aids, you will be equipped to handle this task with confidence.
You'll Learn About
Understanding Stove Wiring
Importance of Proper Wiring
Proper wiring is essential for the safe operation of your stove. Incorrect wiring can lead to various electrical hazards, including short circuits, electrical fires, and electrocution. Therefore, it is vital to ensure that any electrical work, including extending stove wire, is done in accordance with local building codes and safety standards.
Types of Stove Wires
Stove wires are typically heavier gauge wires designed to handle high current loads. Understanding the type of wire used in your stove is crucial for selecting the right materials for the extension. Common types include:
- Copper Wire: Known for its excellent conductivity and flexibility.
- Aluminum Wire: Lighter and less expensive but requires special connectors to avoid oxidation and connection issues.
- Stranded Wire: Offers greater flexibility and is easier to handle in tight spaces compared to solid wire.
Preparing for the Extension
Safety Precautions
Before starting any electrical work, it’s important to take necessary safety precautions:
- Turn off the power: Ensure the power supply to the stove is turned off at the circuit breaker.
- Use appropriate safety gear: Wear gloves and safety goggles to protect yourself from electrical hazards.
- Work in a dry environment: Avoid working in wet or damp conditions to reduce the risk of electrical shock.
- Inform others: Let other household members know you are working on the stove to prevent accidental power restoration.
Tools and Materials Needed
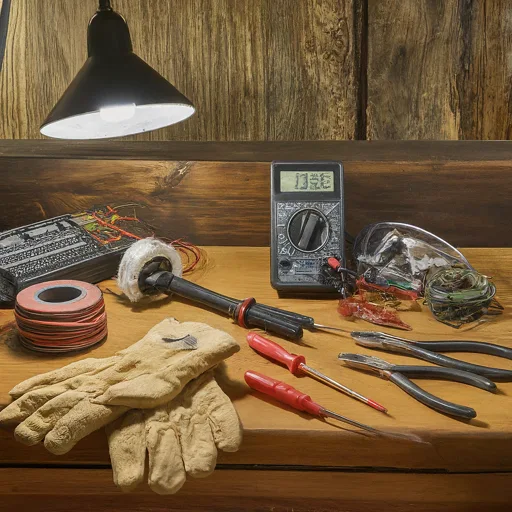
Gathering the right tools and materials will make the extension process smoother and safer:
- Wire cutters/strippers: For cutting and stripping wire insulation.
- Screwdrivers: For removing and securing panels.
- Wire nuts/connectors: For joining wire ends securely.
- Electrical tape: For securing wire connections.
- Additional stove wire (same gauge as the original): For extending the existing wire.
- Multimeter: For testing continuity and voltage.
- Voltage tester: For ensuring power is off before working.
- Gloves: For protecting hands from electrical hazards.
- Safety goggles: For protecting eyes from debris.
Step-by-Step Guide to Extending Stove Wire
1. Turning Off the Power
Locating the Circuit Breaker
Identify and turn off the circuit breaker that supplies power to the stove. This step is crucial for ensuring your safety while working on the electrical system. Circuit breakers are typically labeled, but if you’re unsure which one controls the stove, it’s best to turn off the main breaker.
Double-Checking Power Disconnection
Verify that the power is off by testing the stove’s existing wiring with a voltage tester. This ensures safety before proceeding with the extension. Hold the tester near the wires; if it detects voltage, do not proceed until the power is fully disconnected.
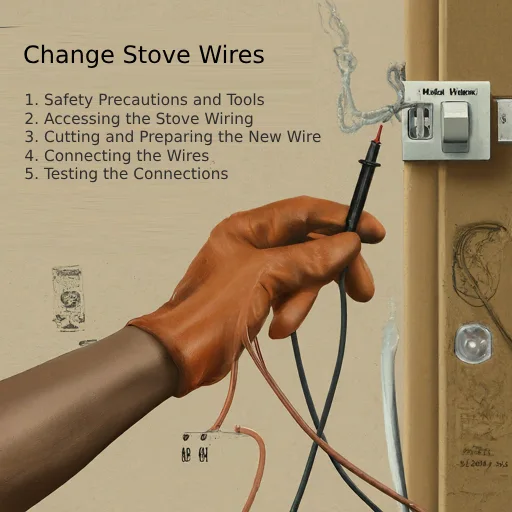
2. Accessing the Stove Wiring
Removing the Back Panel
Carefully remove the stove’s back panel to access the wiring. Use a screwdriver to remove the screws securing the panel. Keep the screws in a safe place to avoid losing them. Once the panel is off, set it aside carefully.
Identifying the Wires
Locate the wires that need to be extended. Take note of their connections and routing to ensure proper reinstallation. Typically, you will see three or four wires: a neutral wire, a ground wire, and one or two hot wires.
3. Cutting and Preparing the New Wire
Measuring the Wire
Measure the length of wire needed for the extension, ensuring you have enough slack for connections and routing. It’s better to have a little extra length than to be short. Cut the new wire to the required length using wire cutters.
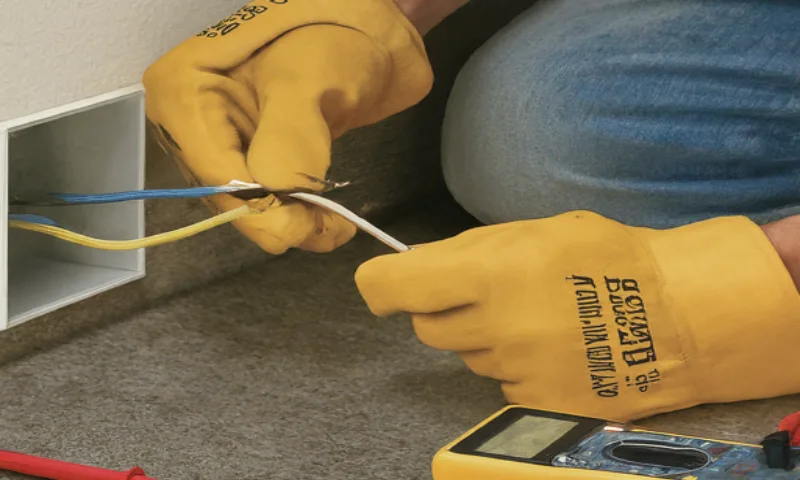
Stripping the Insulation
Use wire strippers to remove about 1/2 inch of insulation from the ends of both the existing and new wires. Be careful not to damage the wire strands. Stripping too much insulation can expose too much wire, while stripping too little can make connections difficult.
4. Connecting the Wires
Using Wire Nuts or Connectors
Join the stripped ends of the existing and new wires using wire nuts or connectors. Ensure the connections are tight and secure. Twist the wires together in a clockwise direction before screwing on the wire nut. Make sure no bare wire is exposed outside the nut.
Securing the Connections
Wrap electrical tape around the wire nuts or connectors for additional security. This helps to prevent the connections from coming loose and adds an extra layer of insulation. Make sure the tape covers the entire connector and extends slightly onto the wires.
5. Testing the Connections
Checking Continuity
Use a multimeter to check for continuity in the extended wire. This ensures that the connection is complete and there are no breaks in the wire. Set the multimeter to the continuity setting and place the probes on either end of the wire. A continuous beep indicates a good connection.
Verifying Voltage
Turn the power back on and use a voltage tester to ensure that the extended wire is properly carrying the voltage. If everything is correct, turn the power off again before proceeding. Check each wire to confirm the presence of voltage where expected.
6. Finalizing the Installation
Reinstalling the Back Panel
Reattach the stove’s back panel, securing it with screws. Ensure that the wires are properly routed and not pinched or exposed. Tighten the screws securely to keep the panel in place.
Turning the Power Back On
Turn the power back on at the circuit breaker. Test the stove to ensure it is functioning correctly with the extended wire. Check all the stove’s functions, including the burners and oven, to ensure everything is working properly.
Common Mistakes to Avoid
Using Incorrect Wire Gauge
Using a wire gauge that is too small can cause overheating and pose a fire hazard. Always use the same gauge wire as the original stove wire to ensure safety and compliance with electrical codes.
Failing to Secure Connections Properly
Loose connections can lead to arcing and overheating. Make sure all connections are tight and secure, and use wire nuts or connectors rated for the wire gauge and current.
Not Checking for Voltage Before Working
Always double-check that the power is off before touching any wires. Use a voltage tester to confirm the absence of voltage. This step is critical to avoid electric shock.
Overlooking Ground Connections
Proper grounding is essential for safety. Ensure that all ground wires are securely connected and that the stove is properly grounded to prevent electrical hazards.
Troubleshooting Common Issues
Stove Not Powering On
If the stove does not power on after extending the wire, check the following:
- Power Supply: Ensure the circuit breaker is turned on and there is power to the outlet.
- Connections: Re-check all wire connections for tightness and proper contact.
- Continuity: Use a multimeter to check for continuity in the wires.
Intermittent Power Issues
If the stove experiences intermittent power issues, inspect the wire connections for any signs of looseness or corrosion. Ensure that wire nuts are securely fastened and that no bare wire is exposed.
Electrical Odors or Sparks
If you notice electrical odors or see sparks, immediately turn off the power and inspect the wiring for loose connections, damaged insulation, or improper grounding. Address any issues before restoring power.
Important Table: Tools and Materials for Extending Stove Wire
| Tool/Material | Purpose |
|---|---|
| Wire cutters/strippers | Cutting and stripping wire insulation |
| Screwdrivers | Removing and securing panels |
| Wire nuts/connectors | Joining wire ends securely |
| Electrical tape | Securing wire connections |
| Additional stove wire | Extending the existing wire |
| Multimeter | Testing continuity and voltage |
| Voltage tester | Ensuring power is off before working |
| Gloves | Protecting hands from electrical hazards |
| Safety goggles | Protecting eyes from debris |
Conclusion
Extending stove wire requires careful planning, the right tools, and adherence to safety protocols. By following the step-by-step guide provided, you can safely and effectively extend your stove wire, ensuring the continued functionality and safety of your appliance.
Regular maintenance and checks can help prevent future issues, making your kitchen a safer place. Always remember to prioritize safety and compliance with local electrical codes when performing any electrical work.
Extending stove wire involves safely connecting additional wiring to reach your stove’s power source. Use the correct gauge wire and follow electrical codes to ensure safety. Always turn off the power before starting and consider consulting a professional if you’re unsure.
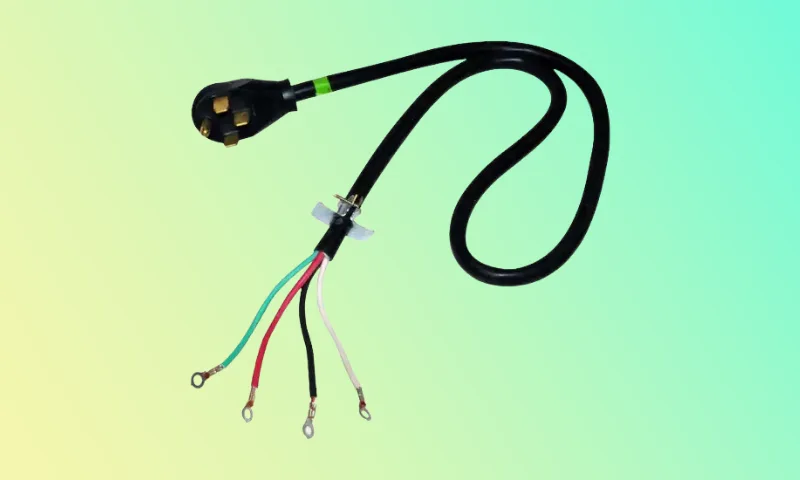
For more electrical projects, check out our guides on running power to a gazebo and identifying a 3-wire dryer cord. Additionally, troubleshooting issues like no power to the Y1 wire on a Nest thermostat can help you maintain your home’s electrical systems.