GE Side by Side Refrigerator Ice Maker Problems and Solutions
The GE side by side refrigerator is a popular appliance for its convenience and functionality. One of its standout features is the built-in ice maker, which provides a constant supply of ice for drinks and cooking.
However, when the ice maker is not working, it can be a major inconvenience. This blog will delve into the 5 to 10 common problems that can arise with the GE side by side refrigerator ice maker, with the purpose of providing practical solutions and troubleshooting tips to help get it up and running again.
From insufficient water pressure to a faulty mechanical arm, this guide will cover the most common issues and how to fix them.
You'll Learn About
GE Side by Side Refrigerator Ice Maker Problems
The GE side by side refrigerator ice maker can face various problems, including being turned off, insufficient water pressure, a faulty mechanical arm, a warmer freezer, a bad water filter, a faulty ice tray temperature sensor, a faulty fridge door switch, or a possible frozen water or ice chunk.
To reset the ice maker, you can turn off the shutoff switch for 30 seconds, locate the arm within the ice maker, and turn the power back on. It’s recommended to keep the freezer temperature below 10°F for optimal ice production.
Other potential issues include a water and ice dispenser problem. If you are facing any issue with your GE side by side refrigerator ice maker, it’s best to consult a professional for a proper diagnosis and repair.
Problem 1: Ice Maker Turned Off
One of the simplest reasons for an ice maker not working is that it has been turned off. The ice maker may have been accidentally shut off by pressing a button, flipping a switch, or unplugging the refrigerator. If this is the case, then the solution is easy: simply turn it back on.
Steps to Reset the Ice Maker
If you suspect the ice maker is turned off, here is how you can reset it:
- Locate the ice maker on/off switch: Depending on the model of your GE side by side refrigerator, the ice maker on/off switch may be located in the ice maker control panel or in the refrigerator’s main control panel.
Turn the Switch to the “on” Position
Flip the switch to the “on” position. This should activate the ice maker.
GE Side by Side Refrigerator Problems and Solutions
Wait for Ice to Start Producing
Give the ice maker a few hours to start producing ice. If it doesn’t start working within this time, then it is possible that the problem is something more serious, and you should move on to the next step of troubleshooting.
If you are still unable to turn the ice maker back on, it is recommended that you consult your owner’s manual or contact GE customer service for further assistance.
if your GE side by side refrigerator ice maker is not working, the first step is to check if it has been accidentally turned off. By following the steps outlined above, you should be able to reset it quickly and easily. If the problem persists, move on to the next troubleshooting step to diagnose and fix the issue.
Problem 2: Insufficient Water Pressure
The water pressure in your home plays a crucial role in the functioning of your GE side by side refrigerator’s ice maker. The ice maker requires a steady flow of water to fill its tray and produce ice.
If the water pressure is low, the ice maker may not fill up properly, and as a result, you may experience problems with ice production. Insufficient water pressure can also lead to a slow ice production rate and a low ice cube output.
Possible Solutions to Increase Water Pressure
If you’re experiencing low water pressure in your home, there are several steps you can take to resolve the issue:
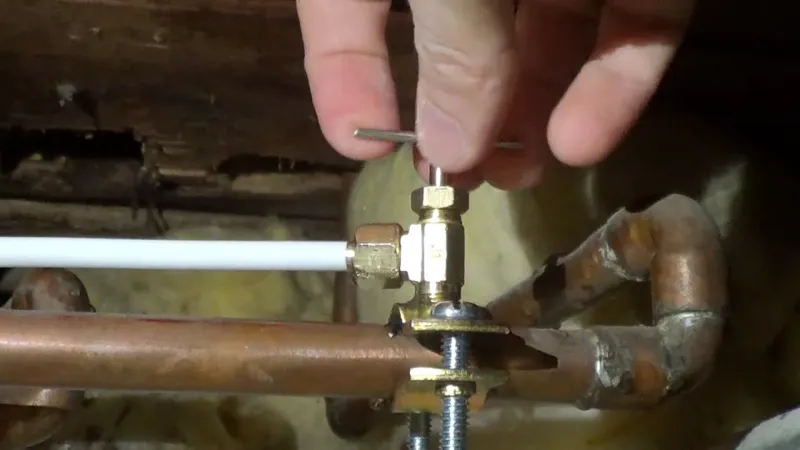
Check the Shut-off Valve
If the shut-off valve that supplies water to your refrigerator is partially closed, it could be affecting the water pressure. Ensure that the valve is fully open to allow for proper water flow.
Check the Water Line
Sometimes, the water line that supplies water to the ice maker may become clogged with debris. Cleaning the line should resolve the issue.
Replace the Water Inlet Valve
If the above two solutions do not resolve the low water pressure issue, you may need to replace the water inlet valve. This is a more complex repair that may require the help of a professional technician.
If your GE side by side refrigerator’s ice maker is not working correctly due to low water pressure, you can try these solutions to resolve the issue. If you’re still having trouble, it may be best to call in a professional technician to diagnose and repair the problem.
Problem 3: Faulty Mechanical Arm
The mechanical arm is a critical component of the GE side by side refrigerator’s ice maker. It is responsible for automatically releasing ice cubes into the ice bin once they are formed. This arm operates on a lever system, moving up and down to activate the ejector and release the ice.
How a Faulty Mechanical Arm Affects the Ice Maker
If the mechanical arm is faulty, it may not be fully extending out to activate the ejector, or it may not be fully retracting in to activate the ejector. If this is the case, ice will not be released from the ice maker, and as a result, ice cubes may accumulate in the ice bin.
A faulty mechanical arm can also result in a slow ice production rate or an ice maker that will not turn on. The ice maker may start but stop producing ice or may not produce ice at all. You may also experience a complete freeze over of the ice bin, and may have to manually remove ice cubes to clear the ice bin.
Some ice makers may exhibit these symptoms even when the mechanical arm is functioning normally. The symptoms of a faulty mechanical arm may indicate the presence of other problems, and you should therefore move on to the next step of troubleshooting.
Steps to Check the Mechanical Arm
- Check the position of the arm to confirm it is fully extended. You can do this by pressing the arm down and pulling the lever up.
- Check the position of the arm to confirm it is fully retracted. You can do this by pressing the arm down and pulling the lever up.
If your GE side by side refrigerator’s ice maker is not working, the first step is to check if there is a problem with the mechanical arm. If this is the case, you may need to replace it. Consult your owner’s manual or contact GE customer service for further assistance.
Problem 4: Warmer Freezer
How a Warmer Freezer Affects the Ice Maker
The temperature of the freezer plays a crucial role in the functioning of the GE side by side refrigerator’s ice maker. If the freezer is warmer than the recommended temperature, it can affect the formation and quality of the ice.
As a result, the ice maker may produce less ice or produce ice with a poor quality. A warmer freezer can also cause the ice to melt, which can lead to a clogged ice maker and decreased production.
Recommended Temperature for Optimal Ice Production
To ensure optimal ice production, it is recommended to keep the temperature of the freezer between 0°F to 5°F. This temperature range is ideal for producing high-quality ice, and it also helps prevent ice from melting and clogging the ice maker.
Tips to Keep the Freezer at the Right Temperature
Here Are Some Tips to Help Keep the Freezer at the Right Temperature:
- Check the temperature regularly: You should periodically check the temperature of the freezer to ensure it stays within the recommended range.
- Adjust the thermostat: If the temperature is too warm, you may need to adjust the thermostat to a lower setting.
- Avoid overloading the freezer: Overloading the freezer can affect the circulation of cold air, causing the temperature to rise.
- Avoid placing hot food in the freezer: Hot food should be cooled to room temperature before being placed in the freezer.
Clean the Coils
Dust and debris can accumulate on the coils, affecting the cooling efficiency of the freezer. Regular cleaning of the coils can help keep the temperature within the recommended range.
By following these tips, you can keep the freezer at the right temperature and ensure optimal ice production from the GE side by side refrigerator’s ice maker.
Problem 5: Bad Water Filter
Problem 5: Bad Water Filter
A. How the Water Filter Affects the Ice Maker
The water filter in your GE side by side refrigerator plays a crucial role in ensuring that the ice produced by the ice maker is clean and free of any impurities. If the water filter is clogged or has gone bad, it can cause the ice maker to produce ice that has a strange taste or odor.
Signs of a Bad Water Filter
There are several signs that can indicate that your water filter is bad and needs to be replaced. Some of these include:
- Reduced water pressure
- Strange taste or
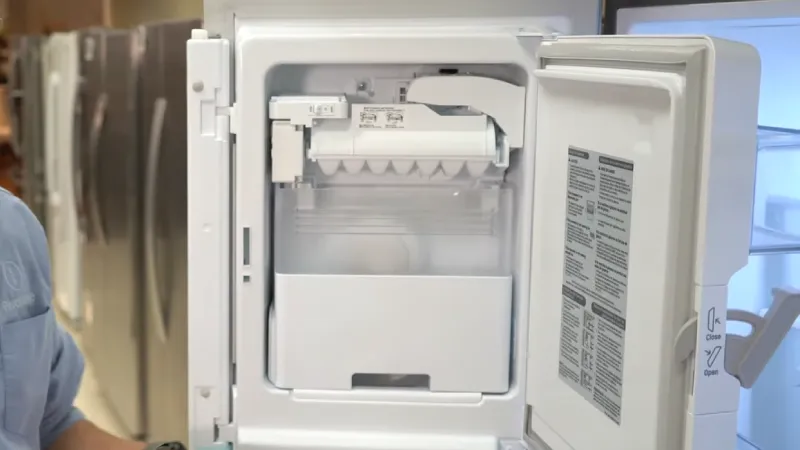
Problem 6: Faulty Ice Tray Temperature Sensor
What the Ice Tray Temperature Sensor Does
The ice tray temperature sensor, also known as the thermistor, is a critical component in the operation of an ice maker. This sensor is responsible for monitoring the temperature of the ice tray, and communicating this information to the refrigerator’s control board. The control board then uses this information to determine when to turn on and off the ice maker, ensuring that the ice is produced at the right time and temperature.
Symptoms of a Faulty Temperature Sensor
A Faulty Ice Tray Temperature Sensor Can Result in Several Issues, Including:
- Ice maker not making ice
- Ice cubes not releasing from the ice tray
- Ice cubes being too small or thin
- Ice maker producing ice, but it’s not being dispensed
How to Replace a Faulty Temperature Sensor
Replacing a faulty temperature sensor can be a bit complicated, and it’s recommended to seek assistance from a professional if you’re unsure of the steps involved. However, if you’re handy and want to attempt the repair yourself, here’s what you need to do:
- Turn off the refrigerator and unplug it from the power source.
- Locate the temperature sensor, which is usually located near the ice maker.
- Disconnect the temperature sensor wires.
- Remove the old temperature sensor and install the new one.
- Connect the wires to the new temperature sensor.
- Turn on the refrigerator and test the ice maker to ensure that it’s working correctly.
a faulty ice tray temperature sensor is one of the common issues that can cause an ice maker to stop working. If you’re experiencing any of the symptoms described above, replacing the temperature sensor could be the solution. However, if you’re unsure of the process, it’s best to seek the assistance of a professional to avoid causing damage to the refrigerator or injuring yourself.
Problem 7: Faulty Fridge Door Switch
How the Fridge Door Switch Affects the Ice Maker
The fridge door switch is responsible for turning off the ice maker when the fridge door is opened. This is an important safety feature that prevents the ice maker from dispensing ice when the door is open, which could cause damage or injury. If the fridge door switch is faulty, it can result in the ice maker not functioning properly.
Signs of a Faulty Fridge Door Switch
One of the main signs of a faulty fridge door switch is the ice maker continuing to dispense ice even when the fridge door is open. Another symptom is the ice maker not turning on when the door is closed.
If you suspect a faulty door switch, you can test it by manually pressing the switch with a screwdriver while the fridge door is open. If the ice maker turns off, then the switch is likely faulty.
Electrolux Refrigerator Problems and Solutions
Options for Fixing a Faulty Fridge Door Switch
If you have confirmed a faulty fridge door switch, you have two options for fixing it. You can either replace the switch yourself or hire a professional to do it for you. Replacing the switch is not a complicated task, but it does require some basic electrical knowledge and tools.
If you’re not comfortable doing it yourself, it’s best to hire a professional. They will be able to diagnose the problem and replace the switch quickly and efficiently.
a faulty fridge door switch can cause your GE side by side refrigerator’s ice maker to stop working. If you suspect this is the problem, be sure to check the switch and consider your options for fixing it. With a functioning fridge door switch, your ice maker should work properly and keep your drinks cold and refreshing.
Problem 8: Possible Frozen Water or Ice Chunk
Explanation of How This Issue Can Arise
A common problem with GE side by side refrigerators with ice makers is that the water line supplying the ice maker can become frozen. This can be due to a variety of reasons, including a clogged defrost drain, a low temperature in the freezer, or a slow water supply. When the water line is frozen, it cannot supply the ice maker with the water it needs to produce ice.
How to Thaw a Frozen Water Line or Ice Chunk
Thawing a frozen water line or ice chunk is relatively simple. First, unplug the refrigerator and locate the water line that supplies the ice maker. If the water line is visibly frozen, you can use a hair dryer on a low setting to thaw it.
If the water line is not visible, you can use a hair dryer to warm up the surrounding area to help thaw the frozen line. You can also try defrosting the freezer by turning off the power to the refrigerator for several hours.
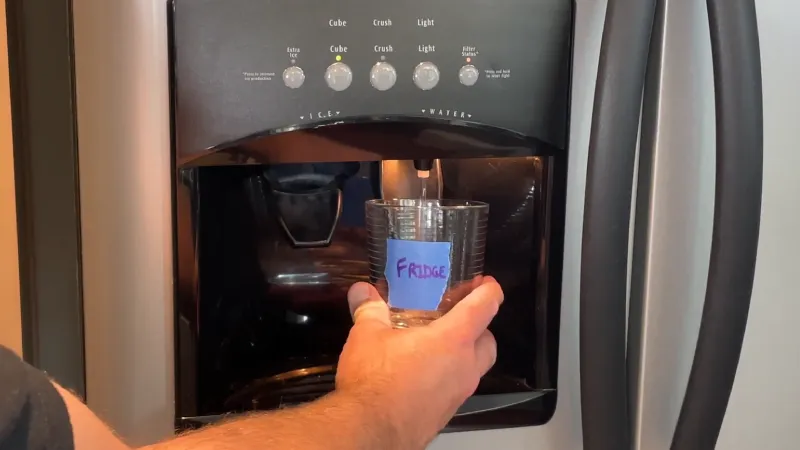
Once the water line is thawed, turn the power back on and run water through the dispenser to clear out any ice or water that may have built up. If the issue persists, you may need to call a professional to diagnose and fix the problem.
Problem 9: Low Ice Bin Capacity
The ice maker tray has a capacity of about 30 pounds. The amount of ice that the ice maker can produce is based on the amount of ice cubes stored in the ice bin. If you experience a slow ice production rate, or an ice bin full of ice, it may be due to the low capacity of the ice bin.
When your ice bin is full of ice, the ice maker will not be able to produce as much ice as it would if there were less ice in the ice bin. It may therefore be better to add more ice to your ice bin to make room for more ice production.
Another way to resolve this problem is to change your ice bin. GE side by side refrigerators come with a standard ice bin and a second, larger ice bin. You can access the larger ice bin by opening the refrigerator door.
There are usually two ice bin handles on each side of the ice maker, and these handle can be used to remove the standard ice bin.
If your GE side by side refrigerator ice maker is not working, the first step is to check if there is an issue with the capacity of the ice bin. If this is the case, you may need to increase the capacity of the ice bin.
You can do this by adding more ice to the ice bin. Consult your owner’s manual or contact GE customer service for further assistance.
French Door Refrigerator Problems and Solutions
Conclusion
the GE side by side refrigerator ice maker is a convenient appliance that can make life easier. However, like any other appliances, it can face various problems, ranging from simple ones like insufficient water pressure or a warmer freezer, to complex ones like a faulty mechanical arm or a bad water filter.
This blog has outlined 5 to 10 of the most common issues that may arise with the GE side by side refrigerator ice maker and provides possible solutions to these problems. It’s important to remember that while some of these problems can be fixed easily, others may require professional help.
Therefore, if the problem persists or if you are not comfortable with the solution, it’s recommended to consult a professional for repair and maintenance. This will ensure that the ice maker is functioning properly and that your refrigerator continues to provide you with fresh ice for years to come.