GE Profile Refrigerator Ice Maker Problems and Solutions
The ice maker in a refrigerator is a convenient feature that provides a constant supply of ice for drinks and other uses. However, sometimes it can stop working and cause frustration for homeowners. In this blog, we will explore some of the most common GE Profile refrigerator ice maker problems and how to diagnose and fix them.
From simple issues like the ice maker being turned off, to more complex problems like a faulty water filter or temperature sensor, we will cover all the most common reasons your GE Profile refrigerator’s ice maker may not be working properly.
You'll Learn About
Overview of GE Profile Refrigerator Ice Maker Problems
An ice maker is a crucial component of a refrigerator as it provides a constant supply of ice, making it convenient to have cold drinks and other beverages. But like any other appliances, ice makers also face problems and stop functioning correctly. In this blog, we will discuss 5 to 10 common problems that can arise with the GE Profile refrigerator ice maker and the solutions to resolve these issues.
Problem 1: Ice Maker is Off
One of the simplest reasons why the ice maker may not be working is because it’s turned off.
Solution: To turn the ice maker on, locate the on/off switch and switch it to the “on” position. If you’re unable to locate the switch, consult the manual or refer to the manufacturer’s website for instructions.
Problem 2: Insufficient Water Supply or Water Pressure
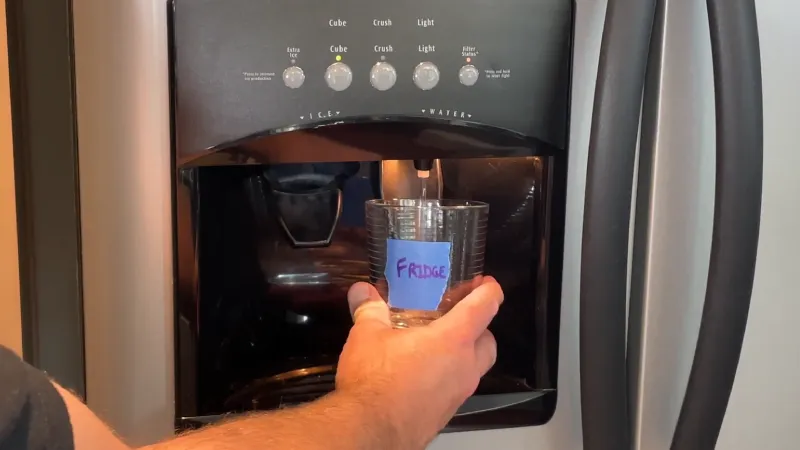
The ice maker needs a constant water supply to function correctly. If the water supply is cut off or if there’s insufficient water pressure, the ice maker will not work.
Solution: To resolve this issue, check if the water supply is turned on and if there’s enough water pressure. If not, consider getting the water supply repaired or calling a professional to resolve the issue.
Problem 3: Faulty Mechanical Arm (Ejector Arm)
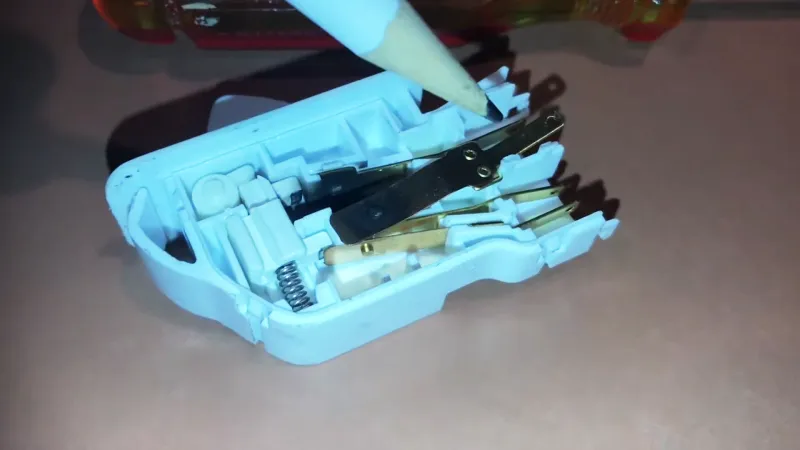
The mechanical arm, also known as the ejector arm, helps regulate the ice production. If the arm is faulty, it can cause the ice maker to stop working.
Solution: To inspect the arm, locate it and check if it’s moving freely. If the arm is broken or damaged, consider replacing it to resolve the issue.
Problem 4: Warmer Freezer
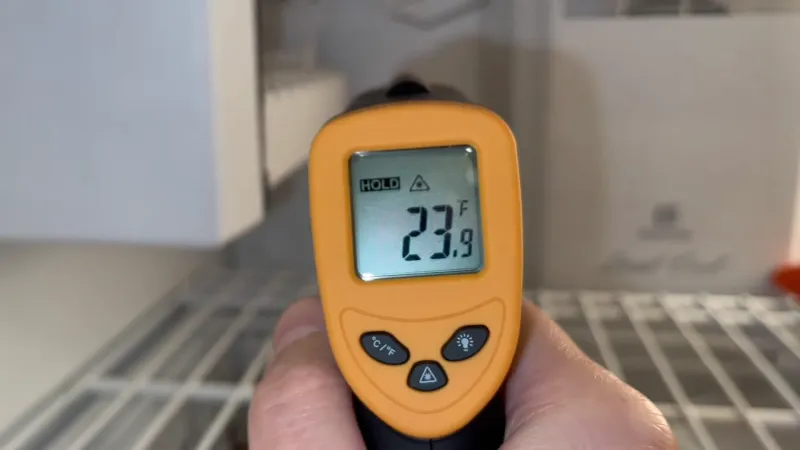
The freezer temperature needs to be optimal for ice production. If the temperature is higher than 10°F, it can cause the freezer to be warmer, hindering ice production.
Solution: To keep the freezer temperature optimal, consider adjusting the temperature setting to 0-5°F. If the issue persists, consider getting the freezer serviced by a professional.
Problem 5: Clogged Water Filter
The water filter helps purify the water used by the ice maker. If the filter is clogged, it can cause the ice maker to stop working.
Solution: To resolve this issue, consider replacing the water filter.
Problem 6: Faulty Ice Tray Temperature Sensor/thermostat
The temperature sensor or thermostat helps regulate the temperature of the ice tray. If it’s faulty, it can cause the ice maker to stop working.
Solution: To resolve this issue, inspect the temperature sensor/thermostat and replace it if necessary.
Problem 7: Faulty Fridge Door Switch
The fridge door switch helps control the lighting and cooling inside the fridge. If it’s faulty, it can cause the ice maker to stop working.
Solution: To resolve this issue, inspect the fridge door switch and replace it if necessary.
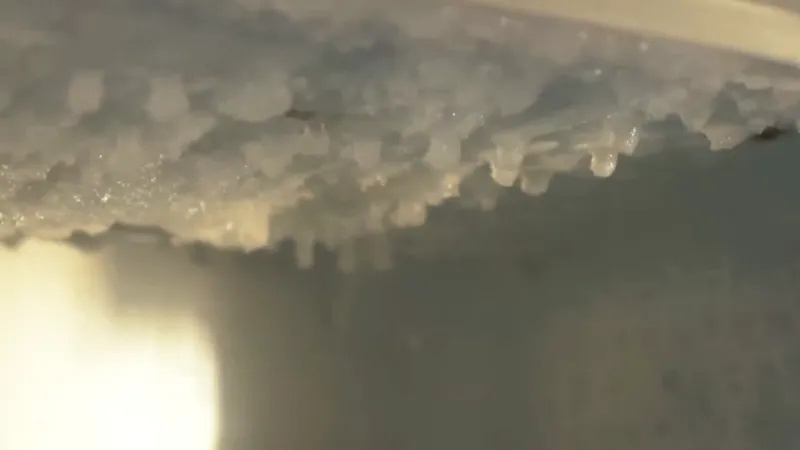
Problem 8: Frozen Water or Ice Chunk
Over time, the water supply line to the ice maker can freeze, causing a blockage in the water supply. This can cause the ice maker to stop working.
Solution: To resolve this issue, locate the water supply line and thaw it. If the issue persists, consider getting the line inspected and repaired by a professional.
Problem 1: Ice Maker is Off
One of the simplest reasons for a GE Profile refrigerator ice maker not working is that it may simply be turned off. This could happen if the ice maker was accidentally turned off, or if the power to the refrigerator was disrupted for any reason.
Steps to Turn the Ice Maker on
To turn the ice maker back on, simply locate the on/off switch or lever, which is usually found near the ice maker or in the freezer compartment. If the switch is in the “off” position, simply move it to the “on” position. If your refrigerator has a control panel, you may be able to turn the ice maker on or off using the control panel.
If you are unable to locate the on/off switch or control panel, refer to your GE Profile refrigerator manual for further instructions. Once the ice maker is turned on, it should start producing ice within 24 hours. If it still does not produce ice, there may be a different issue at hand and further troubleshooting may be necessary.
Problem 2: Insufficient Water Supply or Water Pressure
Another common reason for a GE Profile refrigerator ice maker not working is an insufficient water supply or water pressure. The ice maker requires a constant supply of water to produce ice, and if there is not enough water or the water pressure is too low, the ice maker may not work properly.
Solutions to Resolve the Issue
If you suspect that there is an issue with the water supply or water pressure, there are a few steps you can take to resolve the problem:
Check the Water Supply Valve
The first step is to make sure that the water supply valve, which is usually located under the sink, is fully open. If it is closed or partially closed, open it fully to ensure a constant water supply to the refrigerator.
Check the Water Pressure
If the water supply valve is open, the next step is to check the water pressure. Low water pressure could be due to a clogged water line or other issues with the plumbing. To check the water pressure, you can use a water pressure gauge, which can be purchased at a hardware store.
Replace the Water Filter
If the water supply and pressure are both adequate, the issue may be with the water filter. If the water filter is clogged or has not been replaced in a while, it may need to be replaced. Refer to your GE Profile refrigerator manual for instructions on how to replace the water filter.
Contact a Professional
If you are unable to resolve the issue with the water supply or water pressure, it may be necessary to contact a professional for assistance. A plumber or appliance repair technician will be able to diagnose and repair the issue.
By taking these steps, you should be able to resolve any issues with the water supply or water pressure and get your GE Profile refrigerator ice maker working properly again.
Problem 3: Faulty Mechanical Arm (Ejector Arm)
The mechanical arm, also known as the ejector arm, is an important component of the GE Profile refrigerator ice maker. It regulates the ice production by turning the ice tray and releasing the ice cubes into the storage bin.
If the ejector arm is faulty, it can cause the ice maker to stop producing ice or produce irregular shaped ice cubes.
How to Inspect the Arm
To inspect the ejector arm, you need to locate it in your GE Profile refrigerator. This can usually be found near the ice maker or inside the freezer compartment. If the arm is not moving or has any visible damage, it may be faulty and needs to be replaced.
Steps to Replace the Arm
Replacing the ejector arm requires some technical knowledge and should be performed by a professional if you are not confident in your abilities. However, here are the steps for a basic ejector arm replacement:
- Turn off the power to your refrigerator by unplugging it or turning off the circuit breaker.
- Locate the ejector arm in the freezer and remove it by carefully lifting it off the ice maker.
- Install the new ejector arm in place of the old one by securing it to the ice maker.
- Turn the power back on to your refrigerator and test the ice maker to ensure it is working properly.
the ejector arm is a critical component of the GE Profile refrigerator ice maker. If you suspect the arm is faulty, it is important to inspect and replace it as soon as possible to ensure the ice maker continues to function properly.
Problem 4: Warmer Freezer
The temperature of the freezer is an important factor in the proper functioning of the ice maker. If the temperature of the freezer is too warm, it can hinder ice production and affect the quality of the ice produced.
A warmer freezer can be caused by various reasons such as a faulty thermostat, faulty door seals, or a malfunctioning refrigeration system.
Solutions to Keep the Freezer Temperature Optimal for Ice Production
Check the Thermostat
The thermostat controls the temperature of the freezer. If it is not working properly, it can cause the freezer to be too warm. You can check if the thermostat is working by adjusting it to a lower temperature and waiting to see if the temperature decreases.
Inspect the Door Seals
If the door seals are not airtight, cold air can escape and warm air can enter the freezer, causing the temperature to rise. Check the door seals for any signs of wear and tear or damage and replace them if necessary.
Check the Refrigeration System
If the refrigeration system is not working properly, it can cause the freezer to be too warm. Check if the condenser coils are dirty and clean them if necessary. Also, check if the refrigerant levels are adequate and if not, have the system recharged by a professional.
It is important to keep the freezer temperature optimal for ice production to ensure that the ice maker functions properly. Regularly checking the freezer temperature, door seals, and refrigeration system can help prevent warmer freezer issues.
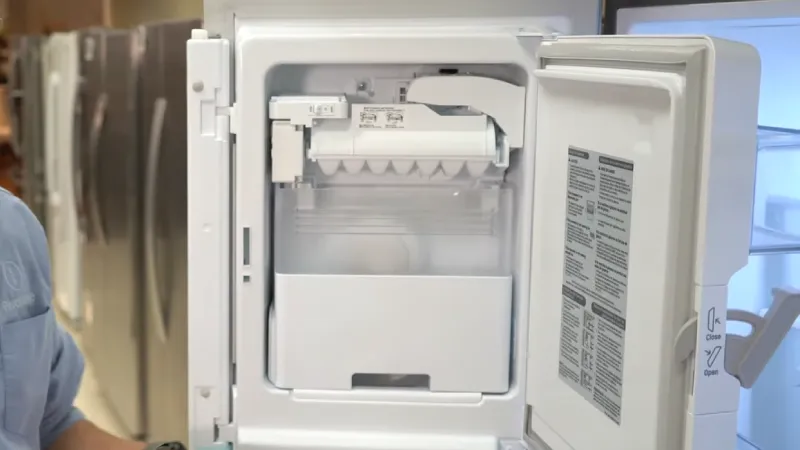
Problem 5: Clogged Water Filter
One of the common reasons why the GE Profile refrigerator’s ice maker may not be working is due to a clogged water filter. A clogged water filter restricts the water flow to the ice maker, which in turn, reduces the production of ice.
Steps to Replace the Water Filter
- Locate the water filter: The water filter is usually located in the refrigerator’s upper right corner, in the back of the refrigerator, or in the base grille.
- Turn off the water supply: Before replacing the water filter, turn off the water supply to the refrigerator to prevent any leaks.
- Remove the old filter: Depending on the model, you may need to unscrew the filter or simply twist it to the left to release it.
- Replace with a new filter: Insert a new water filter, making sure it is securely in place.
- Turn on the water supply: Once the water filter is securely in place, turn on the water supply to the refrigerator.
It’s important to replace the water filter regularly, usually every six months, to ensure the ice maker is working efficiently and producing high-quality ice.
Problem 6: Faulty Ice Tray Temperature Sensor/thermostat
A functioning temperature sensor/thermostat is essential for the proper operation of the ice maker. This component measures the temperature of the ice tray and helps to regulate the ice making process. If the temperature sensor/thermostat is faulty, it can lead to issues with ice production such as the formation of thin or uneven ice, or a complete halt in ice production.
Steps to Inspect and Replace the Sensor/thermostat
To inspect the temperature sensor/thermostat, you will need to locate it within the ice maker and test it using a multimeter. If the sensor/thermostat is faulty, it will need to be replaced. Here are the steps to replace it:
Unplug the refrigerator
Before beginning the replacement process, make sure to unplug the refrigerator from the electrical outlet to avoid any electrical hazards.
Locate the temperature sensor/thermostat
The temperature sensor/thermostat is usually located near the ice maker and connected to the control board.
Test the Sensor/thermostat
Use a multimeter to test the temperature sensor/thermostat. If it is not functioning properly, it will need to be replaced.
Remove the faulty sensor/thermostat
Carefully remove the faulty sensor/thermostat from its position.
Install the new sensor/thermostat
Replace the faulty sensor/thermostat with the new one and securely attach it in place.
Plug in the refrigerator
After replacing the temperature sensor/thermostat, plug the refrigerator back in and test the ice maker to make sure it is functioning properly.
Replacing a faulty temperature sensor/thermostat can be a bit of a technical task, so if you are unsure about your ability to complete the process, it is best to seek the help of a professional.
Problem 7: Faulty Fridge Door Switch
The fridge door switch, also known as the light switch, is a safety mechanism that helps regulate the interior light of the refrigerator and prevent the ice maker from functioning when the door is open. A faulty door switch can cause the ice maker to stop working, even if the other components are functioning properly.
Steps to Inspect and Replace the Switch
- Locate the door switch: The door switch is usually located near the top of the refrigerator compartment and is connected to the door frame.
- Test the switch: To test the switch, simply open and close the door and observe the interior light. If the light turns on and off as expected, the switch is working correctly. If the light does not turn on or stays on, the switch may be faulty.
- Replace the switch: To replace the switch, unplug the refrigerator and locate the wires that are connected to the switch. Detach the wires from the switch and attach them to the new switch in the same order. Reinstall the switch and plug the refrigerator back in to test the ice maker.
It is recommended to consult the manufacturer’s manual or a professional for this process, as different GE Profile refrigerators may have different door switch configurations.
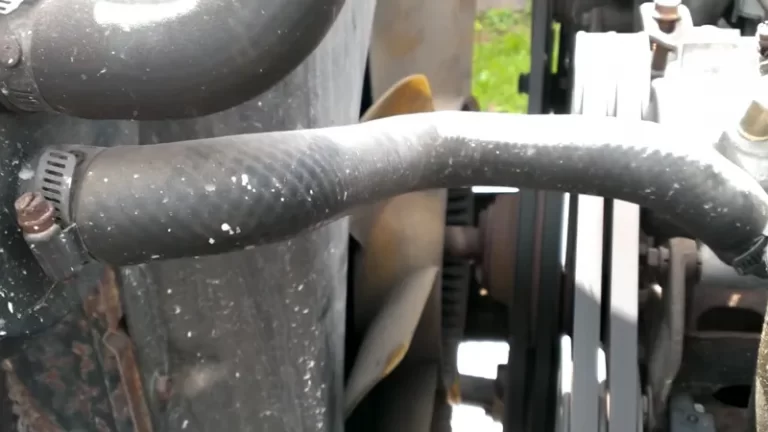
Problem 8: Frozen Water or Ice Chunk
One of the common problems with a GE Profile refrigerator ice maker is a frozen water or ice chunk. This happens when the water supply line that feeds the ice maker becomes clogged with ice, causing a lack of water flow and resulting in the formation of a large chunk of ice. This can prevent the ice maker from functioning properly and producing new ice.
Steps to Resolve the Issue
Here are some steps to resolve the issue of a frozen water or ice chunk in the GE Profile refrigerator ice maker:
- Locate the water supply line: The water supply line is usually found behind the refrigerator and is connected to the back of the ice maker.
- Turn off the water supply: Before attempting to resolve the issue, it is important to turn off the water supply to the ice maker to avoid any water damage.
- Thaw the water supply line: Using a hair dryer or hot towel, gently warm the water supply line until the ice inside has melted.
- Clear any blockages: Check the water supply line for any blockages or debris and clear them out.
- Turn on the water supply: Once the water supply line is clear, turn the water supply back on and wait for the ice maker to start producing ice again.
It is important to regularly check the water supply line for any blockages or frozen water to prevent this issue from happening again in the future. If the issue persists, it may be necessary to call a professional for further assistance.
Conclusion
The GE Profile refrigerator ice maker is an essential component of a functioning refrigerator, providing consumers with a convenient source of ice. However, as with any appliance, problems can arise that affect its performance.
The 8 common problems listed above, ranging from insufficient water supply to a faulty fridge door switch, can cause disruptions in the ice-making process. It’s important to regularly inspect and maintain your ice maker to avoid these problems.
If you encounter an issue that you can’t resolve on your own, it’s best to seek professional help to ensure a proper and safe resolution. The information provided above is a general guide, and you may need to conduct further research or consult with a professional for a more comprehensive understanding of your particular issue.