Dry Well for Condensate: Your Ultimate Fix for Soggy Yards
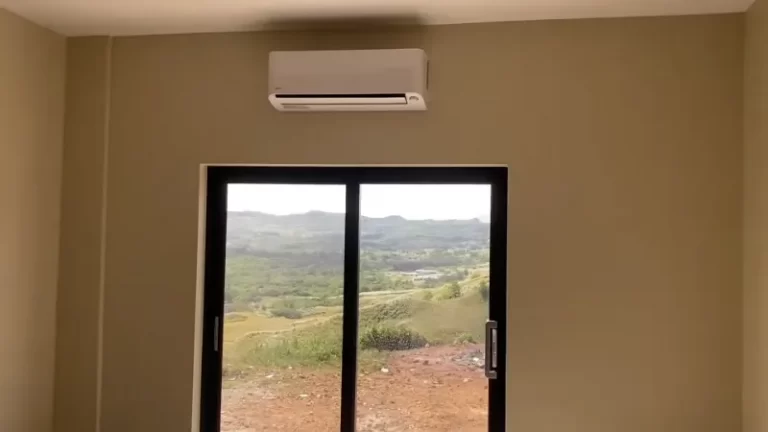
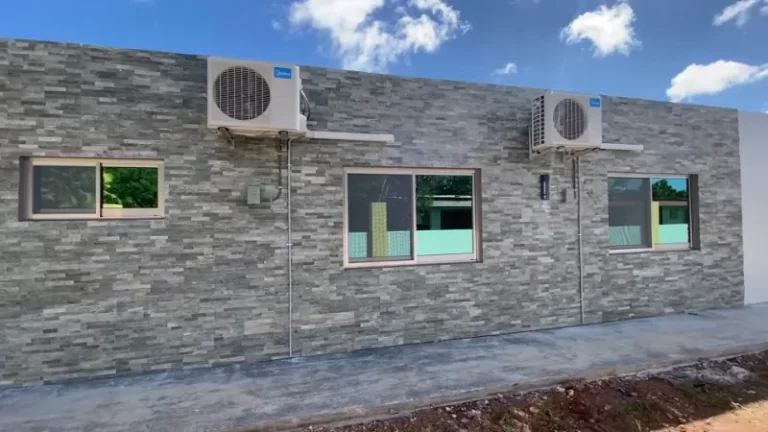
Is there a perpetually damp spot in your yard near your outdoor AC unit? That constant trickle of water is HVAC condensate, and while it means your system is working, it can create a host of problems if left unchecked. From soggy lawns and damaged foundations to attracting pests, improper condensate drainage is a headache you don’t need.
Many homeowners find their builder-grade condensate lines simply dump this water right next to the house, creating a muddy mess. Fortunately, there is an elegant and highly effective solution that hides underground and works silently to protect your property: a dry well for condensate.
You'll Learn About
What Is a Dry Well and Why Do You Need One for Condensate?
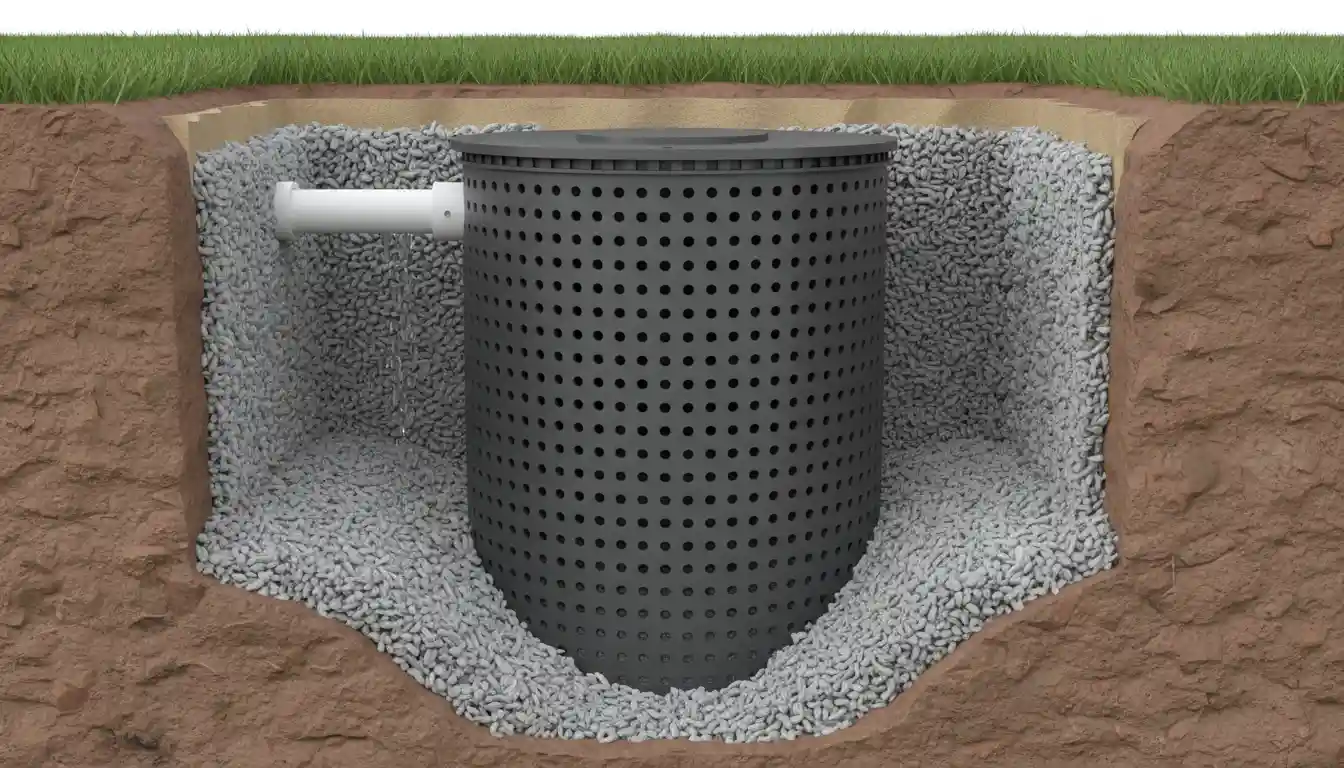
A dry well is essentially a buried, perforated container surrounded by gravel that collects water and allows it to slowly and safely seep into the surrounding soil. Think of it as a mini, underground reservoir designed to manage excess water. While often used for stormwater runoff from gutters, a smaller version is a perfect solution for the consistent, low-volume drainage from an HVAC system.
Your air conditioner or high-efficiency furnace removes a surprising amount of moisture from the air, which drains out through a small pipe. When this pipe just ends at your foundation, it concentrates all that water in one small area, leading to significant issues.
The Hidden Dangers of Improper Condensate Drainage
Ignoring that constant drip might not seem like a big deal, but it can lead to costly and frustrating problems down the line. A saturated area next to your home is more than just an eyesore; it’s a threat to your property’s integrity and your peace of mind.
Foundation Damage: The single most critical reason to manage condensate is to protect your foundation. Constant moisture saturation can weaken the soil supporting your home, leading to cracks, settling, and expensive structural repairs. Over time, this water can even infiltrate basement walls, creating bigger issues.
Lawn and Garden Destruction: A perpetually soggy patch of grass will eventually die, creating a muddy, barren spot in your yard. The constant water can also drown the roots of nearby plants and shrubs, ruining your carefully planned landscaping.
Pest Infestations: Standing water is a breeding ground for mosquitoes, termites, and other pests. By allowing condensate to pool near your home, you are essentially rolling out the welcome mat for unwanted insects and critters.
Slippery Hazards and Nuisance: Water spilling onto walkways or patios creates a slippery surface, posing a safety hazard. Local building codes also often prohibit drainage from creating a public nuisance, meaning you could be in violation. Managing this water is not just smart; it’s often required.
The Solution: Installing a DIY Dry Well for Condensate
Installing a dry well is a manageable weekend project for a motivated homeowner. It permanently solves your drainage problem by moving the water away from your foundation and dispersing it underground where it can be absorbed naturally. This guide will walk you through the entire process, from planning to completion.
Step 1: Planning Your Condensate Dry Well Installation
Before you dig, proper planning is essential for a successful installation. Taking a few minutes to map out your project will save you time and prevent major headaches. First, select a suitable location. Your dry well should be at least 10 feet away from your home’s foundation to ensure the water disperses well away from any structural elements.
Next, it’s crucial to call 811 before you dig. This free service contacts local utility companies to mark the location of any underground lines, such as gas, water, and electricity. Digging without this step is dangerous and can lead to costly damages and serious injury. Finally, check your local municipal codes regarding drainage to ensure your project is in compliance.
Step 2: Gathering Your Tools and Materials
Having everything you need on hand before you start makes the process go smoothly. You can find most of these items at your local hardware or home improvement store. A pre-fabricated dry well basin or kit is often the easiest option for a small-scale condensate project.
Here is a comprehensive list of what you’ll need for this project:
| Tool/Material | Purpose |
|---|---|
| Dry Well Basin (or 5-gallon bucket with holes) | The main chamber for collecting and dispersing water. |
| ¾” Schedule 40 PVC Pipe | To extend the condensate drain line to the dry well. |
| PVC Primer and Cement | For securely joining PVC pipe and fittings. |
| Shovel and/or Trenching Spade | For digging the hole for the well and the trench for the pipe. |
| Landscape Fabric | To line the hole and prevent silt from clogging the gravel. |
| ¾” Washed Gravel or Drainage Rock | To fill the hole around the basin, facilitating water dispersion. |
| Tape Measure & Level | For ensuring proper measurements and slope for the drain line. |
| Utility Knife | For cutting landscape fabric. |
Step 3: Excavation – Digging the Hole and Trench
With your location marked, it’s time to start digging. The hole for your dry well should be about twice the diameter of your basin and about 6-8 inches deeper. For a typical condensate dry well using a 5-gallon bucket, a hole about 2 feet wide and 2 feet deep is sufficient.
Next, dig a narrow trench from your existing condensate line to the hole. This trench only needs to be about 4-6 inches wide and deep enough to accommodate the PVC pipe. Crucially, the trench must have a slight downward slope away from the house—about 1/4 inch of drop for every foot of pipe—to ensure gravity pulls the water to the dry well.
Step 4: Assembling and Installing the System
Now you can begin putting the pieces together. Start by lining the entire hole with a single, large piece of landscape fabric, leaving plenty of excess around the edges. This fabric is vital for preventing soil and silt from mixing with your gravel and clogging the system over time.
Shovel a 4-6 inch layer of washed gravel into the bottom of the fabric-lined hole. Place your dry well basin (or drilled bucket) in the center of the hole on top of the gravel. Now, connect your PVC pipe to your existing condensate line and run it along the trench, inserting the end into one of the side holes of your basin. Use PVC primer and cement for a permanent, leak-proof seal at any joints.
Step 5: Backfilling and Finishing Touches
Once the pipe and basin are in place, begin filling the hole around the outside of the basin with more washed gravel. Fill it all the way to the top of the basin. This gravel-filled void is what allows the water to disperse effectively.
Fold the excess landscape fabric over the top of the gravel and the basin lid. This creates a “burrito wrap” that completely encases your system in a protective filter. Finally, backfill the hole and the trench with the soil you excavated earlier. You can replace the sod on top, and within a few weeks, no one will ever know it’s there.
Advanced Considerations for Your Drainage System
While a basic dry well is a fantastic solution, understanding a few more concepts can ensure your system is perfectly suited to your property and will last for decades. Taking these extra steps demonstrates a commitment to a robust and sustainable home maintenance strategy.
Soil Type and Percolation Testing
The effectiveness of a dry well depends heavily on your soil’s ability to absorb water, known as its percolation rate. Sandy or loamy soils drain quickly, making them ideal for a dry well. Heavy clay soils, however, drain very slowly and can cause a dry well to fill up faster than it can disperse water.
For a small condensate dry well, this is rarely an issue due to the low volume of water. But if you have very dense clay, you might consider making the dry well slightly larger with more gravel to increase its holding capacity. This gives the water more time to seep away between cycles.
Integrating with Sustainable Landscaping
A dry well doesn’t just have to be a hidden utility; it can be part of a smart, eco-friendly garden design. The slowly dispersing water creates a zone of reliable moisture in the soil. You can take advantage of this by planting water-loving native plants or a small rain garden in the area above or near your dry well.
This approach turns a simple drainage solution into a beautiful garden feature that supports local pollinators and reduces your need for supplemental watering. It’s a perfect example of how home systems can work in harmony with the natural environment.
Maintaining Your Dry Well for Long-Term Success
Your new dry well is a low-maintenance system, but a little preventative care can ensure it functions flawlessly for years. The biggest threat to any drainage system is clogging from debris. While condensate is relatively clean, it’s wise to ensure the drain line itself remains clear.
Once a year, typically in the spring before you start running your AC, inspect the point where the condensate line exits the house. Ensure it’s free of leaves, grass clippings, or other blockages. If your furnace drain line is tied in, this maintenance is even more critical. Addressing a potential clog in the main line, like a Goodman furnace condensate drain leaking, prevents problems from ever reaching your dry well.
Because the dry well is wrapped in landscape fabric, internal clogging is highly unlikely. The system is designed to be a set-it-and-forget-it solution that provides decades of reliable, invisible protection for your home and garden.