Cover Flashing: The Secret to Permanently Fixing Roof Leaks
A mysterious water stain appears on your ceiling. You’ve checked the shingles, sealed the obvious gaps, yet the drip persists after every heavy rain. This frustrating scenario often points to a single, frequently overlooked culprit: failed or missing cover flashing.
Cover flashing, also known as counter-flashing, is the unsung hero of a truly waterproof roof. It is the critical second layer of defense that protects the most vulnerable points of your home from water intrusion.
You'll Learn About
What Is Cover Flashing and Why Is It So Important?
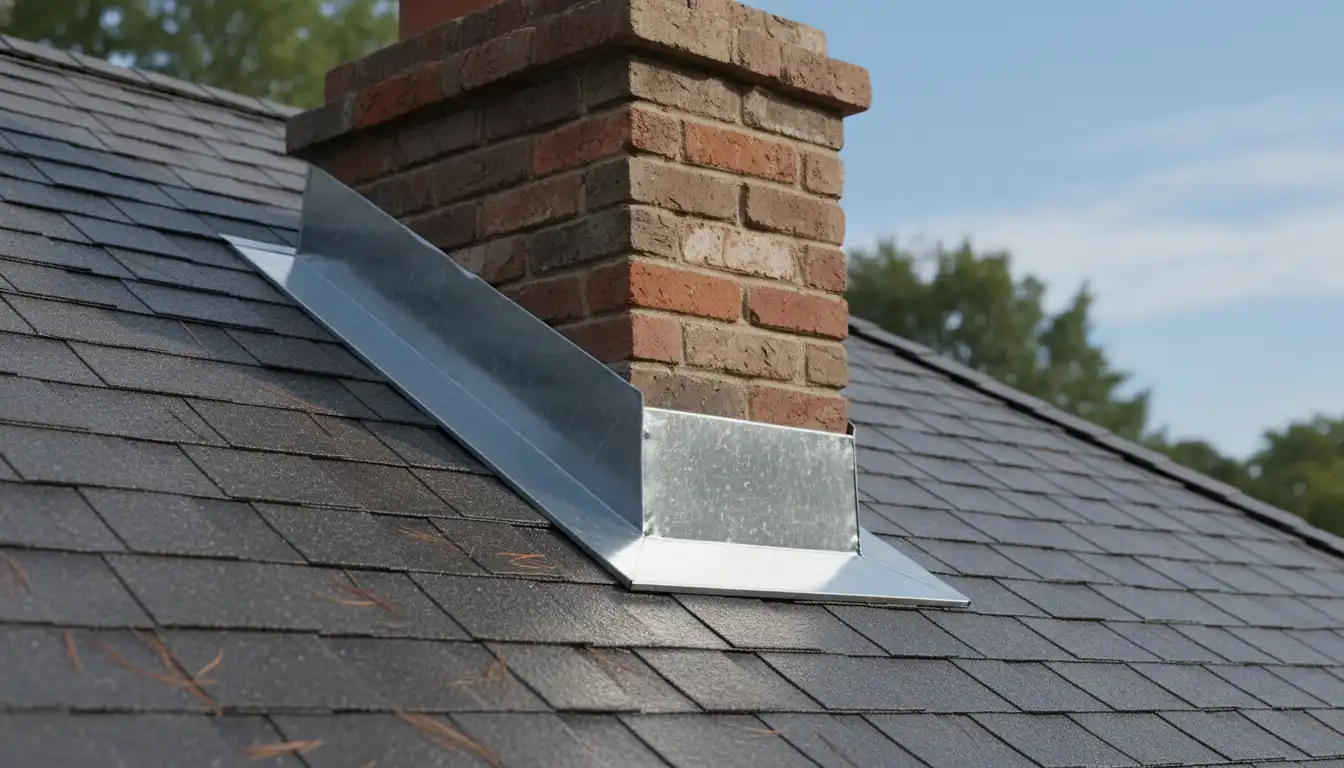
Cover flashing is a metal sheet that covers the top edge of a primary piece of flashing, called base flashing or step flashing. Its primary job is to prevent water from getting behind the base flashing, creating a two-part system that ensures a durable, watertight seal.
Imagine the base flashing as the main shield against rain. The cover flashing acts like a cap or a lid, sealing the top seam where that shield meets a vertical surface like a brick chimney or a wall. Without it, water runs down the wall and finds its way behind the first layer of defense, leading to slow, hidden leaks that can cause significant damage over time. The result can be devastating, from rotted roof decking to persistent drips that create tiny holes in the ceiling of your home.
The Hidden Genius of a Two-Part Flashing System
The real reason cover flashing is superior lies in how it handles the natural movement of your home. Your roof deck (made of wood) and a chimney (made of brick and mortar) expand and contract at very different rates with temperature and humidity changes. A single piece of flashing attached to both would be under constant stress, eventually causing its sealant to crack and fail.
A two-part system solves this problem elegantly. The base flashing is secured to the roof deck and moves with it. The cover flashing is secured to the chimney or wall, moving with the masonry. The clever overlap allows these two pieces to slide independently of each other, maintaining a waterproof seal without stressing the joints.
Critical Areas That Demand Cover Flashing
Certain junctions on your roof are hotspots for leaks and absolutely require a correctly installed cover flashing system for long-term protection. Understanding these areas helps you inspect your own roof for potential vulnerabilities.
The most common and critical location is where a roofline meets a brick chimney. This area faces direct rainfall and involves two very different materials. Another key spot is any roof-to-wall intersection, such as where a dormer wall meets a sloped roof or where a second-story wall begins.
Parapet walls on flat or low-slope roofs and the bases of some skylights also depend on this two-part system. In all these cases, the cover flashing is the final piece of the puzzle that directs water safely down and away from the structure.
Choosing the Right Cover Flashing Material
The material you choose for your cover flashing impacts its durability, cost, and appearance. While a professional can recommend the best option for your specific climate and roofing material, understanding the choices helps you make an informed decision.
Copper is often considered the premium choice for its extreme longevity and beautiful patina, while galvanized steel offers a cost-effective solution for many homeowners. The table below compares the most common options.
| Material | Pros | Cons | Best For |
|---|---|---|---|
| Galvanized Steel | Affordable, strong, widely available. | Can rust over time if scratched or improperly coated. | Budget-conscious projects and standard roofing applications. |
| Aluminum | Lightweight, corrosion-resistant, easy to form. | Can be easily dented, not as strong as steel. | Coastal areas where salt corrosion is a concern. |
| Copper | Extremely durable (100+ years), beautiful aesthetic, requires no painting. | Very expensive, requires skilled installation. | Historic restorations and high-end custom homes. |
| Lead | Highly malleable, excellent for complex shapes. | Toxic, heavy, requires special handling and safety precautions. | Primarily used in historic restorations by specialists. |
| Stainless Steel | Highly resistant to rust and corrosion, very strong. | More expensive than steel or aluminum, harder to work with. | Modern homes and areas with harsh weather or industrial exposure. |
How to Install Cover Flashing on a Brick Chimney
Installing cover flashing is a precise job that requires the right tools and a healthy respect for heights. While hiring a professional is often the safest bet, understanding the process is valuable. The gold standard method involves cutting a groove, known as a reglet, into the masonry mortar joints.
First, safety is paramount. Ensure you have a securely placed ladder and proper safety gear. You will use an angle grinder with a diamond blade to cut a reglet approximately 1 to 1.5 inches deep into the horizontal mortar joints of the chimney, following the slope of the roof.
Next, you will measure and bend your metal flashing pieces. Each piece should be bent to fit snugly into the reglet at the top, while the bottom edge must overlap the existing step or base flashing by at least two to three inches. This overlap is non-negotiable for a waterproof seal.
The bent pieces are then inserted into the reglet. Small metal wedges are often hammered into the reglet to hold the flashing securely in place before the final seal is applied. Finally, a high-quality, flexible polyurethane masonry sealant is injected deep into the reglet, completely sealing the top edge of the flashing. This creates a permanent mechanical and chemical bond that keeps water out.
Common and Costly Cover Flashing Mistakes
Incorrect installation can render even the best materials useless. The most common mistake is face-mounting the flashing, which involves simply laying the metal against the brick and relying on a bead of caulk along the top edge. This caulk is fully exposed to the elements and is guaranteed to fail, often within a couple of years.
Another frequent error is insufficient overlap between the cover flashing and the base flashing, which allows wind-driven rain to be forced underneath. Using the wrong type of sealant is also a critical failure point. Standard silicone caulk will not adhere well to masonry and will quickly crack under UV exposure.
Finally, a holistic approach to water management is key. Proper flashing must work together as a system across the entire exterior. For example, ensuring proper flashing techniques are used everywhere, flashing where siding meets concrete, prevents water from compromising your foundation, just as cover flashing protects your roof.
Long-Term Maintenance and Inspection
Your flashing system requires periodic checks to ensure it remains effective. It’s wise to inspect your roof flashing at least once a year and after any major weather event. Following a severe storm, a thorough inspection is crucial, similar to the checks needed for Zephyrhills hurricane damage recovery.
Look for sealant that is cracking, shrinking, or pulling away from the joint. Check for any pieces of flashing that have become loose or dislodged. If you see signs of rust on galvanized steel, it may need to be cleaned and repainted or replaced to prevent further corrosion.
Knowing When to Call a Professional
While some maintenance, like applying new sealant, might be within reach for a skilled DIYer, the initial installation or replacement of cover flashing is often best left to a professional. The work involves power tools, working at heights, and a deep understanding of roofing and masonry systems.
If your chimney’s mortar is crumbling, if you are uncomfortable working on a steep roof, or if you suspect the leak has already caused underlying structural damage, do not hesitate to call a qualified roofer or masonry contractor. Investing in a professional installation ensures the job is done safely and correctly, providing you with peace of mind for decades.
A Foundation of a Dry Home
Cover flashing is more than just a piece of metal on your roof; it is a meticulously designed system that accounts for the physics of your home. It provides the permanent, flexible seal that vulnerable roof junctions need to withstand the relentless forces of nature.
By understanding its function and ensuring its correct installation, you are investing in the long-term health and integrity of your entire home. It is the definitive solution to some of the most stubborn and damaging roof leaks.