Cement Board Over OSB: Stop! Read This Before You Lay a Single Tile
You have a vision for your project: a beautiful, durable tiled surface. But there’s a problem lurking beneath the surface—your subfloor is Oriented Strand Board (OSB). This common situation leaves many homeowners and DIY enthusiasts asking the same critical question: can you successfully install cement board over OSB without creating a ticking time bomb of cracked tiles and water damage?
The answer is a resounding yes, but only if you do it perfectly. Tiling directly onto OSB is a recipe for disaster. The wood strands and resins in OSB are susceptible to moisture and movement, two things that tile and grout simply cannot tolerate. The result is a failed installation, wasted money, and a massive headache.
This guide provides the definitive, step-by-step solution to properly installing cement board over OSB. By following these instructions, you’ll create a rock-solid, waterproof foundation that ensures your tile work lasts a lifetime.
You'll Learn About
Why OSB Alone Is a Nightmare for Tile
Oriented Strand Board is an engineered wood product made from compressed layers of wood strands held together with adhesives. It’s strong and cost-effective, making it a popular choice for subflooring and sheathing. However, its properties make it fundamentally unsuitable as a direct base for tile.
OSB’s biggest weakness is its reaction to moisture. When exposed to water from thin-set mortar or leaks, it can swell, warp, and delaminate. This movement, however slight, is enough to break the rigid bond of tile and grout, leading to catastrophic failure. Furthermore, the surface of OSB doesn’t allow for a strong, permanent bond with tile adhesives.
The Critical Role of Cement Board as an Underlayment
This is where cement board comes in as the essential middle layer. Cement board is a sheet made of cement and reinforcing fiberglass mesh. It is dimensionally stable, incredibly durable, and highly resistant to water. It will not rot, swell, or decompose when exposed to moisture, making it the ideal tile backer.
By properly installing cement board over your OSB subfloor, you create a stable, uncoupling layer. This new surface provides the perfect substrate for thin-set mortar to bond with, ensuring your tiles stay put for decades. It effectively isolates the tile from the problematic OSB below.
The Wrong Way vs. The Right Way to Install
A common and disastrous mistake is to simply screw the cement board directly to the OSB subfloor. This traps air pockets and allows for micro-movements between the layers. Over time, this movement will translate through to the tile, causing cracks and failure.
The only correct method involves creating a solid, monolithic structure. This is achieved by embedding the cement board in a fresh bed of thin-set mortar spread over the OSB, and then securely fastening it. This process eliminates voids and ensures the entire assembly is bonded together as a single, solid unit.
Step-by-Step Installation Guide for Floors
Follow these steps meticulously to guarantee a professional-grade installation that will stand the test of time. Do not skip any steps; each one is crucial for success.
H3: Step 1: Subfloor Preparation is Non-Negotiable
Before you begin, your subfloor must be structurally sound. The industry standard for tile requires the floor to have a maximum deflection of L/360, meaning it shouldn’t flex more than the span length divided by 360. For a typical 16-inch joist spacing, this is a very small amount.
Walk across the floor and check for any bounce or sponginess. If you notice significant movement, you must reinforce the floor from below by adding blocking between the joists. Ensure the OSB is at least 23/32” thick for standard joist spacing. The surface must be clean, dry, and free of any debris, paint, or old adhesive.
H3: Step 2: The “Secret” Layer: Applying Thin-Set Mortar
This is the most critical and often-skipped step. Applying a layer of thin-set mortar between the OSB and the cement board is essential. This mortar bed fills any voids, corrects minor imperfections in the subfloor, and creates an unbreakable bond between the two layers.
Use a modified thin-set mortar. Mix it according to the manufacturer’s instructions to a peanut butter-like consistency. Using a 1/4-inch square-notched trowel, spread an even layer of thin-set over an area just large enough for one sheet of cement board.
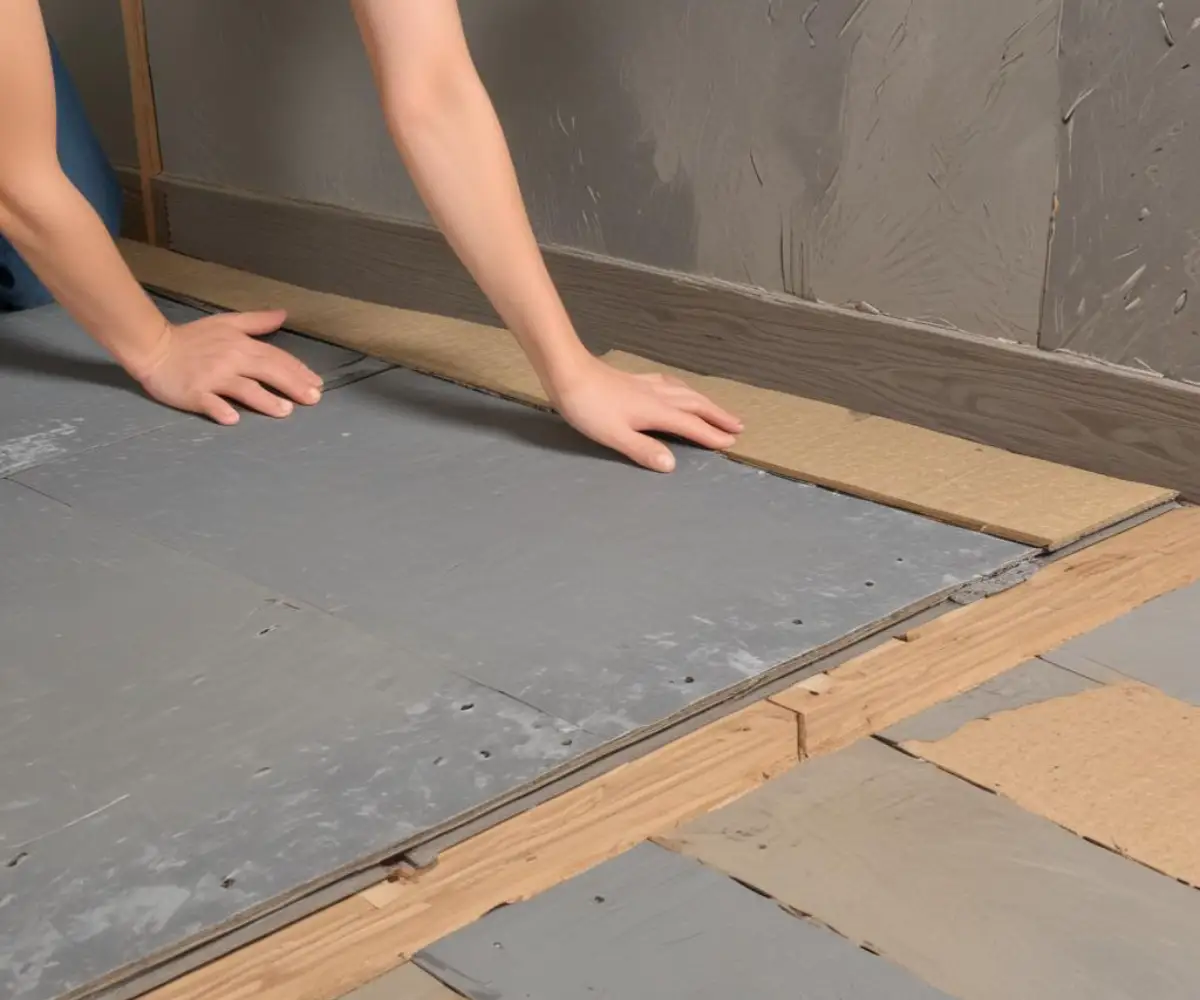
H3: Step 3: Laying and Fastening the Cement Board
Immediately place the cement board sheet into the wet thin-set. Use a slight sliding motion to press it firmly into the mortar, ensuring complete contact. The goal is to eliminate any air pockets. It’s important to stagger the cement board joints so they do not line up with the seams in the OSB subfloor below.
Leave a 1/8-inch gap between cement board sheets and a 1/4-inch gap along walls. Fasten the board every 8 inches throughout the entire sheet using specified 1-1/4” corrosion-resistant cement board screws. Drive the screws so the heads are flush with or just slightly below the surface.
H3: Step 4: Finishing the Seams for a Waterproof Assembly
Once all the boards are laid and fastened, the final step is to treat the seams. Apply more thin-set mortar over the joints between the boards. Immediately embed 2-inch wide, alkali-resistant fiberglass mesh tape into the wet mortar, pressing it in with a putty knife.
Skim another thin layer of mortar over the tape to smooth it out. This process ties all the individual boards together into a single, continuous, and stable surface, ready for tile.
Adapting the Process for Walls
The same fundamental principles apply when installing cement board over OSB on walls, such as for a shower surround or kitchen backsplash. However, for wet areas like a shower, adding a waterproofing membrane is absolutely essential.
After installing the cement board and taping the seams, apply a liquid waterproofing membrane like RedGard over the entire surface, including screw heads. This creates a fully waterproof barrier, protecting the wall cavity from any moisture penetration. This process is distinct from other wall projects, such as those covered in our guide to sunroom wall panel replacement, where moisture protection requirements differ.
| Factor | Method 1: Cement Board Over OSB (Correct) | Method 2: Tiling Directly on OSB (Incorrect) |
|---|---|---|
| Stability & Rigidity | Excellent. Creates a solid, unmoving substrate. | Poor. Subject to flex, movement, and bounce. |
| Moisture Resistance | High. Cement board is impervious to water damage. | Very Low. OSB will swell, warp, and rot with moisture. |
| Bond Strength | Superior. Thin-set bonds perfectly to cement board. | Weak. Thin-set cannot get a reliable, long-term bond to OSB resins. |
| Longevity of Tile | Decades. Prevents cracks in tile and grout. | Short-lived. Leads to cracked tiles and grout failure. |
| Overall Result | A professional, durable, and long-lasting installation. | A failed project requiring complete replacement. |
Common Questions and Pro Tips
Even with a clear guide, questions arise. Here are answers to some of the most common queries to ensure your project is a success.
Do I really need thin-set under the cement board?
Yes, absolutely. This is not for adhesion in the traditional sense, but to provide 100% support by filling all voids. Without it, the board can flex under load, which will eventually lead to cracked tiles.
What kind of screws must I use?
Only use screws specifically designed for cement board. These are corrosion-resistant and have a special head design that allows them to countersink properly without damaging the board. Never use drywall screws.
How does this compare to other flooring installations over OSB?
The requirements are very different. For instance, when installing floating vinyl plank over OSB, the primary concern is a smooth surface, not the rigid, waterproof bond required for tile. Each flooring type has unique substrate needs.
What if I am working in a basement?
Basement installations require special attention to moisture from the concrete slab below. While cement board is excellent, consider integrated systems. Exploring a DRICORE SMARTWALL alternative might reveal insulated paneling solutions that manage moisture differently for finished walls.
Conclusion: Build it Right, Build it Once
Installing cement board over an OSB subfloor is the correct and necessary step to prepare for a lasting tile installation. While it adds an extra day to your project, it’s the only way to ensure your beautiful new tiles won’t fail prematurely.
By understanding the weaknesses of OSB and the strengths of cement board, and by meticulously following the installation process—especially the critical thin-set layer—you are not just laying tile. You are building a durable, high-quality flooring system from the ground up that will add value and beauty to your home for years to come.