Wire a Ceiling Fan When There Is No Ground Wire [Proper Method]

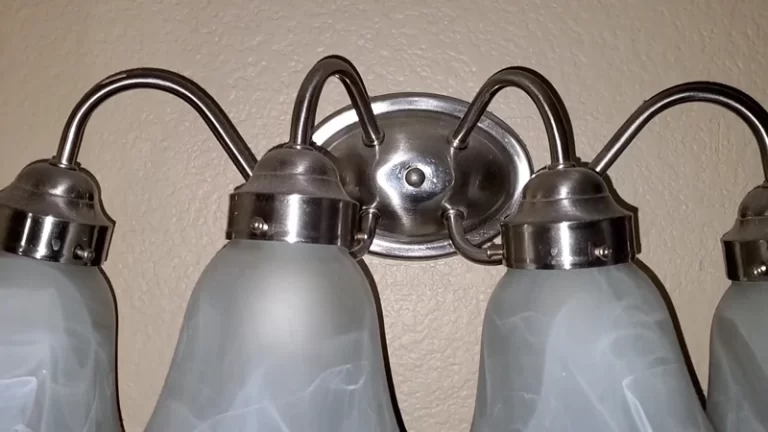
A ceiling fan is a very popular and versatile fixture. It has many uses such as lighting, air circulation, and cooling. It can also be used as a decorative fixture, adding color and lighting to a room. However, this fixture can be quite difficult to wire and install. If you are not sure how to do it, we are here to help you.
The number one thing to consider when you are working on any electrical device, even the simplest one, is safety. You want to make sure that you are following all the safety regulations and guidelines when doing any electrical work. In the case of wiring a ceiling fan, it is even more important to be careful. Follow all the rules when doing this.
You'll Learn About
What is a Ground Wire?
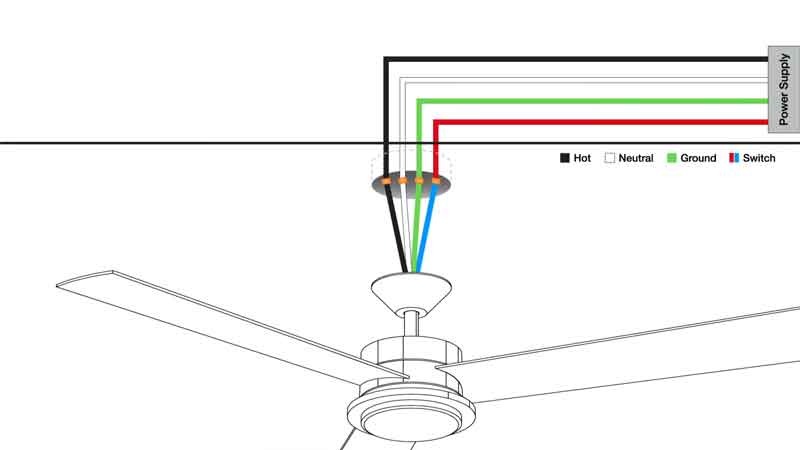
What is a ground wire? It ensures that your electrical system remains grounded and provides protection against electric shock. A ground wire attaches to the chassis of a building or an overhead power line if you are using electricity from the grid. It connects to all metal objects in its vicinity, including pipes, wires, and fixtures.
The Purpose of Ground Wire
The purpose of having a ground wire installed is twofold. Firstly, it reduces the potential for electric shocks by providing an earth connection. Secondly, by keeping metal objects connected together electrically through the use of a grounding conductor, corrosion will be less likely to occur. This is due to contact with another object’s surface.
In order to avoid dangerous situations caused by faulty wiring or overloaded circuits, the installation of ground wires is mandatory. This is especially true where electricity is fused and used for general purposes such as lighting or heating.
Here’s How to Ground a Ceiling Fan with No Ground Wire
To ground a ceiling fan, you have to follow the proper steps. Here’s how:
Step 1: Ensure Junction Box is Rated for the Ceiling Fan
Junction boxes are the devices that connect the wires from the different fixtures in the home. For a ceiling fan, you will need to get a junction box that is rated to handle the wattage of the ceiling fan. The watts are the measure of the electrical current going through the wires in your home. You want to ensure that the junction box is rated for the maximum amount of current that your ceiling fan can draw.
Step 2: Wire the Ceiling Fan Without the Ground
When you are wiring a ceiling fan, you want to make sure that you do not wire the ground wire. The ground wire is the wire that connects the positive and negative terminals of the fixture. By wiring the ground wire, you are preventing a short circuit. This allows the fan to turn on.
Step 3: Mount Any Brackets Necessary
You will need to mount any necessary brackets to the ceiling fan. This is necessary to hold the ceiling fan in place and keep the wires from getting damaged.
Step 4: Assemble the Fan
The fan should be assembled and ready to be installed. The fan should be able to be installed in the fixture you are installing it in. If it is not, then you may need to purchase a ceiling fan that is already assembled.
Step 5: Wire Your Fan Properly
Now that you have the wiring and mounting complete, it is time to wire your ceiling fan. To wire a ceiling fan, you want to make sure that you are not short-circuiting the wires or using them in an improper manner. You want to make sure that the wires are in the correct position and that the voltage and current are correct. If you are not sure how to wire your fan, you can always call a professional or the manufacturer for assistance.
Here’s a Quick Look
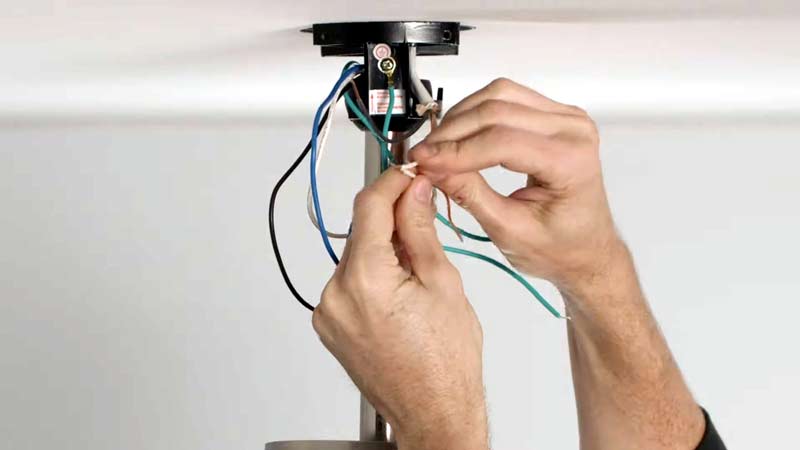
Before you begin, be sure to turn off the power to your ceiling fan. This can be done by flipping the breaker or unplugging it from the wall. Next, remove any screws that may be securing the blades or light fixtures to the ceiling. Disconnect either end of the wiring if there is no ground wire attached. This will vary depending on the model.

Touch one lead of your new electrical cord to each terminal. Hold down both ends while pulling up on the other lead until tight. Do not twist. With wires now connected in a loop, position them so they are hanging over either side of an old light fixture. Screw them into place with screws provided (or use nails if you have access).
If using bare wires instead of a cord wrap kit, make a small “jungle” bracket out of some scrap wood. Mount it securely overhead near the centerline of the fan blade(s). Make sure all exposed metal is covered.
Snap-in cover plates and test for voltage before turning fans back on. Always follow the manufacturer’s instructions for safe operation.
To Recap
Ceiling fans are one of the most useful devices in your home. If you have them, they make a huge difference in the comfort of your home.
Frequently Asked Questions
Do you need a ground wire to install a ceiling fan?
When installing a ceiling fan, you will need to attach a ground wire to the fixture. If you do not have a ground wire, you will need to add one. The ground wire connects to the screw that is attached to the ceiling. It then connects to the metal part of the fixture. This is how a ground wire works.
What if there is no ground wire?
If there is no ground wire, the ceiling fan will not work. You will not be able to turn it on or off. You will have to get a ground wire.
What if I don’t have a ground wire for a light fixture?
You will have to get a ground wire for the light fixture, even if there is a ground wire for the ceiling fan.
Can I attach the ground wire to the mounting screw?
It is fine to attach the ground wire to the mounting screw. You will have to get a ground wire for the light fixture.
Is it OK to install a light fixture without a ground wire?
Yes, it is fine to install the light fixture without a ground wire.