Stop Brushing Baseboards! Use Canned Spray Paint for a Flawless Look
Spray painting can seem like a daunting task at first glance, especially when you’re used to the traditional brush-and-roll approach. However, for those aiming for a flawless, professional-grade finish, it’s an invaluable technique that offers incredible results. Whether you’re tackling baseboards, furniture, or trim, spray painting provides an even, smooth coat that’s nearly impossible to achieve with a brush alone.
While the preparation may take some effort, the speed and superior finish make it well worth the investment. In this article, we’ll explore how you can master the art of spray painting to transform your home with ease and precision.
You'll Learn About
Why Your Brush Is Ruining Your Baseboards
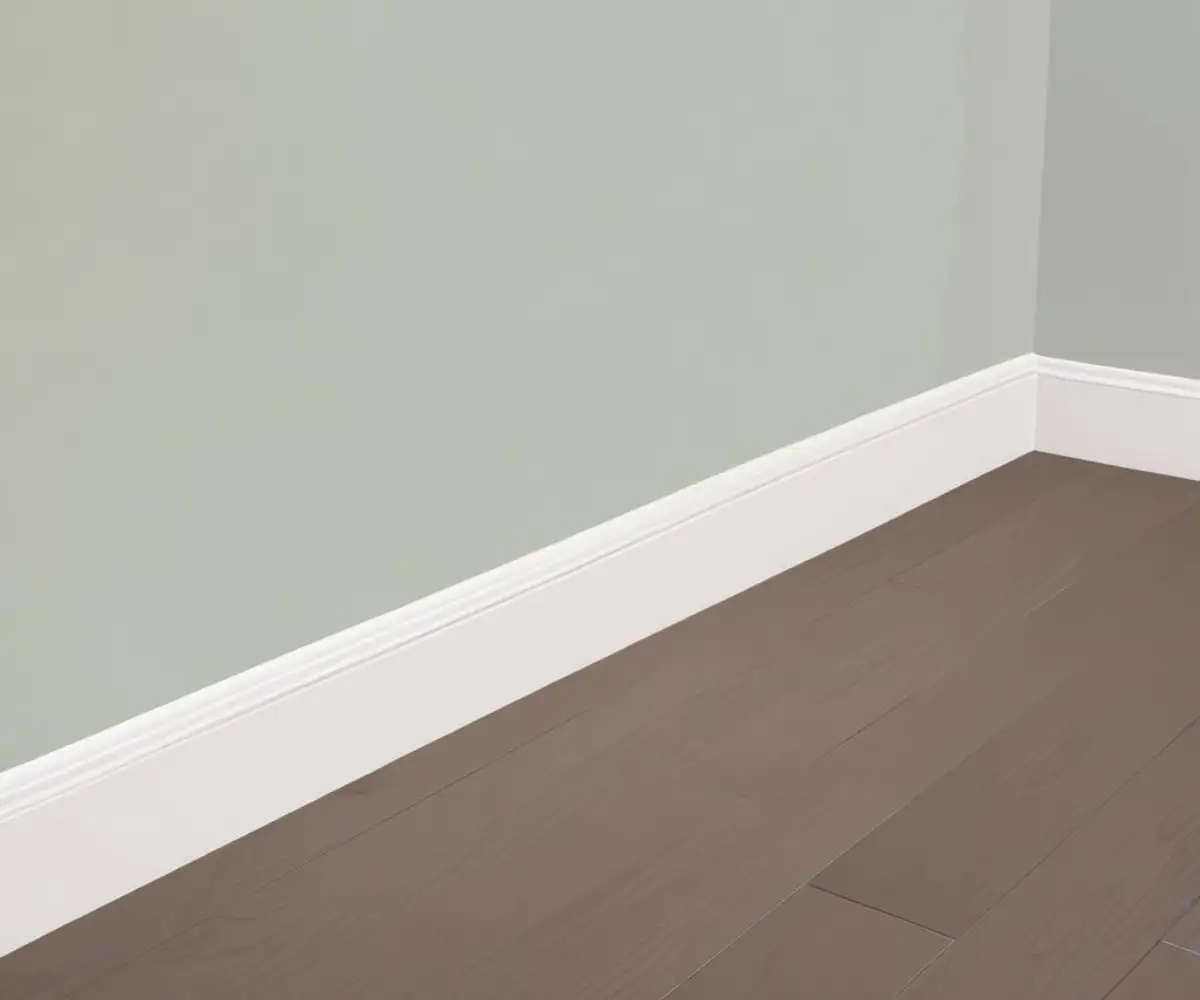
Let’s be honest: painting baseboards with a brush is a tedious, back-breaking task that almost never delivers the smooth, flawless finish you envision. You spend hours on your knees, meticulously taping and cutting in, only to be left with visible brush strokes, drips, and an uneven sheen. It’s one of the most frustrating DIY painting jobs, and the results often scream “amateur” instead of “professional.”
The core problem lies with the tool. Brushes, no matter how expensive, are designed to apply paint through friction, which inevitably leaves behind a texture. For walls, this is often unnoticeable, but on the smooth, narrow surface of baseboards and trim, every imperfection is magnified. This is where the game changes. Using canned spray paint isn’t just an alternative; it’s a superior method for achieving a stunning, factory-like finish with a fraction of the effort.
Brush vs. Spray: A Head-to-Head Showdown
Still not convinced that a can of spray paint can outperform your trusty paintbrush? The differences are stark when you compare the process and the final results. While traditional methods have their place, modern spray paint technology offers advantages in speed and quality that are hard to ignore for trim work.
Making the right choice depends on your project goals. Are you prioritizing speed and a perfect, smooth surface, or are you more comfortable with traditional methods despite their drawbacks? This comparison will clarify which approach is best suited for your baseboard project.
| Feature | Brush Painting | Canned Spray Painting |
|---|---|---|
| Finish Quality | Prone to brush marks, drips, and uneven sheen. Difficult to achieve a perfectly smooth surface. | Delivers a consistently smooth, even, factory-like finish with no texture. |
| Speed & Efficiency | Extremely slow and labor-intensive, especially for long stretches of baseboard or multiple rooms. | Significantly faster application. An entire room can be coated in a fraction of the time. |
| Preparation Time | Requires careful taping of the floor and wall, but less concern about airborne particles. | Requires extensive masking of floors, walls, and furniture to protect from overspray. |
| Skill Level Required | Requires a steady hand and good technique (“cutting in”) to avoid getting paint on floors or walls. | Requires learning a proper spray technique (distance, motion) to avoid runs and uneven coats. |
| Cleanup | Involves washing brushes, rollers, and paint trays, often with mineral spirits for oil-based paints. | Minimal cleanup; involves removing masking materials and disposing of empty cans. |
| Durability & Touch-ups | Can be durable depending on the paint used. Touch-ups are relatively simple with a small brush. | Highly durable, especially with enamel-based spray paints. Touch-ups can be more challenging to blend seamlessly. |
The Pre-Flight Checklist: Gearing Up for a Perfect Spray
Success with spray painting is all about having the right tools on hand before you start. Unlike brush painting where you can often make do, spray painting demands proper equipment for safety, precision, and a professional outcome. Gathering these items beforehand will streamline the process and prevent frustrating interruptions.
Choosing Your Weapon: The Best Canned Spray Paint for Trim
The single most important decision is your choice of paint. Not all spray paints are created equal, and baseboards demand a specific type of durability. Because they are in a high-impact area—prone to scuffs from shoes, vacuums, and furniture—you need a paint that cures to a hard, resilient finish.
Look for an oil-based or acrylic-alkyd enamel spray paint. These formulas cure much harder than standard latex paints, offering superior resistance to chipping and scuffing. For the finish, a Satin or Semi-Gloss sheen is ideal. These finishes are easier to clean than flat or matte sheens and provide a subtle luster that makes trim pop without being overly reflective. Brands like Rust-Oleum and Krylon offer excellent “all-in-one” paint and primer formulas designed for this purpose.
Essential Supplies Beyond the Can
While the paint is the star, the supporting cast of supplies is what ensures a clean, professional job. Don’t skimp on these items; they are your defense against the primary enemy of spray painting: overspray.
Your essential supply list should include high-quality painter’s tape (at least 1.5 inches wide), masking paper or plastic sheeting, a spray shield for tight corners, a high-quality respirator mask (not a simple dust mask), disposable gloves, and a tack cloth for final dust removal.
The Art of Preparation: Where 90% of the Magic Happens
Professional painters agree that a perfect paint job is almost entirely dependent on meticulous preparation. With spray painting, this is even more critical. Airborne paint particles will settle on any unprotected surface, so your prep work must be thorough and precise to avoid a messy disaster.
Cleaning and Surface Prep
Start by thoroughly cleaning your baseboards. Use a degreasing cleaner to remove any dirt, grime, or oils, as these will prevent the paint from adhering properly. Once dry, give the entire surface a light sanding with fine-grit sandpaper (220-grit is ideal). This step, known as “scuff sanding,” de-glosses the old finish and creates microscopic grooves for the new paint to grip onto, ensuring a long-lasting bond.
After sanding, fill any nail holes or gouges with wood putty. Apply caulk to the top edge where the baseboard meets the wall to create a seamless, professional look. Before you even think about painting, it’s a great time to seal any gaps at the bottom, which can help with pest control. For more on this, see our guide on how to seal baseboards from ants. Finally, vacuum all dust and wipe the baseboards down with a tack cloth for a perfectly clean surface.
Mastering the Mask: How to Prevent Overspray Disasters
Masking is the most time-consuming part of the process, but it’s non-negotiable. Never underestimate overspray; it travels farther than you think. Use painter’s tape to secure masking paper or plastic to the floor, running it right up to the bottom edge of the baseboard. On the wall, mask at least 12 inches above the trim.
A pro-level technique involves using a “spray shield”—a simple handheld tool that you can move along with you to block overspray in real-time. This is especially useful for the top edge of the baseboard. Deciding on the order of operations is also key. For a truly professional finish, understanding the sequence is vital; our detailed guide on whether to paint walls or baseboards first can provide further insight.
Execution: The Spray Painting Technique for a Flawless Coat
With your preparation complete, it’s time for the most rewarding step: applying the paint. Proper technique is simple to learn but crucial for achieving that coveted smooth finish. Rushing this stage can lead to common issues like drips, runs, and uneven coverage.
Your Environment Matters: Ventilation and Safety First
Spray paint fumes are potent and harmful to inhale. Always wear a respirator rated for paint fumes and ensure the room is well-ventilated by opening windows and using fans to create cross-breezes. Turn off any pilot lights and be mindful of fumes traveling to other areas of the house.
The Perfect Spray Motion
The key to a perfect coat is consistency. First, shake the can vigorously for at least one full minute after you hear the mixing ball begin to rattle. Hold the can approximately 10-12 inches away from the baseboard. Any closer and the paint will be too heavy and run; any farther and the paint will dry mid-air, creating a rough, dusty texture.
Begin your spray *before* the start of the baseboard and continue it *past* the end. This prevents thick, blotchy spots at the beginning and end of each pass. Move in a steady, sweeping motion, overlapping each pass by about 50%. This ensures even coverage and helps to blend the paint seamlessly.
Building Coats: Patience is a Virtue
One of the biggest mistakes DIYers make is trying to achieve full coverage in a single pass. This leads to heavy application, which inevitably causes drips and runs. The professional approach is to apply two to three light coats rather than one heavy one.
Allow the paint to become tacky to the touch between coats, which usually takes about 15-20 minutes, but check the can for specific instructions. Building up thin layers creates a more durable and even finish. This patient approach is what separates a good paint job from a great one.
Post-Painting Perfection and Troubleshooting
The work isn’t over once the final coat is applied. The steps you take immediately after painting and in the following days are critical for ensuring a sharp, durable finish that lasts for years. This is also the time to correct any minor mistakes.
The Big Reveal: Removing Your Masking
Timing is everything when removing painter’s tape. If you wait for the paint to fully cure, you risk peeling off chunks of your new finish along with the tape. The ideal time to remove masking is when the paint is still slightly tacky but not fully wet. This allows the tape to come off cleanly without disturbing the paint film.
To ensure an ultra-crisp line, carefully score the edge of the tape with a utility knife before pulling it away. Pull the tape back on itself at a 45-degree angle for the cleanest removal.
Curing Time vs. Drying Time: The Hidden Danger
It’s crucial to understand the difference between dry time and cure time. Paint may feel dry to the touch within an hour, but it can take several days—or even weeks for oil-based enamels—to fully cure. “Curing” is the process where the paint hardens to its maximum durability.
During the curing period, the paint is still soft and vulnerable to scratches, scuffs, and dings. Avoid placing furniture against the baseboards or using harsh cleaning chemicals on them until they have had ample time to cure completely.
Common Problems and How to Fix Them
Even with careful technique, mistakes can happen. If you notice a drip or run, don’t try to wipe it while it’s wet. Let it dry completely, then use fine-grit sandpaper to sand the drip smooth, wipe away the dust, and apply a light touch-up coat to the area.
If you have a fuzzy or rough texture, it’s likely due to spraying from too far away. Sand the area smooth between coats and ensure you maintain the correct 10-12 inch distance on your next pass. An uneven sheen is typically caused by inconsistent spray distance or overlapping, so focus on maintaining a steady hand and motion.
Beyond Baseboards: Where Else Can You Use This Technique?
Once you master the art of spray painting baseboards, you’ll see opportunities to apply this skill throughout your home. The same principles of meticulous prep and consistent application can be used to achieve a professional finish on a variety of trim elements.
This technique is perfect for intricate trim like painting shoe molding, which is notoriously difficult to paint with a brush without getting paint on the floor. It’s also ideal for window casings, door frames, and even crown molding, giving all the trim in your home a cohesive, high-end look.
Final Thoughts: Is Spray Painting Baseboards Right for You?
While the extensive preparation required for spray painting can seem daunting, the payoff in speed and finish quality is undeniable. For homeowners seeking a truly professional, glass-smooth finish free of brush marks, canned spray paint is an exceptional tool. It transforms a frustrating chore into a surprisingly fast and satisfying project.
If you value a pristine finish and are willing to invest the time in proper masking, this method will deliver results that a brush simply cannot match. Embrace the technique, and you’ll elevate the look of your entire home, one perfectly painted baseboard at a time.