Stop Ants For Good: Seal Baseboards From Pests
You see one tiny ant and think nothing of it. Then you see another, and another, until an entire trail is marching along your baseboards as if they own the place. It’s a frustratingly common problem that can make your clean home feel invaded.
This relentless parade of ants isn’t just a fluke; your home’s baseboards are acting as a superhighway for pests. The tiny, often invisible gaps between the baseboards and your walls or floors are perfect, sheltered entry points for ants seeking food, water, and shelter. Sealing these gaps is one of the most effective, long-term solutions to reclaim your space.
You'll Learn About
Why Your Baseboards Are an Ant Superhighway
To effectively stop ants, you first have to understand how they’re getting in. Baseboards, while essential for a finished look, often create unintentional entry points for pests. Over time, houses settle and wood contracts, creating small cracks and gaps that are an open invitation for tiny invaders.
These gaps provide a hidden and protected route for ants to travel from wall voids directly into your living spaces. Foraging ants lay down pheromone trails for others to follow, turning a small gap into a major entry point for the entire colony. Simply spraying the ants you see is a temporary fix; you have to block their path for good.
Unseen Gaps, Big Problems
The space between the bottom of your drywall and the floor is often unsealed behind the baseboard. Ants can travel from the outside, through the wall framing, and emerge from under the baseboard completely undetected. This is especially true in areas with moisture, which can attract pests and make sealing even more critical.
Similarly, the small seam along the top of the baseboard where it meets the wall can provide another easy access point. What looks like a tight fit to you is a wide-open door for an ant. A thorough seal addresses both of these vulnerable areas.
Before You Seal: Preparation is Everything
Jumping straight to caulking without the right prep work can lead to a messy job and an ineffective seal. Taking the time to properly prepare the area will ensure the sealant adheres correctly and creates an impenetrable barrier against ants. A strong defense starts with a clean slate.
This preparation phase involves three critical steps: a thorough inspection to find every possible entry point, a deep clean to ensure the sealant can bond, and choosing the right material for the job. Don’t skip these steps if you want professional, lasting results.
Step 1: Inspect and Identify Every Entry Point
Follow the ant trail. The most obvious way to find entry points is to see where the ants are coming from. Observe their lines to pinpoint the exact cracks or holes they are using along the baseboards. Look closely at corners, joints where two pieces of trim meet, and any areas where the baseboard may have pulled away from the wall.
Don’t just look where you see ants now. Inspect all the baseboards in the room, and even adjacent rooms, for potential gaps. Use a flashlight to illuminate the area and get a clear view of any imperfections that need sealing.
Step 2: Clean the Area for a Perfect Seal
For a sealant to work, the surface must be clean. Start by vacuuming the entire length of the baseboard, using a crevice tool to remove all dust, debris, and any ants from the gaps. This step is crucial for good adhesion.
Next, wipe the baseboards and the adjacent wall area with a mild detergent and water solution or rubbing alcohol. This removes grease, grime, and any residues that could prevent the caulk from sticking. If there is any old, cracked caulk, use a utility knife or a caulk removal tool to scrape it away before cleaning. Ensure the area is completely dry before you begin sealing.
Step 3: Choose the Right Sealant for the Job
Not all caulks are created equal. For sealing baseboards against pests, you need a sealant that is durable, flexible, and creates a permanent barrier. The right choice will depend on your baseboard material and whether you plan to paint over it.
For a deeper dive into pest-proofing materials, exploring an ant proof sealant guide can provide more specialized options. However, for most interior baseboard applications, two main types of caulk are excellent choices.
| Sealant Type | Best For | Pros | Cons |
|---|---|---|---|
| Acrylic Latex Caulk | General purpose sealing for gaps that will be painted. | Easy to apply and smooth, paintable, easy water cleanup. | Less flexible than silicone, can shrink over time. |
| Silicone Caulk | Areas with potential moisture (bathrooms, kitchens) or where flexibility is needed. | Highly flexible, waterproof, long-lasting, resistant to shrinking and cracking. | Not paintable (unless specified), requires mineral spirits for cleanup. |
| Paintable Silicone Caulk | The best of both worlds; areas needing flexibility that also require painting. | Combines the durability and flexibility of silicone with the paintability of acrylic. | Can be more expensive than other types. |
Your Step-by-Step Guide to Sealing Baseboards
With your inspection and cleaning complete and the right caulk in hand, you’re ready to create a pest-proof barrier. This process is straightforward, but taking your time and being methodical will produce a clean, professional-looking seal that effectively keeps ants out.
Follow these steps carefully for a smooth application and a durable, ant-proof finish. Having the right tools on hand before you start will make the job much easier.
Step 1: Gather Your Tools and Materials
Before you begin, assemble everything you need to avoid interruptions. You will need a caulking gun, your chosen tube of sealant, a utility knife to cut the nozzle, painter’s tape for clean lines, and a damp cloth or paper towels for cleanup.
A caulk smoothing tool or even just a cup of water for dipping your finger can also be very helpful for achieving a smooth, professional finish on the caulk bead.
Step 2: Apply Painter’s Tape for Clean Edges
For a perfectly straight caulk line, apply painter’s tape along the wall just above the baseboard and along the floor just below it. This creates a channel for the caulk and ensures any excess goes onto the tape, not your wall or floor.
Press the tape down firmly to prevent any caulk from seeping underneath. This step is especially helpful for beginners and guarantees a sharp, clean finish.
Step 3: Cut the Nozzle and Load the Caulk Gun
Using your utility knife, cut the tip of the caulk tube’s nozzle at a 45-degree angle. Start with a small opening—about 1/8 inch is a good size for baseboards. You can always make it larger if needed, but you can’t make it smaller.
After cutting the tip, puncture the inner foil seal of the tube using the thin metal rod attached to the caulking gun or a long nail. Place the tube into the caulking gun and squeeze the trigger a few times until the caulk begins to emerge.
Step 4: Apply a Continuous Bead of Caulk
Hold the caulking gun at a 45-degree angle to the gap you are sealing. Apply steady, consistent pressure to the trigger while moving the gun smoothly along the gap. Your goal is to apply one continuous “bead” of caulk from one corner to the next.
Work in manageable sections, such as the length of one wall at a time. Don’t worry if the bead isn’t perfectly smooth at this stage; the next step will fix that.
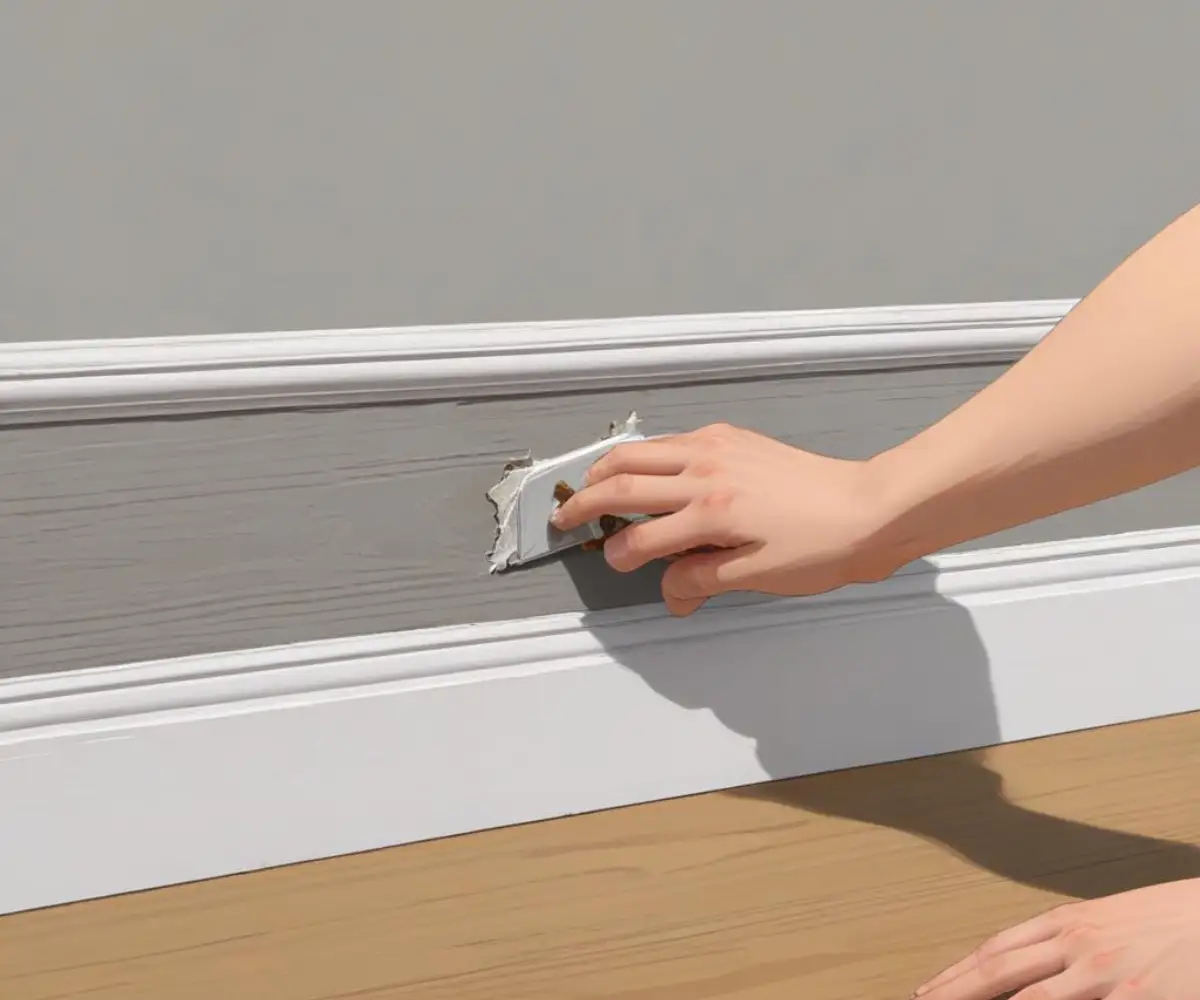
Step 5: Smooth (or “Tool”) the Caulk Bead
Immediately after applying the caulk to a section, you need to smooth the bead. You can use a caulk finishing tool or simply your fingertip. Lightly moisten your finger with water to prevent the caulk from sticking to it.
Gently run your finger along the bead, pressing it into the gap to create a smooth, concave surface. This action forces the caulk into the gap to create a tight seal and removes any excess. Wipe the excess caulk from your finger onto a paper towel.
Step 6: Remove the Tape and Let It Cure
While the caulk is still wet, carefully pull off the painter’s tape at a 45-degree angle away from the freshly caulked seam. Removing the tape before the caulk dries prevents it from pulling up the newly formed seal.
Allow the caulk to cure completely according to the manufacturer’s instructions, which is typically at least 24 hours. Avoid touching the caulk or exposing it to moisture during this time.
A Whole-Home Approach to Ant Prevention
Sealing your baseboards is a powerful step, but it’s part of a larger strategy for keeping your home pest-free. Ants are resourceful, and if they can’t get through the baseboards, they will look for other ways in. Adopting a whole-home approach ensures your efforts are not in vain.
This means sealing other potential entry points around your house and making your home less attractive to ants in the first place. Think like an ant: look for any crack, crumb, or drop of water.
Seal Other Common Pest Entry Points
Ants can enter through any small opening. Take a walk around your home’s interior and exterior to identify other vulnerable spots. Pay close attention to:
- Windows and Doors: Caulk any gaps around frames and ensure weather stripping is intact.
- Utility Lines: Seal the gaps where pipes, wires, and vents enter your home.
- Foundation: Fill any cracks in the foundation with an appropriate sealant.
Sealing all gaps not only prevents pests but can also improve your home’s energy efficiency. It’s a win-win, similar to how proper closet insulation can surprisingly impact your home’s overall thermal performance by sealing off another source of drafts.
Eliminate Food and Water Sources
Ants enter your home for two main reasons: food and water. Making these resources scarce is a critical part of long-term prevention. Be diligent about cleaning up crumbs and spills immediately, storing food in airtight containers, and keeping pet food bowls clean.
Fixing leaks is also essential. A dripping faucet or a small leak under a sink can create the moist environment that ants love. Chronic dampness can lead to bigger issues, which is why understanding why there is water under lifeproof flooring and addressing the source is crucial for both pest control and protecting your home.
When to Call a Professional Exterminator
DIY sealing is highly effective for preventing casual ant invasions. However, some situations may require professional help. If you’re dealing with a massive, persistent infestation, you may have a large, established colony living inside your walls.
Carpenter ants are another reason to call for help immediately. These ants don’t just invade; they cause structural damage by tunneling through wood. If you see ants that are large and black, or find small piles of what looks like sawdust near your baseboards, it’s time to call a professional pest control service.