1×4 Baseboard: The Shocking Truth Behind This Budget DIY Trend
You stare at the gap where your wall meets the floor, a finishing touch that feels unfinished. You’ve seen the high prices of ornate, decorative baseboards in home improvement stores and felt a wave of budget-induced panic. There has to be a simpler, more affordable way to get that clean, polished look for your home.
This is a common roadblock in many home renovation projects. The desire for a modern, stylish finish often clashes with the reality of a tight budget and the complexity of traditional molding installation. You’ve heard whispers of a simple solution, a design “hack” that promises style without the cost, but you’re skeptical. Can a simple, flat piece of lumber truly replace fancy, profiled trim?
The answer is a resounding yes. Using a standard 1×4 board for your baseboard isn’t just a budget-friendly alternative; it’s a powerful design choice that can elevate your space with a clean, minimalist aesthetic. This guide will solve the problem of expensive and complicated trim by showing you exactly how to select, install, and finish 1×4 baseboards for a stunning, professional-grade result that you can achieve yourself.
You'll Learn About
Why a Simple 1×4 is the Unsung Hero of Modern Trim
Before we dive into the “how-to,” let’s address the “why.” Why are so many homeowners and designers turning to basic 1×4 lumber? The reasons go far beyond just saving money, though the cost benefits are significant.
First, consider the aesthetic versatility. A flat, simple 1×4 baseboard is a perfect match for a variety of popular interior design styles. Whether you’re aiming for a modern farmhouse look, a minimalist Scandinavian vibe, or a classic craftsman style, the clean lines of a 1×4 board provide a perfect, unobtrusive foundation. It doesn’t scream for attention; instead, it cleanly defines the space and makes your walls feel taller.
Second is the unbeatable cost-effectiveness. Standard lumber is dramatically cheaper per linear foot than specially milled baseboard profiles. When you’re trimming an entire house, these savings add up to hundreds, if not thousands, of dollars. This financial relief allows you to allocate more of your budget to other impactful areas of your renovation.
Finally, the ease of installation makes this a premier DIY project. Without complex angles and coped joints required for ornate moldings, the cutting and fitting process is straightforward. This simplicity makes the project accessible even for beginners, empowering you to take control of your home’s transformation.
Choosing Your Weapon: Selecting the Right 1×4 Material
Not all 1×4 boards are created equal. Standing in the lumber aisle can be intimidating, but understanding your options is the first step toward a flawless finish. The key is to balance cost, durability, and the final look you want to achieve.
Your primary choices will be between solid wood options like Pine and Poplar, or an engineered product like MDF (Medium-Density Fiberboard). Each has its distinct advantages and is suited for different applications and finishes.
The Great Debate: Solid Wood vs. MDF
Solid wood, like Pine or Poplar, offers a traditional feel and excellent durability. Pine is incredibly affordable and lightweight, making it easy to work with. Poplar is a step up; as a hardwood, it’s more resistant to dents and dings, and its smooth, tight grain makes it an absolutely ideal surface for a painted finish.
MDF is an engineered product made from compressed wood fibers. Its main advantages are its low cost and exceptional stability—it won’t warp or swell with changes in humidity like solid wood can. MDF comes pre-primed, saving you a step, and its perfectly smooth surface creates a flawless painted finish. However, it can be susceptible to water damage if not sealed properly and can be less forgiving with dings and dents.
To help you decide, here is a breakdown of the most common materials for your 1×4 baseboard project:
| Material | Average Cost (per linear foot) | Best For | Pros | Cons |
|---|---|---|---|---|
| Pine (Common/Knotty) | $0.80 – $1.50 | Stained, rustic, or farmhouse styles | Very inexpensive, lightweight, easy to cut | Soft, dents easily, knots can bleed through paint |
| Pine (Select/Clear) | $1.50 – $3.00 | Staining or painting for a clean look | No knots, straight grain, classic wood look | More expensive than common pine |
| Poplar | $2.00 – $4.00 | Painting (The best choice for painted trim) | Harder than pine, dent-resistant, smooth grain | Can have green/gray streaks, not ideal for staining |
| MDF (Medium-Density Fiberboard) | $1.00 – $2.50 | Budget-friendly painted finishes | Very affordable, stable, perfectly smooth, often pre-primed | Not water-resistant, can sag, dust from cutting |
| Oak | $4.00 – $8.00 | High-traffic areas, traditional stained finish | Extremely durable, beautiful grain pattern | Expensive, harder to cut and nail |
A Quick Note on “Actual” Size
Remember that a “1×4” board is not actually 1 inch by 4 inches. This is its nominal size. The actual, dimensional size of a 1×4 is typically 0.75 inches thick by 3.5 inches wide. This is important to know for planning and ensuring it provides the coverage you need.
The Ultimate DIY Installation Guide: From Bare Wall to Beautiful Baseboard
With your materials selected, it’s time to transform your space. This step-by-step guide breaks down the installation process into manageable tasks, ensuring you get it right the first time. Taking on a project like this yourself is not just about saving money; it’s about the satisfaction of a job well done. Similar to learning how to remove granite countertops without damaging cabinets, careful and methodical work is the key to success.
Step 1: Gather Your Tools and Prepare the Space
Having everything you need on hand makes the process smooth and efficient. You don’t need a professional workshop, just a few key tools.
- Miter Saw: This is the most important tool for clean, accurate angle cuts.
- Tape Measure & Pencil: For precise measurements.
- Brad Nailer: A 16 or 18-gauge nailer will make fastening the boards fast and easy.
- Level: To check for any major dips in the floor.
- Caulk Gun: For applying adhesive and finishing caulk.
- Wood Filler/Spackle: To fill nail holes for a seamless finish.
- Sandpaper (220-grit): For smoothing filled holes and rough edges.
Before you begin, ensure your work area is clean. If you’re replacing old baseboards, use a utility knife to score the top edge where it meets the wall to prevent paint from tearing off the drywall.
Step 2: Measure, Measure, and Cut Once
Accuracy is everything. Measure each wall section from corner to corner. When measuring for an inside corner, measure the full wall length. For outside corners, measure to the corner edge and plan for a 45-degree miter cut that extends beyond that point.
Pro Tip for Corners: Walls are almost never perfectly square. Set your miter saw to 45 degrees for your first test pieces on an outside corner. If there’s a gap, adjust slightly to 45.5 or 44.5 degrees to get a tighter fit. For inside corners, a simple butt joint (one board squared off and the other pushed tight against it) is often easiest and can be sealed perfectly with caulk.
Step 3: The Art of the Scarf Joint
What do you do when a wall is longer than your longest board? You create a scarf joint. This is a simple technique where you cut the ends of two boards at opposing 30 or 45-degree angles so they overlap seamlessly.
This joint is far less noticeable than simply butting two square ends together. Always try to place scarf joints over a wall stud so you can nail both overlapping ends securely, pulling them tight together.
Step 4: Nailing for a Secure Fit
Now, it’s time to attach the boards to the wall. For a professional and secure installation, you want your nails to hit the wall studs and the bottom plate (the horizontal stud running along the floor).
Use your brad nailer to shoot one nail about an inch from the top of the board into each stud. Then, place another nail about an inch from the bottom of the board, angled slightly downward to catch the bottom plate. This two-nail pattern prevents the board from twisting or pulling away from the wall.
Finishing Touches: The Secret to a Professional Look
The installation is done, but the project isn’t finished. The final steps of filling, caulking, and painting are what separate an amateur DIY job from a truly professional-looking installation. This is where the magic happens.
Step 5: Fill Every Nail Hole
Use a high-quality wood filler or spackle to cover every single nail hole. Overfill the hole slightly to account for shrinkage as it dries. Once completely dry, use 220-grit sandpaper to sand the filler perfectly smooth and flush with the board’s surface.
Step 6: Caulk is Your Best Friend
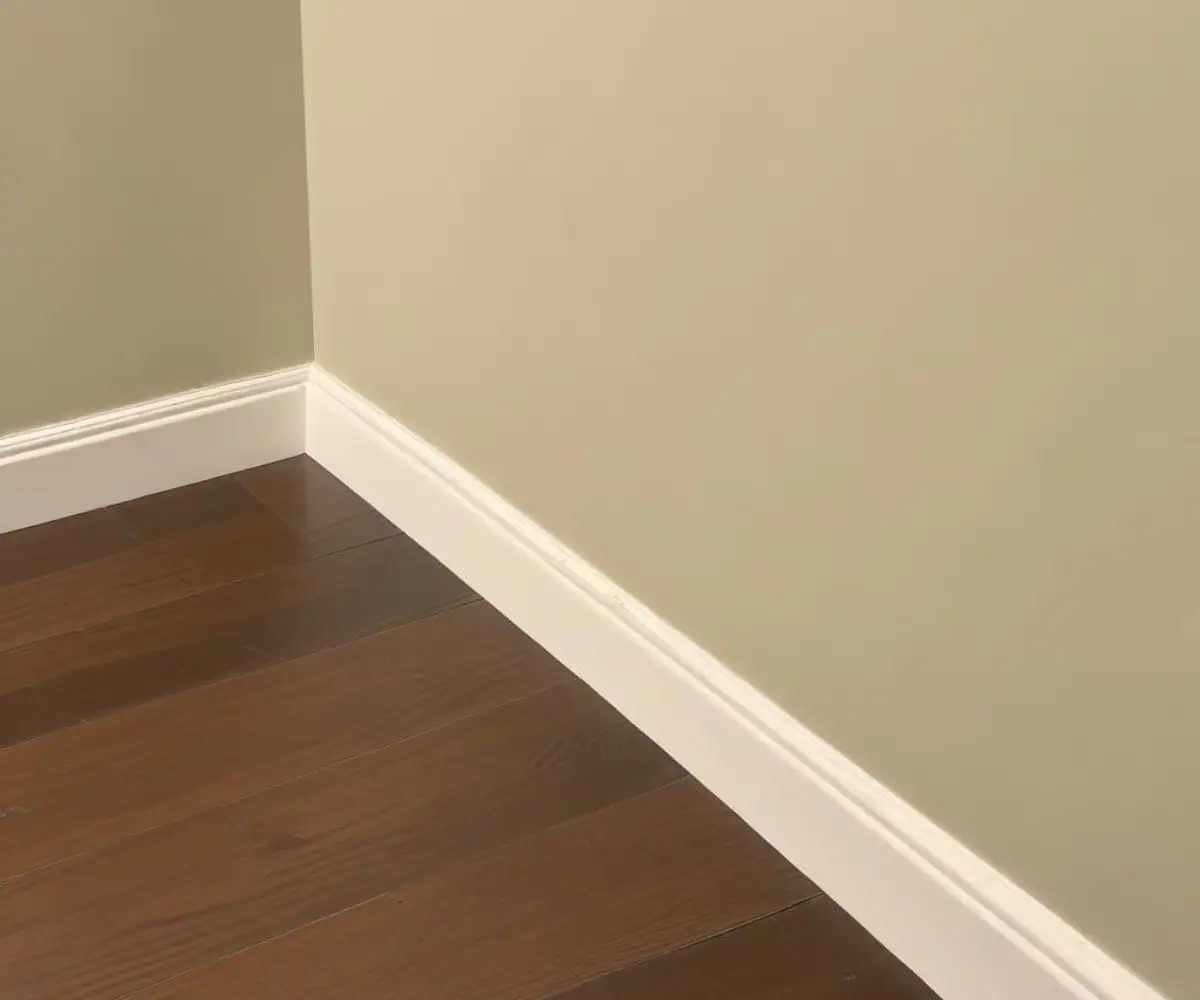
This is the most crucial step for a seamless look. Apply a thin, continuous bead of paintable latex caulk into the gap between the top of the 1×4 baseboard and the drywall. Also, run a bead of caulk into your inside corners.
Use a wet finger or a caulk-smoothing tool to press the caulk into the gap, creating a smooth, invisible transition. Wiping away the excess with a damp cloth is crucial. This step expertly hides any slight imperfections or waviness in your walls, making the baseboard look like it’s a part of the wall itself. After tackling a messy job, you might want to learn a few cleanup tricks, like the best methods for how to clean pipe dope.
Step 7: Prime and Paint
If your boards aren’t already primed, now is the time to do it. Priming is especially important on pine to seal any knots and prevent them from showing through your final paint coat. Once the primer is dry, apply two coats of your chosen trim paint for a durable, beautiful finish.
Painting the boards after they are installed and caulked ensures that the caulk line is also painted, making it completely disappear. Maintaining a quiet and comfortable home is always a priority; if you ever notice unusual sounds, it might be worth investigating, just as you would look into why a radon fan is loud when cold.
Addressing Common Problems and Questions
Even with a straightforward project, questions and challenges can arise. Here are solutions to some of the most common issues DIYers face when installing 1×4 baseboards.
“My floors are uneven. How do I avoid ugly gaps at the bottom?”
This is a very common problem in older homes. The best method to solve this is scribing. Place the 1×4 board against the wall, and use a compass or a small block of wood with a pencil to trace the contour of the floor onto the bottom of the board. Then, carefully cut along this line with a jigsaw or sand it down with a belt sander for a perfect fit.
“The flat top of the 1×4 will just collect dust. What can I do?”
This is a valid concern. To solve it, you have two great options. The easiest is to simply run a bead of caulk along the top edge before painting, smoothing it at a slight angle to make dusting easier. For a more decorative solution, you can add a small piece of “base cap” molding on top of the 1×4 to create a more traditional, profiled look while still using the affordable 1×4 as the main component.
“Should I use miter joints or butt joints for inside corners?”
For a flat 1×4 board, a butt joint is perfectly acceptable and much easier for a beginner. Because there is no profile to match up, a clean butt joint will look great once it is caulked and painted. Miter joints are primarily needed for outside corners where the end grain would otherwise be exposed.
Conclusion: A Simple Solution for a High-End Look
The choice to use 1×4 for baseboard is more than a money-saving trick; it’s a smart design decision that delivers a clean, modern, and versatile foundation for any room. It proves that you don’t need complex, expensive materials to achieve a high-impact, professional finish.
By carefully selecting your material, measuring with precision, and paying close attention to the finishing details like filling and caulking, you can transform your home with your own two hands. Embrace the simplicity and power of the 1×4, and enjoy the satisfaction of a beautiful, budget-friendly upgrade that will stand the test of time.