Yard King 8 27 Snowblower Won’t Start? Here’s The Fix!
There’s nothing more frustrating than waking up to a foot of fresh snow, only to find your trusty Yard King 8/27 snowblower refuses to start. This powerful machine, known for its robust performance, can become a heavy piece of yard art when it fails to roar to life. Many owners face this exact problem, often right when they need their machine the most.
The core issue often isn’t a catastrophic failure but a series of common, fixable problems stemming from fuel, spark, or simple mechanical adjustments. Understanding the likely culprits is the first step toward a reliable, one-pull start every time. This guide will walk you through everything you need to know to diagnose and solve the most frequent issues plaguing the Yard King 8/27.
You'll Learn About
Meet Your Machine: Understanding the Yard King 8/27
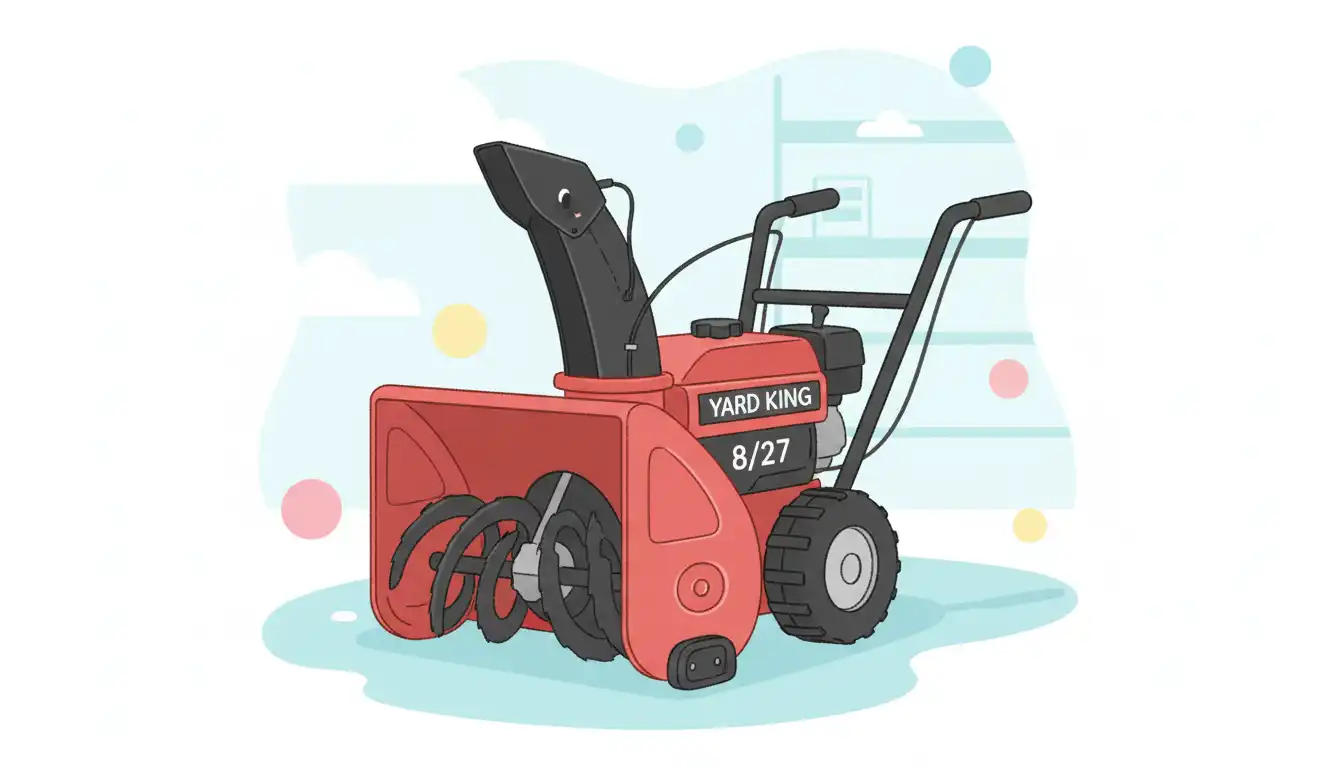
Before diving into troubleshooting, it’s essential to understand the machine you’re working with. The Yard King 8/27 is a formidable two-stage snowblower, built to handle moderate to heavy snowfall with relative ease. Its designation “8/27” typically refers to its 8-horsepower engine and a 27-inch clearing width, making it a popular choice for homeowners with long driveways and significant winter weather.
These machines were often built by major manufacturers like Murray or MTD and sold under the Yard King brand name. This is actually good news for owners, as it means many parts are standardized and can be cross-referenced with other, more common brands, making repairs and parts sourcing much more manageable.
Key Specifications and Features
Knowing the basic specifications of your snowblower is crucial for maintenance and ordering parts. The Yard King 8/27 is a straightforward, powerful machine designed for durability and performance in harsh winter conditions. Its components are engineered to work together to effectively clear large volumes of snow.
The heart of this snowblower is its engine, typically a reliable Tecumseh Snow King model, paired with a robust auger and drive system. Below is a table outlining the typical specifications for this model, which can help you understand its capabilities and requirements.
| Feature | Specification |
|---|---|
| Engine Horsepower | 8 HP (Typically a Tecumseh L-Head Snow King) |
| Clearing Width | 27 inches |
| Stage Type | Two-Stage (Auger and Impeller) |
| Starting System | Recoil Pull-Start & 120V Electric Start Option |
| Drive System | Friction Disc Drive |
| Speeds | Typically 6 Forward, 2 Reverse |
| Auger Diameter | Approximately 12 inches |
The Real Manufacturer Behind the Name
Yard King was a brand name used by various retailers, with the actual manufacturing often handled by Murray. Murray was known for producing durable, affordable outdoor power equipment for decades. Recognizing this connection is key, as it opens up a much wider pool of available spare parts and repair knowledge.
When searching for parts or manuals, using “Murray 8/27 snowblower” alongside “Yard King 8/27” can yield better results. Many components, from belts and shear pins to carburetor kits, are identical across these brands. This shared heritage simplifies long-term ownership and repairs.
The Common Culprits: Why Your Snowblower is Failing
When your Yard King 8/27 refuses to start or runs poorly, the problem almost always boils down to one of three areas: the fuel system, the ignition system, or a mechanical obstruction. Over time, and especially with seasonal use, these systems are prone to specific failures that can be easily addressed with a bit of know-how.
From stale, gunky fuel clogging the carburetor to a fouled spark plug that can’t deliver a spark, these issues are predictable and preventable. By systematically checking each potential failure point, you can quickly isolate the problem and get your machine back to clearing snow.
Fuel System Nightmares: Stale Gas and Clogged Carburetors
The number one reason a snowblower won’t start after sitting is old fuel. Modern gasoline, especially ethanol-blended fuel, can go bad in as little as 30 days. As it degrades, it leaves behind a varnish-like residue that clogs the tiny passages inside the carburetor.
The main jet and emulsion tube in the Tecumseh carburetor are particularly susceptible to these clogs. When these are blocked, fuel cannot be properly atomized and delivered to the engine’s combustion chamber, resulting in a no-start condition. Simply draining the old fuel is often not enough; the carburetor itself usually requires a thorough cleaning.
Ignition System Glitches: The Absence of Spark
An engine needs three things to run: fuel, air, and spark. If the fuel system is clean, the next logical step is to check for a strong, consistent spark. The most common point of failure in the ignition system is the spark plug itself.
Over time, a spark plug can become fouled with carbon deposits or oil, or the electrode can simply wear out. Another potential issue is a faulty ignition coil or a disconnected or malfunctioning safety key. Without a reliable spark at the correct time, even the perfect fuel-air mixture will not ignite.
The Ultimate Troubleshooting Guide: A Step-by-Step Fix
Now, let’s get hands-on and bring your Yard King 8/27 back to life. Follow these steps in order to diagnose and resolve the most common starting issues. Always begin with the simplest checks before moving on to more involved repairs.
Safety First: Before performing any work, disconnect the spark plug wire to prevent any chance of the engine accidentally starting. This is the most critical safety step you can take.
Step 1: The Basic Pre-Start Checklist
Before you pull out any tools, run through the absolute basics. It’s surprising how often a simple oversight is the root cause of a starting problem. Check these four things first.
Ensure there is fresh fuel in the tank. Make sure the fuel shut-off valve is in the “On” position. Set the choke to “Full” and the throttle to a medium or high setting. Finally, confirm the safety ignition key is fully inserted.
Step 2: Addressing the Fuel System
If the basics don’t work, it’s time to look at the fuel system. Start by draining the carburetor bowl. There is a small bolt at the bottom of the carburetor; place a container underneath and loosen it. If a sticky, varnish-like substance or water comes out, you’ve found a major part of your problem.
For a proper fix, the carburetor needs to be removed and cleaned. This involves taking off the float bowl, removing the main jet and float pin, and spraying all passages with carburetor cleaner. Use a small wire or torch tip cleaner to gently clear any stubborn blockages in the main jet.
Step 3: Checking for a Healthy Spark
To test for spark, remove the spark plug. Re-attach the spark plug wire and hold the threaded part of the plug against a metal part of the engine block. Pull the starter cord and look for a bright blue spark jumping across the electrode gap.
If there is no spark or the spark is weak and yellow, the plug is likely fouled and needs to be replaced. They are inexpensive and a common maintenance item. If a new plug doesn’t solve the issue, the problem may lie with the ignition coil, which might require professional service.
Step 4: The Auger’s Hidden Protector: Shear Pins
One of the most critical and often misunderstood components of your snowblower is the shear pin. These small bolts are designed to be the weakest link in the auger system. If the auger hits a rock, a dense chunk of ice, or the morning newspaper, the shear pins are designed to break, protecting the expensive auger gearbox from catastrophic damage.
When a shear pin breaks, the corresponding auger blade will stop spinning. If you notice your snowblower running but not throwing snow, or only clearing from one side, a broken shear pin is the most likely culprit. Always keep several spare shear pins on hand, as they are essential for keeping your machine operational during a heavy storm.
How to Replace a Broken Shear Pin
Replacing a shear pin is a simple process. First, always disconnect the spark plug wire for safety. Use a punch or a nail to tap out the remaining pieces of the broken pin. You may need to rotate the auger by hand to align the hole in the auger shaft with the hole in the auger itself.
Once aligned, simply insert the new shear pin and secure it with its corresponding cotter pin or nut. Never replace a shear pin with a standard bolt. A regular bolt is too strong and will not break under stress, which can lead to hundreds of dollars in gearbox repairs.
Advanced Mechanical Adjustments and Fixes
Sometimes, the engine runs perfectly, but the snowblower itself doesn’t perform as it should. Mechanical issues with the drive system or auger engagement can be just as debilitating as a no-start condition. These problems often require simple adjustments to restore proper function.
Taking the time to understand and adjust these systems will not only improve performance but also extend the life of your machine. Neglecting them can lead to premature wear and frustrating failures when you’re knee-deep in snow.
Restoring Propulsion: The Friction Disc Drive
The Yard King 8/27 uses a friction disc drive system to propel itself forward and backward. This system consists of a rubber-edged wheel (the friction wheel) that contacts a large metal platter (the drive plate) spinning off the engine. The position of the friction wheel on the plate determines your speed and direction.
Over time, the rubber on the friction wheel can wear down, or the engagement cable can stretch, leading to sluggish movement or a complete loss of drive. Adjusting the cable tension or replacing the friction wheel is a common maintenance task that restores the machine’s powerful drive. This can make the difference between an easily maneuverable machine and one that feels as immovable as a garage door too heavy to lift.
Fine-Tuning for Perfect Performance: Skid Shoes and Scraper Bar
Properly adjusting the skid shoes and scraper bar is one of the most overlooked aspects of snowblower maintenance, yet it has a massive impact on performance. The skid shoes are adjustable metal plates on the sides of the auger housing that set the height of the auger off the ground. The scraper bar is the blade at the back of the housing that clears the last layer of snow.
For paved surfaces, the scraper bar should be set about 1/8 inch off the ground. For gravel or uneven surfaces, raise it higher to avoid picking up and throwing stones. Adjusting these components ensures a clean scrape without damaging the machine or the surface you’re clearing. Neglecting this is like accepting a bad countertop installation; it technically works, but it will never look or perform right.
Proactive Care: A Maintenance Schedule for Reliability
The key to a reliable Yard King 8/27 is not just fixing it when it breaks but actively maintaining it to prevent failures. A simple pre-season and post-season maintenance routine will ensure your snowblower starts on the first pull and runs strong all winter.
These simple steps can save you hours of frustration and costly repair bills down the line. Treat your snowblower well, and it will serve you reliably for years to come.
The Essential End-of-Season Shutdown
When winter ends, properly preparing your snowblower for storage is the most important thing you can do. The goal is to prevent the fuel system from getting gummed up and to protect metal parts from rust. This simple procedure will prevent 90% of starting problems next season.
First, add a quality fuel stabilizer to the remaining fuel in the tank and run the engine for about five minutes to circulate it through the carburetor. Then, shut off the fuel valve and let the engine run until it stalls, ensuring the carburetor is completely empty. This prevents varnish from forming during the off-season.
Waking It Up: The Pre-Season Checklist
Before the first snowflake falls, give your snowblower a thorough check-up. This ensures it’s ready for action and helps you identify any potential issues before they become major problems in the middle of a storm.
Start by checking the engine oil level and changing it if necessary. Inspect the condition of the belts for cracks or wear, and check the tire pressure. Finally, lubricate any moving parts, such as the auger shaft and chute gears, according to your owner’s manual.
Is a Used Yard King 8/27 a Good Investment?
Given their age, most Yard King 8/27 snowblowers are found on the second-hand market. For someone willing to do some basic maintenance, they can represent a fantastic value, offering powerful performance for a fraction of the cost of a new machine.
However, it’s crucial to know what to look for to avoid buying a machine that’s on its last legs. A careful inspection can reveal the difference between a hidden gem and a money pit.
Buyer’s Guide: What to Inspect Before You Purchase
When inspecting a used Yard King 8/27, start with the metal housing. Look for excessive rust, especially around the bottom of the auger housing and on the frame. Check the condition of the tires and belts; cracked or worn components will need immediate replacement.
Ask the seller to start the engine. It should start within a few pulls and run smoothly without excessive smoke. Engage the auger and drive systems to ensure they operate correctly. A well-maintained machine is a sign of a diligent owner and a better investment. Just as you’d want to ensure a clean surface before painting, like with pressure washing to remove paint from stucco, you want a machine that has been cared for.
Final Thoughts on the Yard King 8/27
The Yard King 8/27 snowblower is a classic workhorse that, with proper care, can provide many years of reliable service. Its simple, robust design makes it easy for the average homeowner to maintain and repair. Most issues, especially starting problems, can be traced back to simple fuel or spark issues that are easily remedied.
By following this guide, you can confidently troubleshoot and maintain your machine, ensuring it’s always ready to tackle whatever winter throws your way. A little proactive maintenance goes a long way in keeping this powerful tool in peak condition, ready to clear your path season after season.